Introduction
Welcome to the Wordpress documentation. This theme is fully compatible with Elementor for easy page building and WooCommerce for online stores. This guide will help you install, set up, and customize your theme with step-by-step instructions.
How to Install Theme
- Download the theme .zip file.
- Log in to your WordPress Dashboard.
- Go to Appearance → Themes → Add New.
- Click Upload Theme, select the .zip file, and click Install Now.

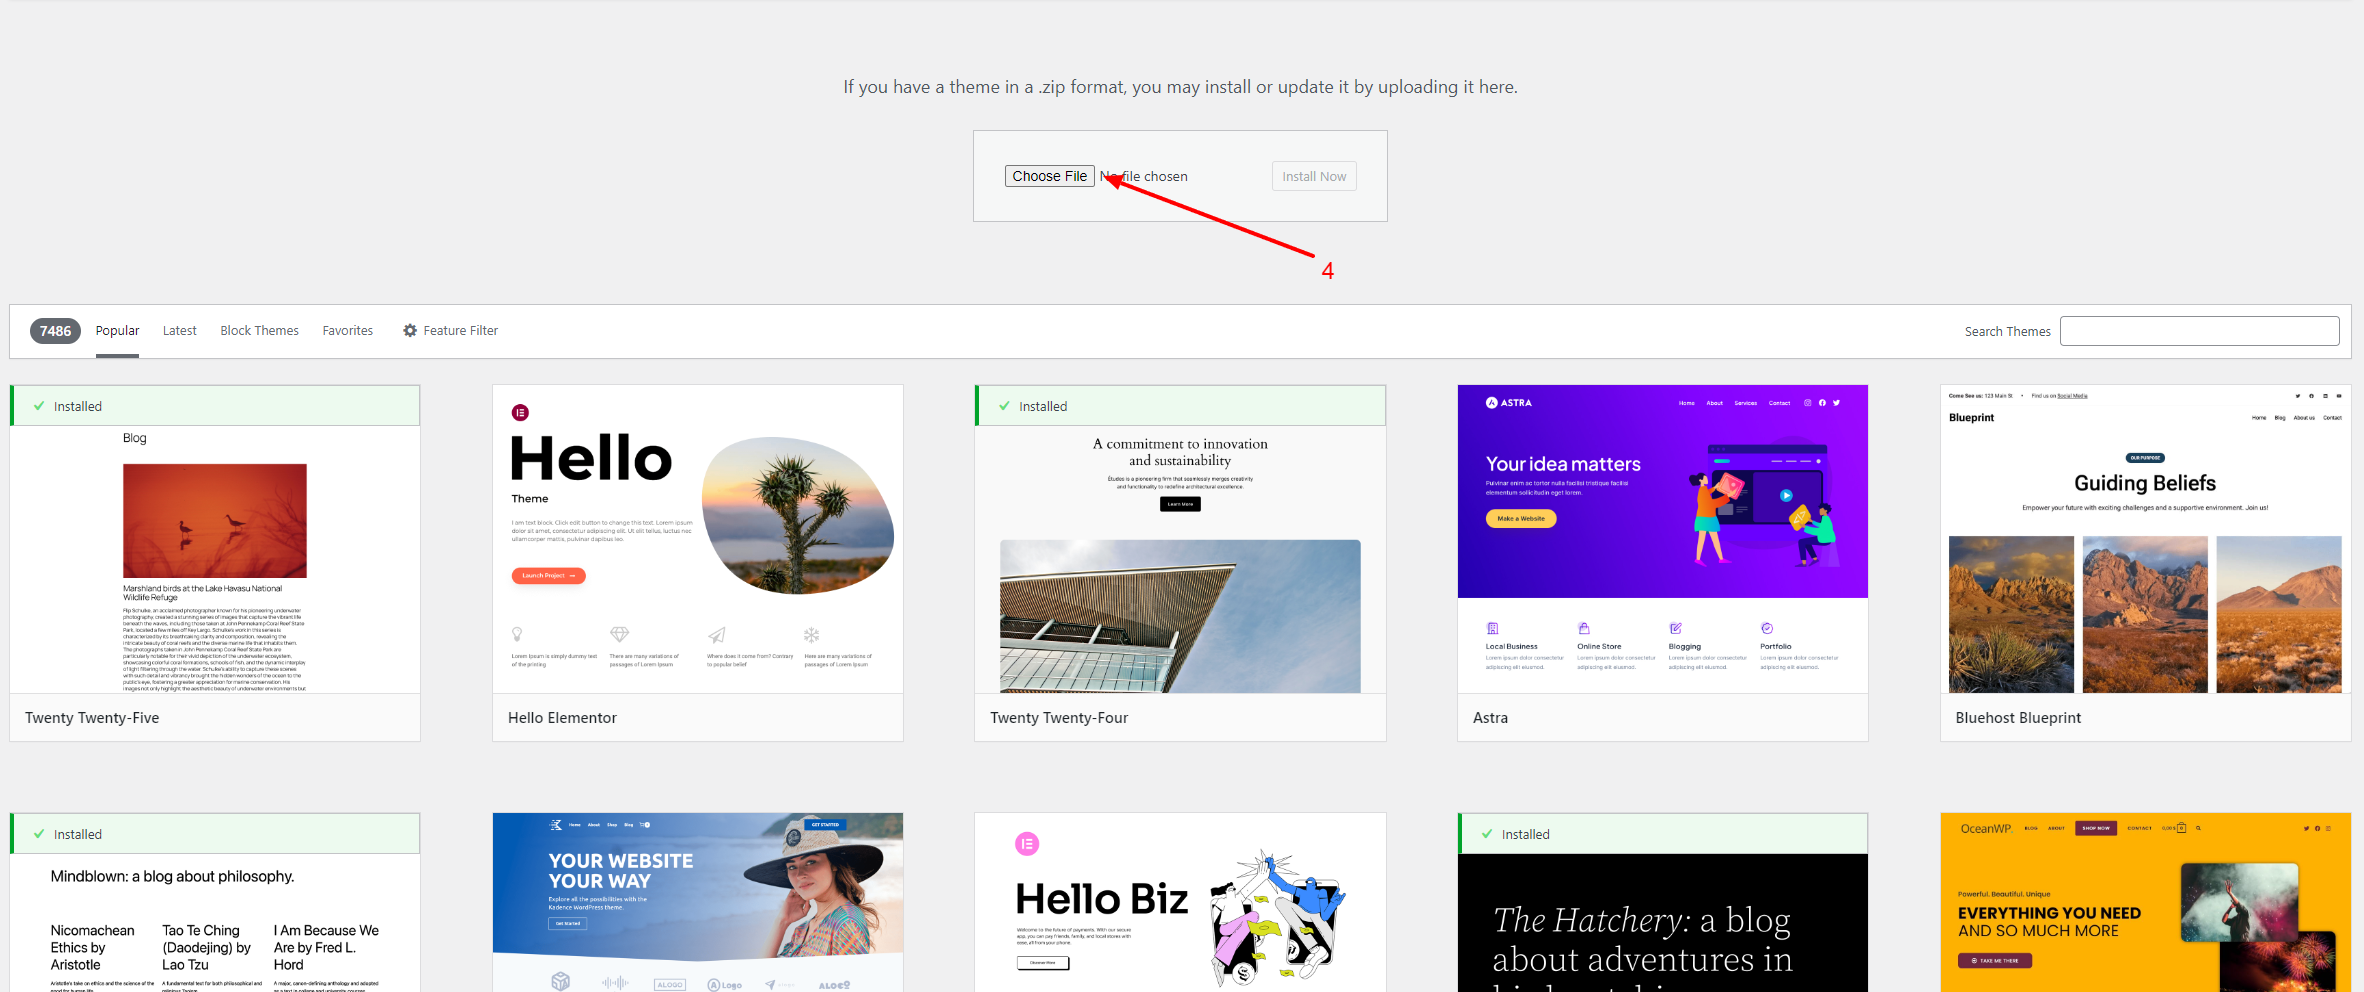
- Once installed, click Activate.
Installing Required Plugins
For full functionality, install and activate the following plugins:- Elementor – Drag-and-drop page builder..
- WooCommerce – Adds eCommerce functionality..
- One Click Demo Import – For importing demo content (if provided)..
- Any Additional Plugins This Theme Requires Will Be appeared on the admin dashbaord.

To install plugins:
Follow the steps mentioned below- Go to Plugins → Add New.
- Search for the required plugin.
- Click Install and then Activate.
- Any Additional Plugins This Theme Requires Will Be appeared on the admin dashbaord.
Importing Demo Content (Optional):
Follow the steps mentioned below- Install and activate the theme.
- Go to Appearance > Install Plugins and install the One Click Demo Import plugin.
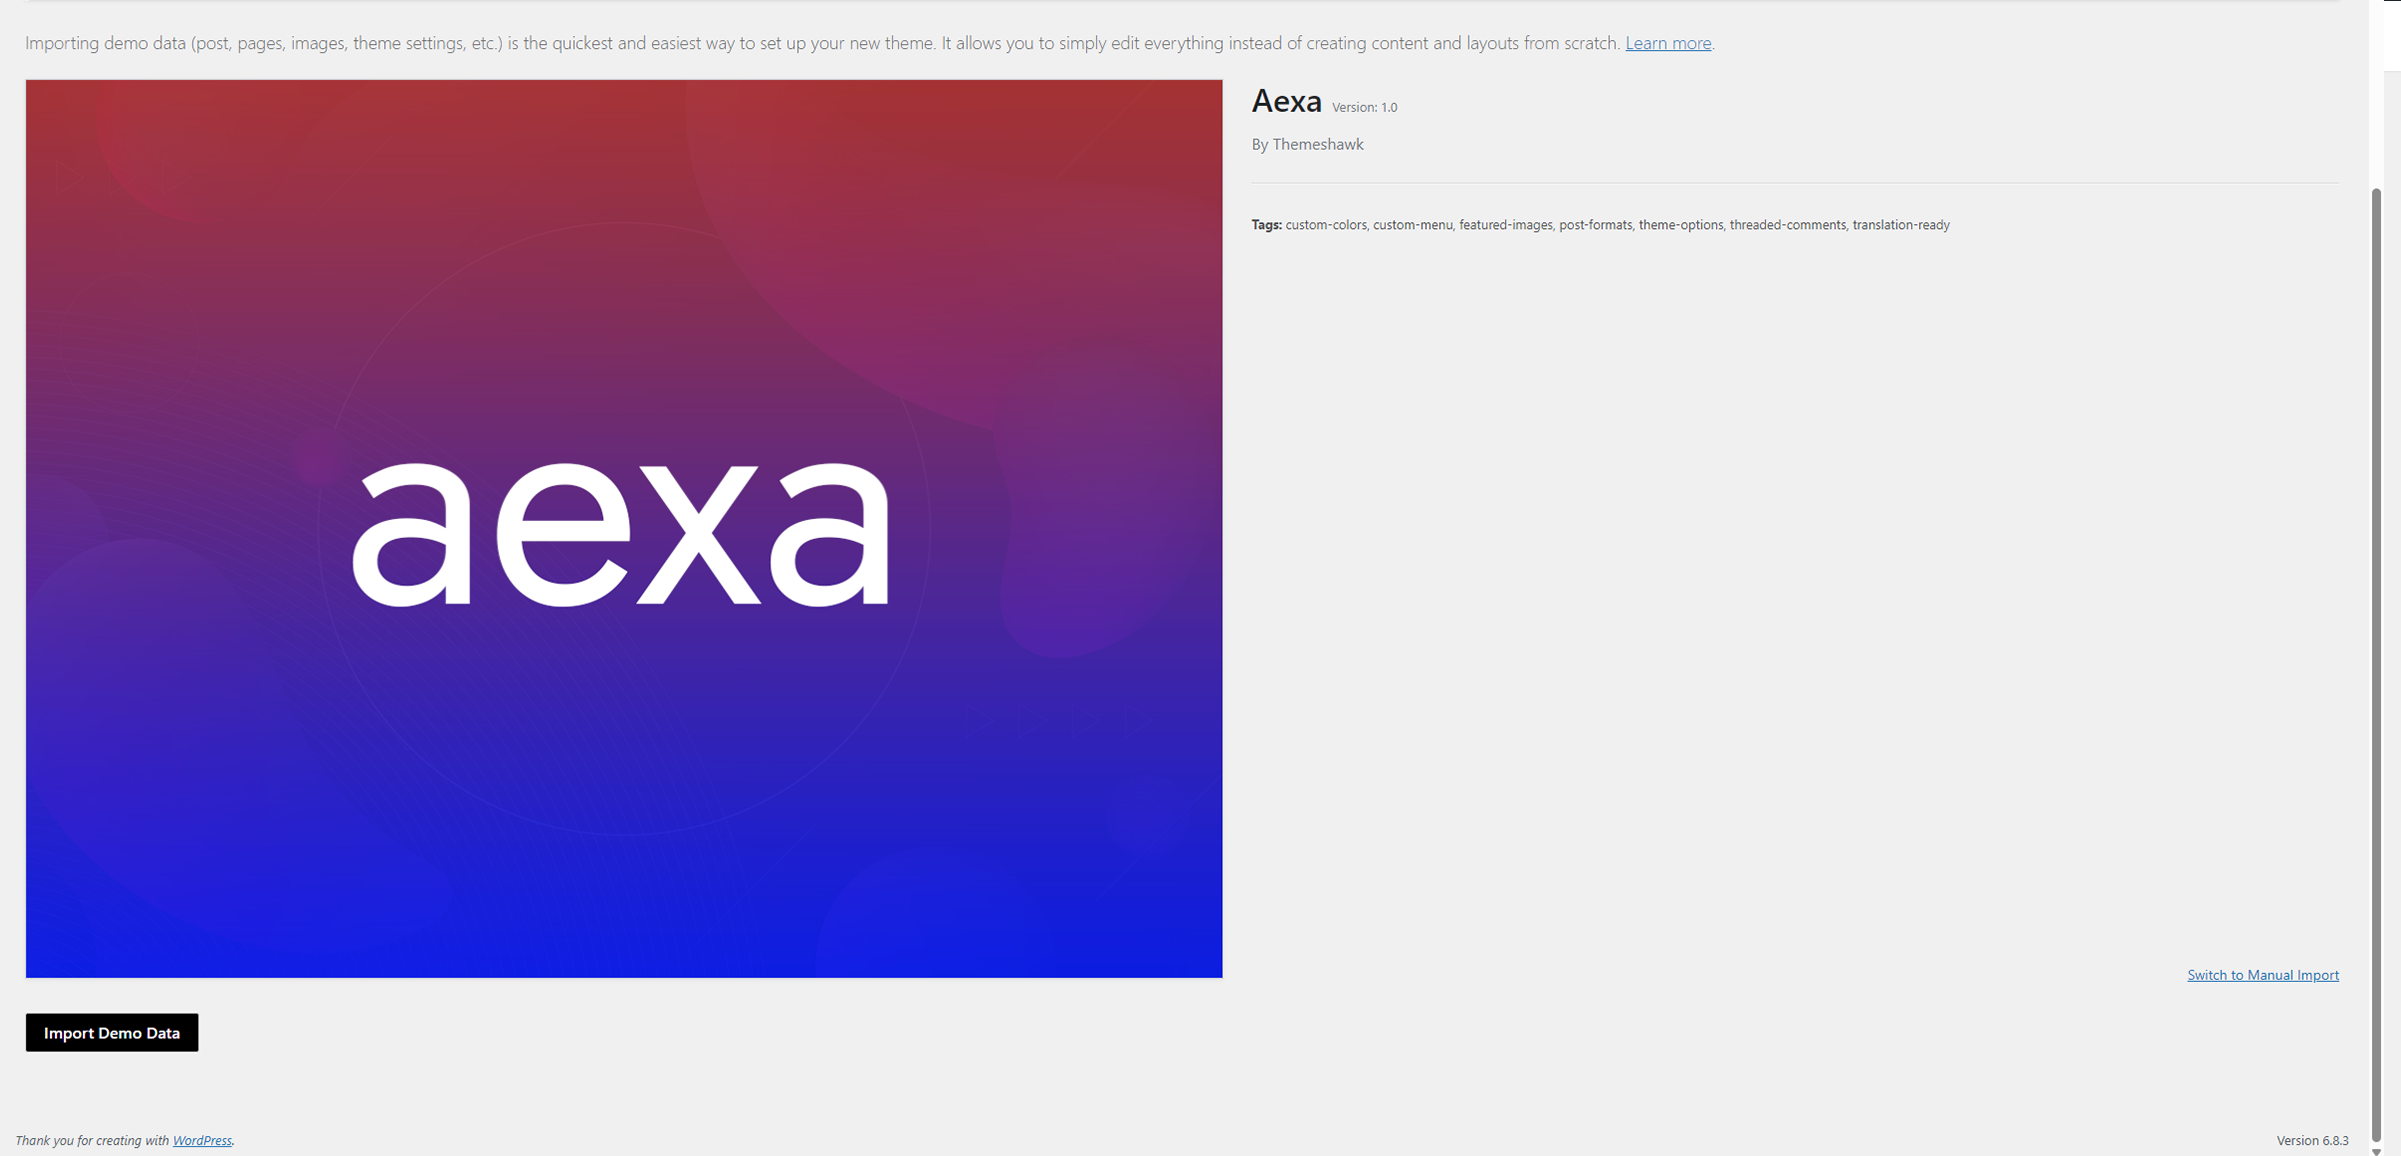
- Navigate to Appearance > Import Demo Data.
- Select a demo (e.g., "Fashion") and click Import.
- For uploading, themeoptions.json. Please go to themeshawk, then import/export and import that.
- Setting Up the Homepage(Just edit homepage via elementor editor and publish).
- Now your website will look like demo.
- Ensure your server has at least 256M PHP memory and 300 seconds execution time to avoid timeouts.
- Note: Demo images are placeholders and may require licensing for live sites.
- For uploadiing demo-xxx.xml file, you can go to Tools>Import and upload there.
- For uploading customizer.dat, you can go to Appearance>Cutomize and the go to botton, there is an option to import.
- For uploading widgets.wie, please first install Widget Importer/Exporter plugin and then import that file from there.
- For uploading, themeoptions.json. Please go to themeshawk, then import/export and import that.
- Ensure your server has at least 256M PHP memory and 300 seconds execution time to avoid timeouts.
- Note: Demo images are placeholders and may require licensing for live sites.
Setting Up the Homepage:
Follow the steps mentioned below- Go to Settings → Reading.
- Under Your homepage displays, select A static page.
- Choose a page for the Homepage and another for the Blog page.
Theme Settings:
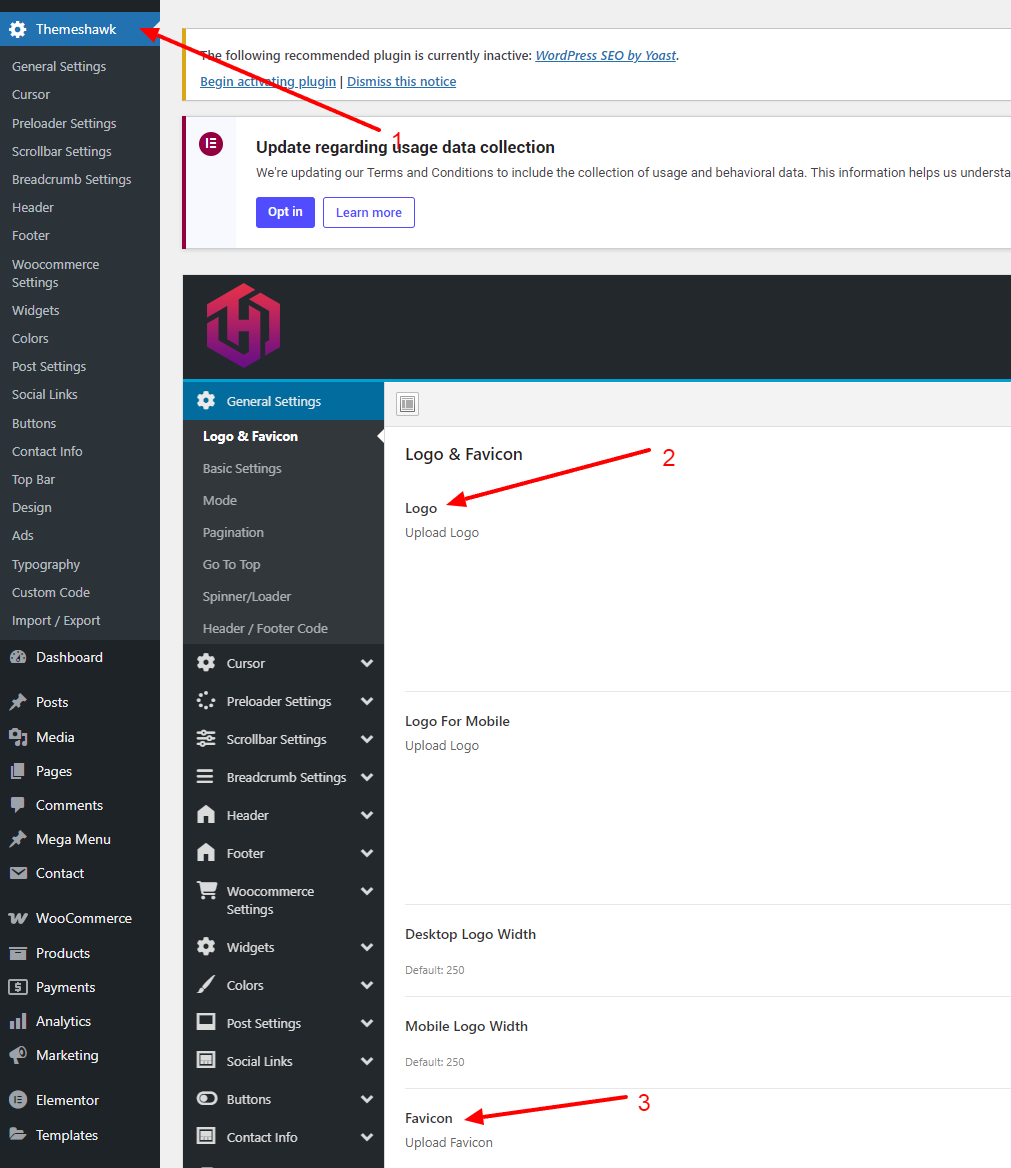
Go to themeshawk option in admin panel. Follow the steps mentioned below- Site Identity – Upload logo, site title, and tagline.
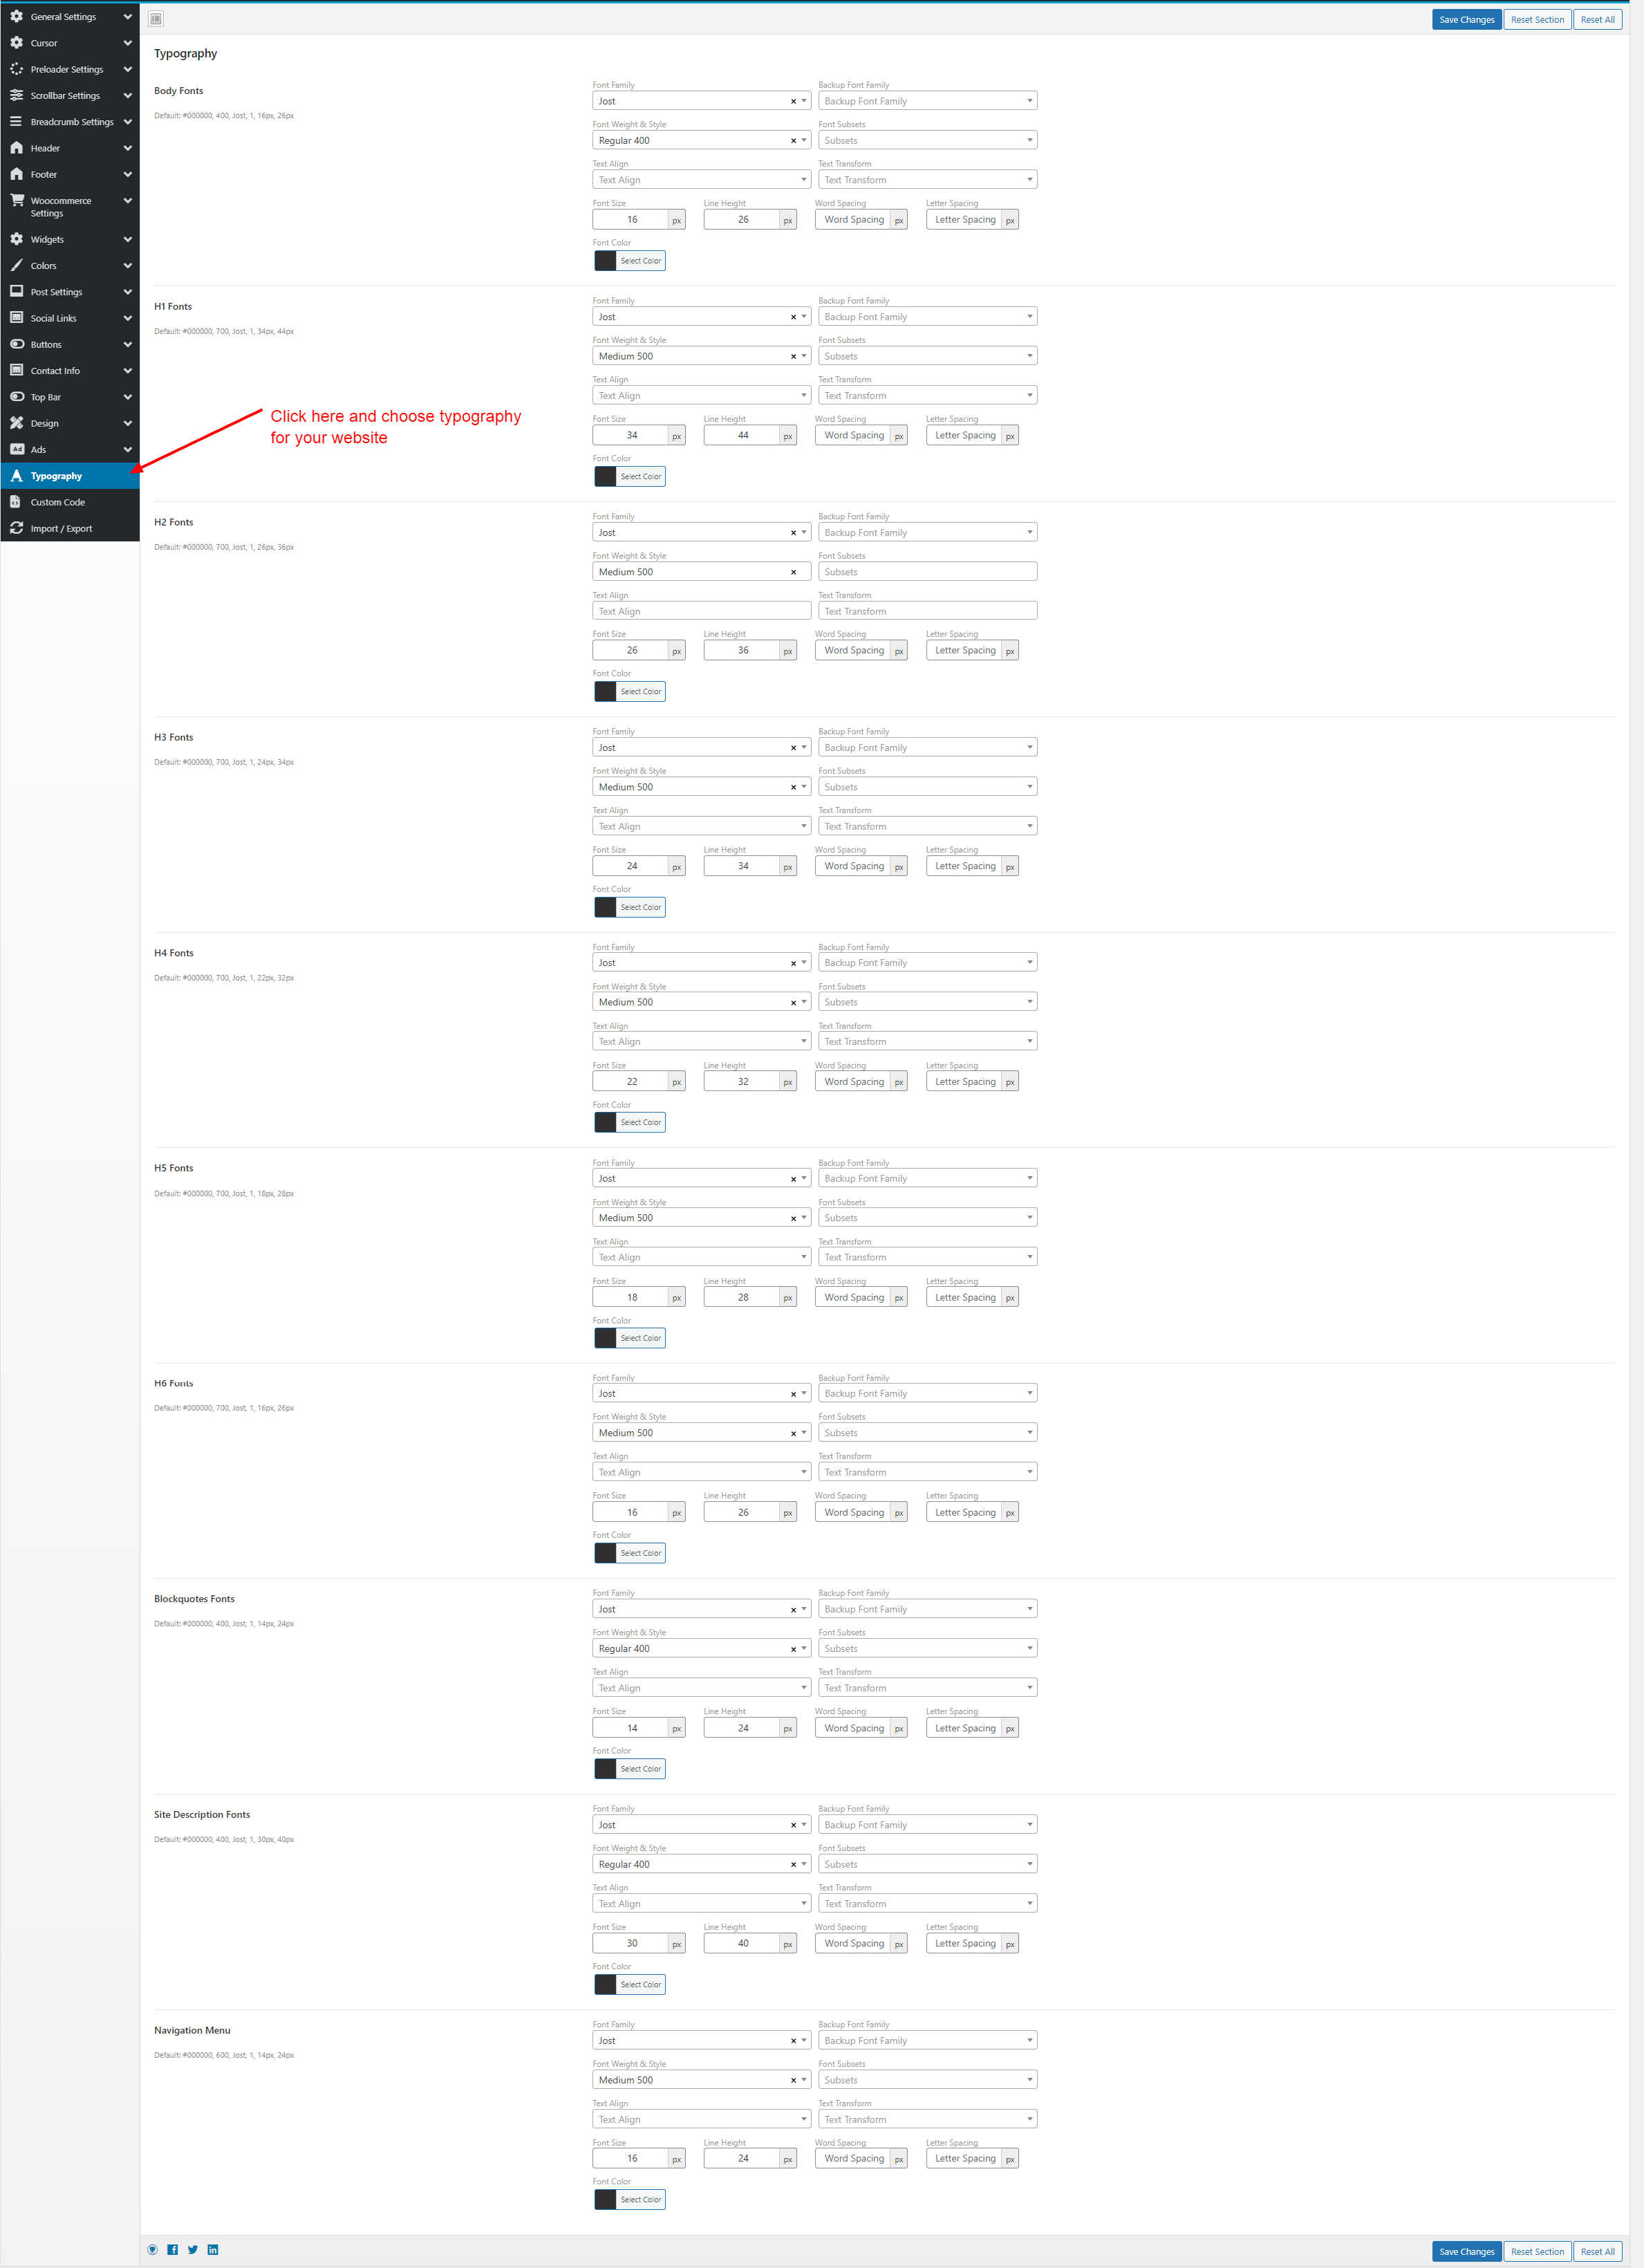
- Typography – Select fonts for headings and body text.
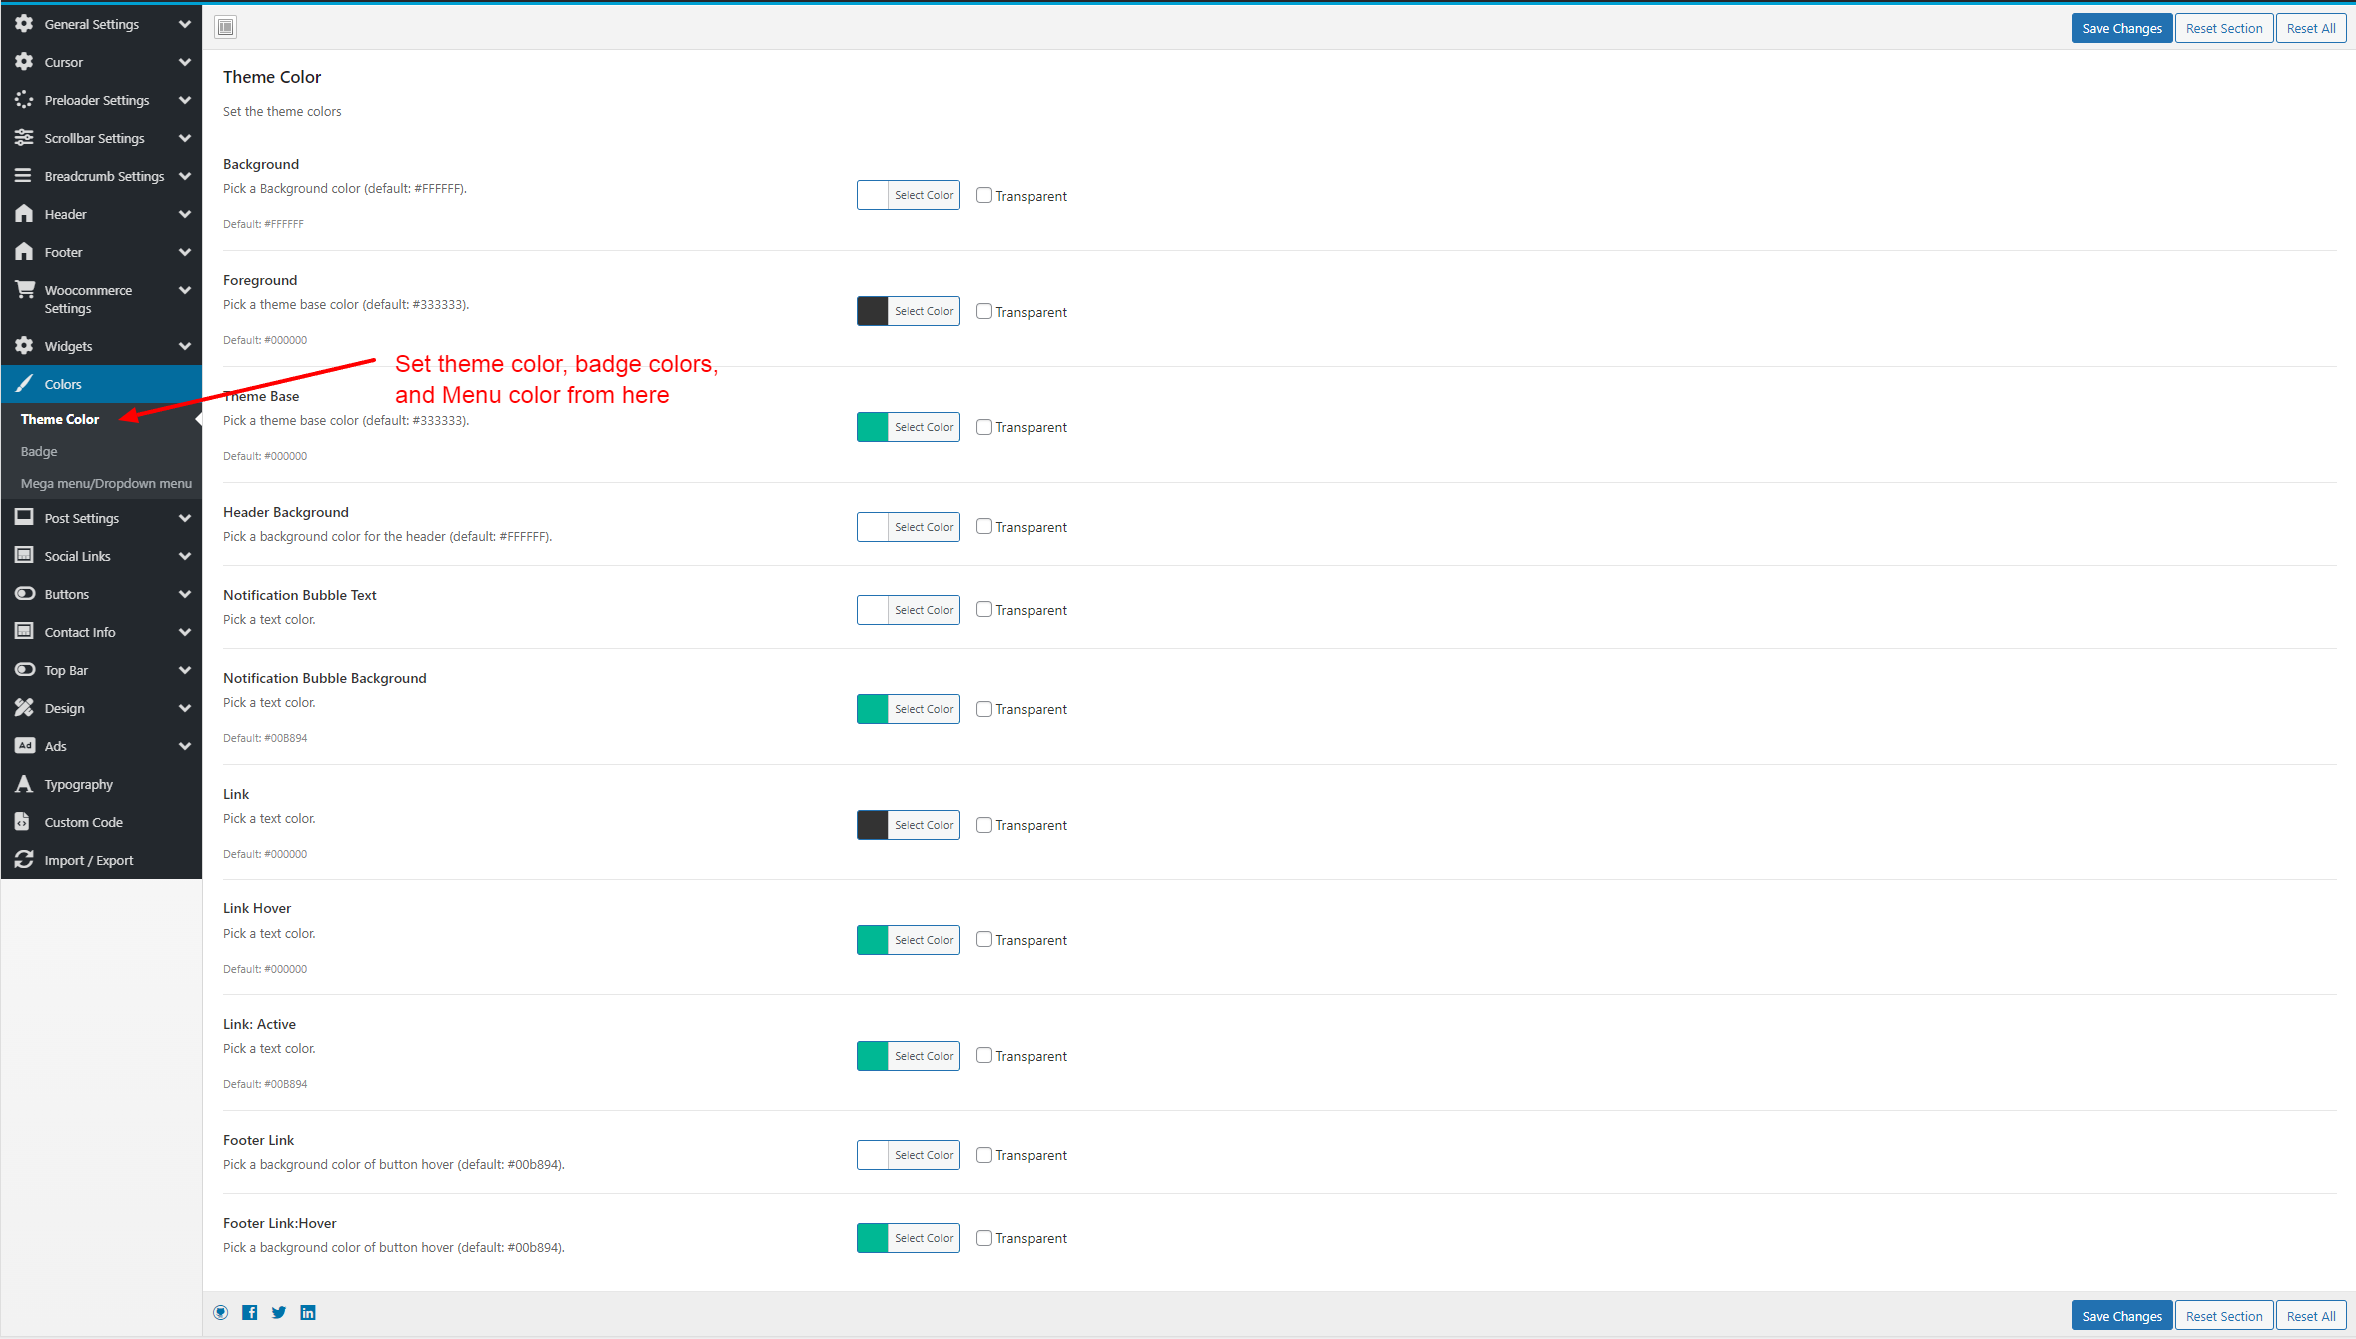
- Colors – Customize theme colors.
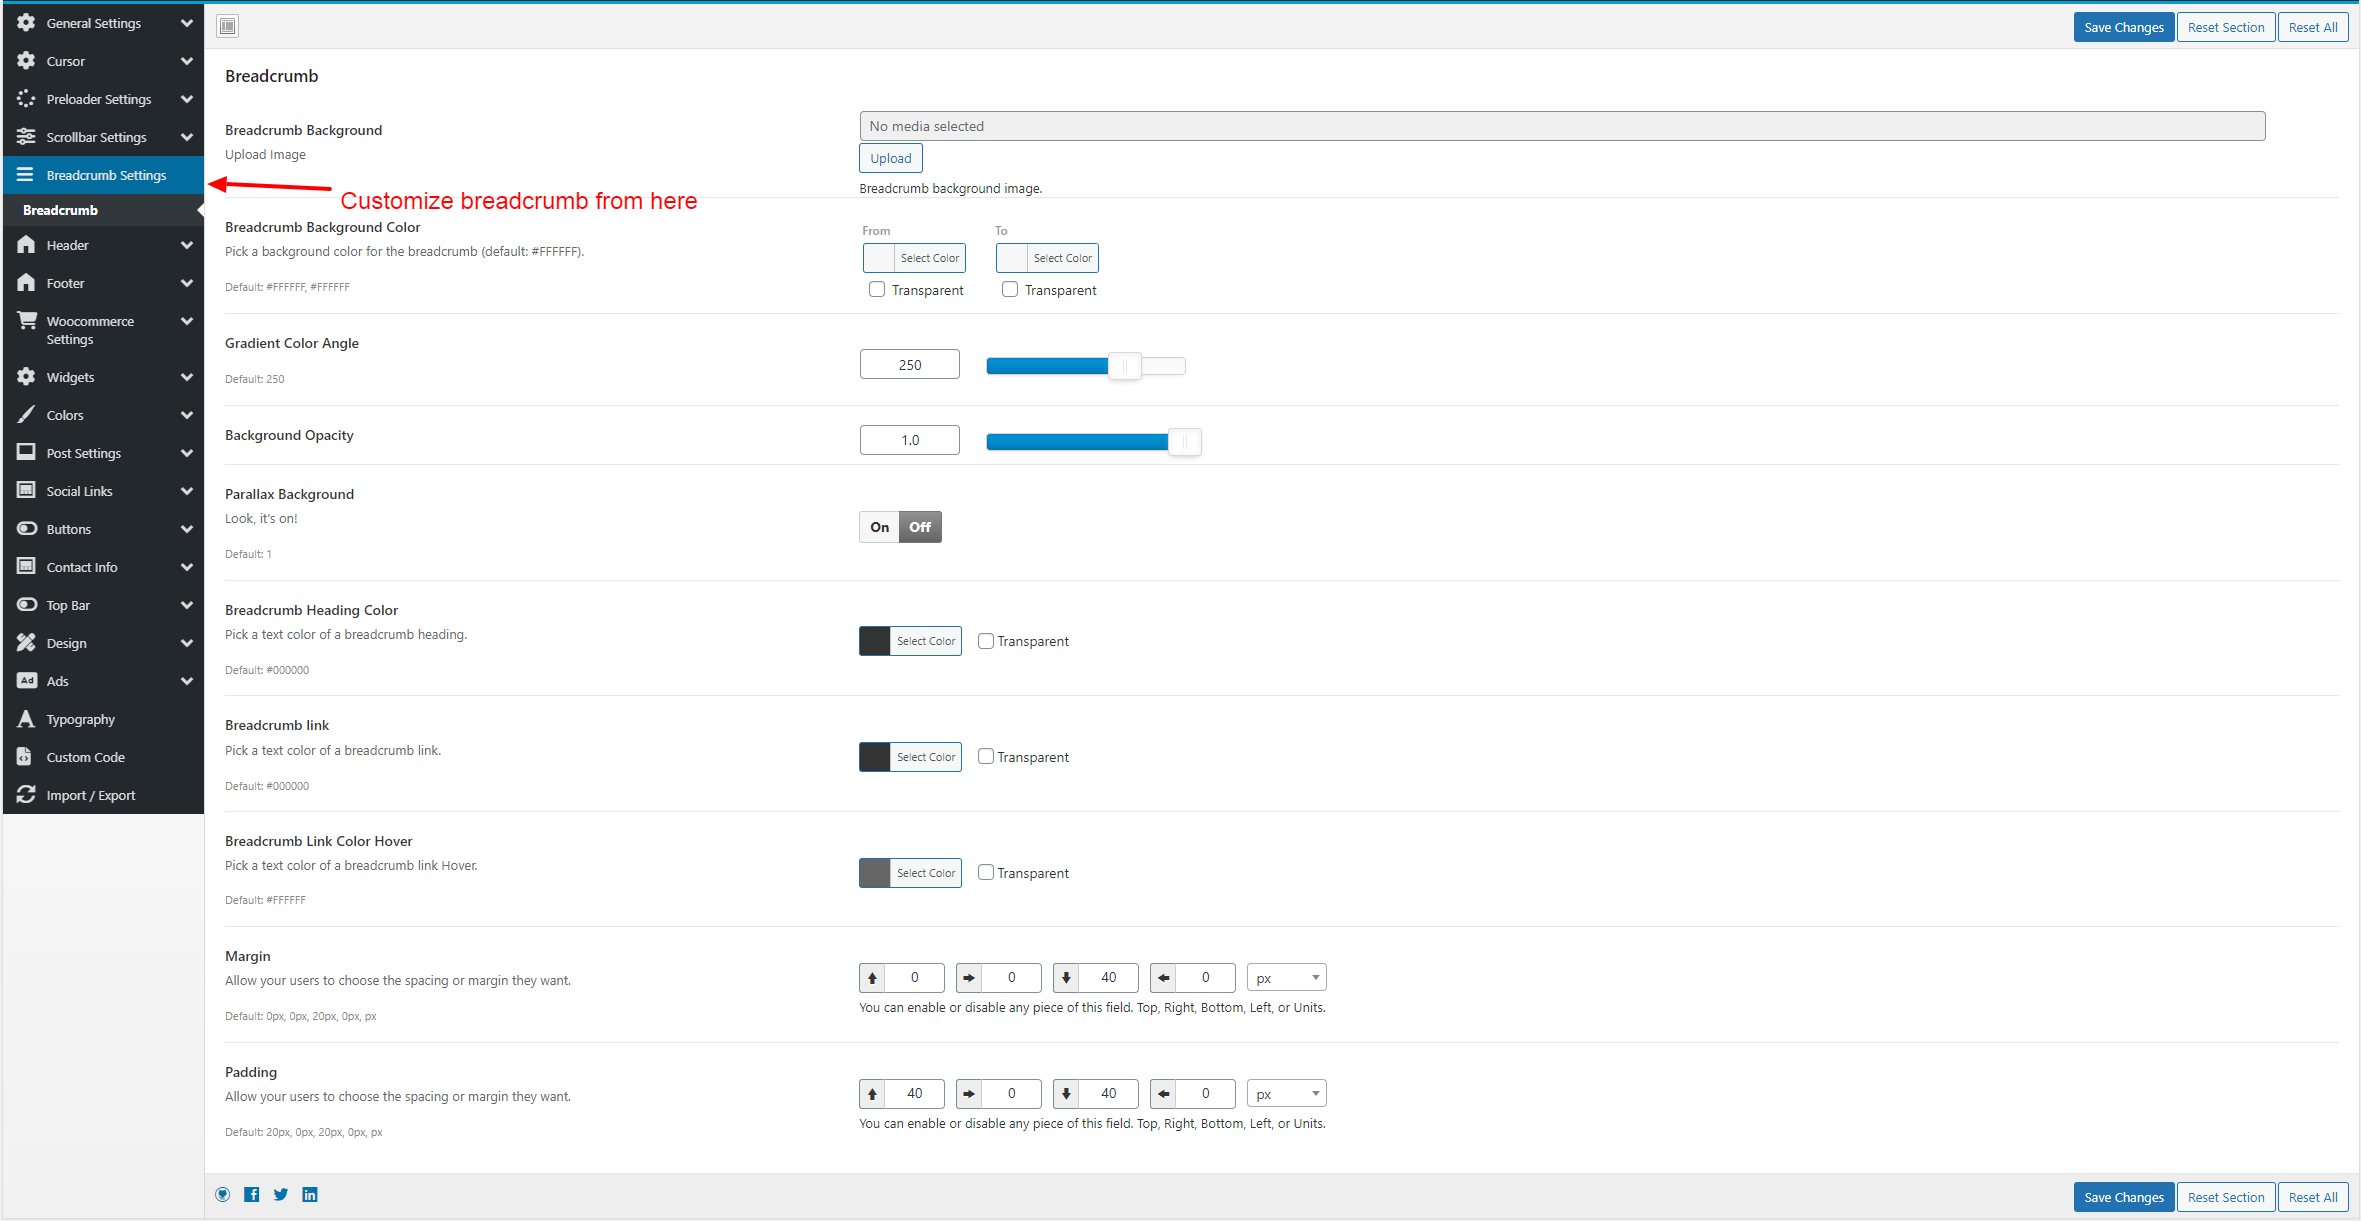
- Breadcrumb – Customize breadcrumb colors.
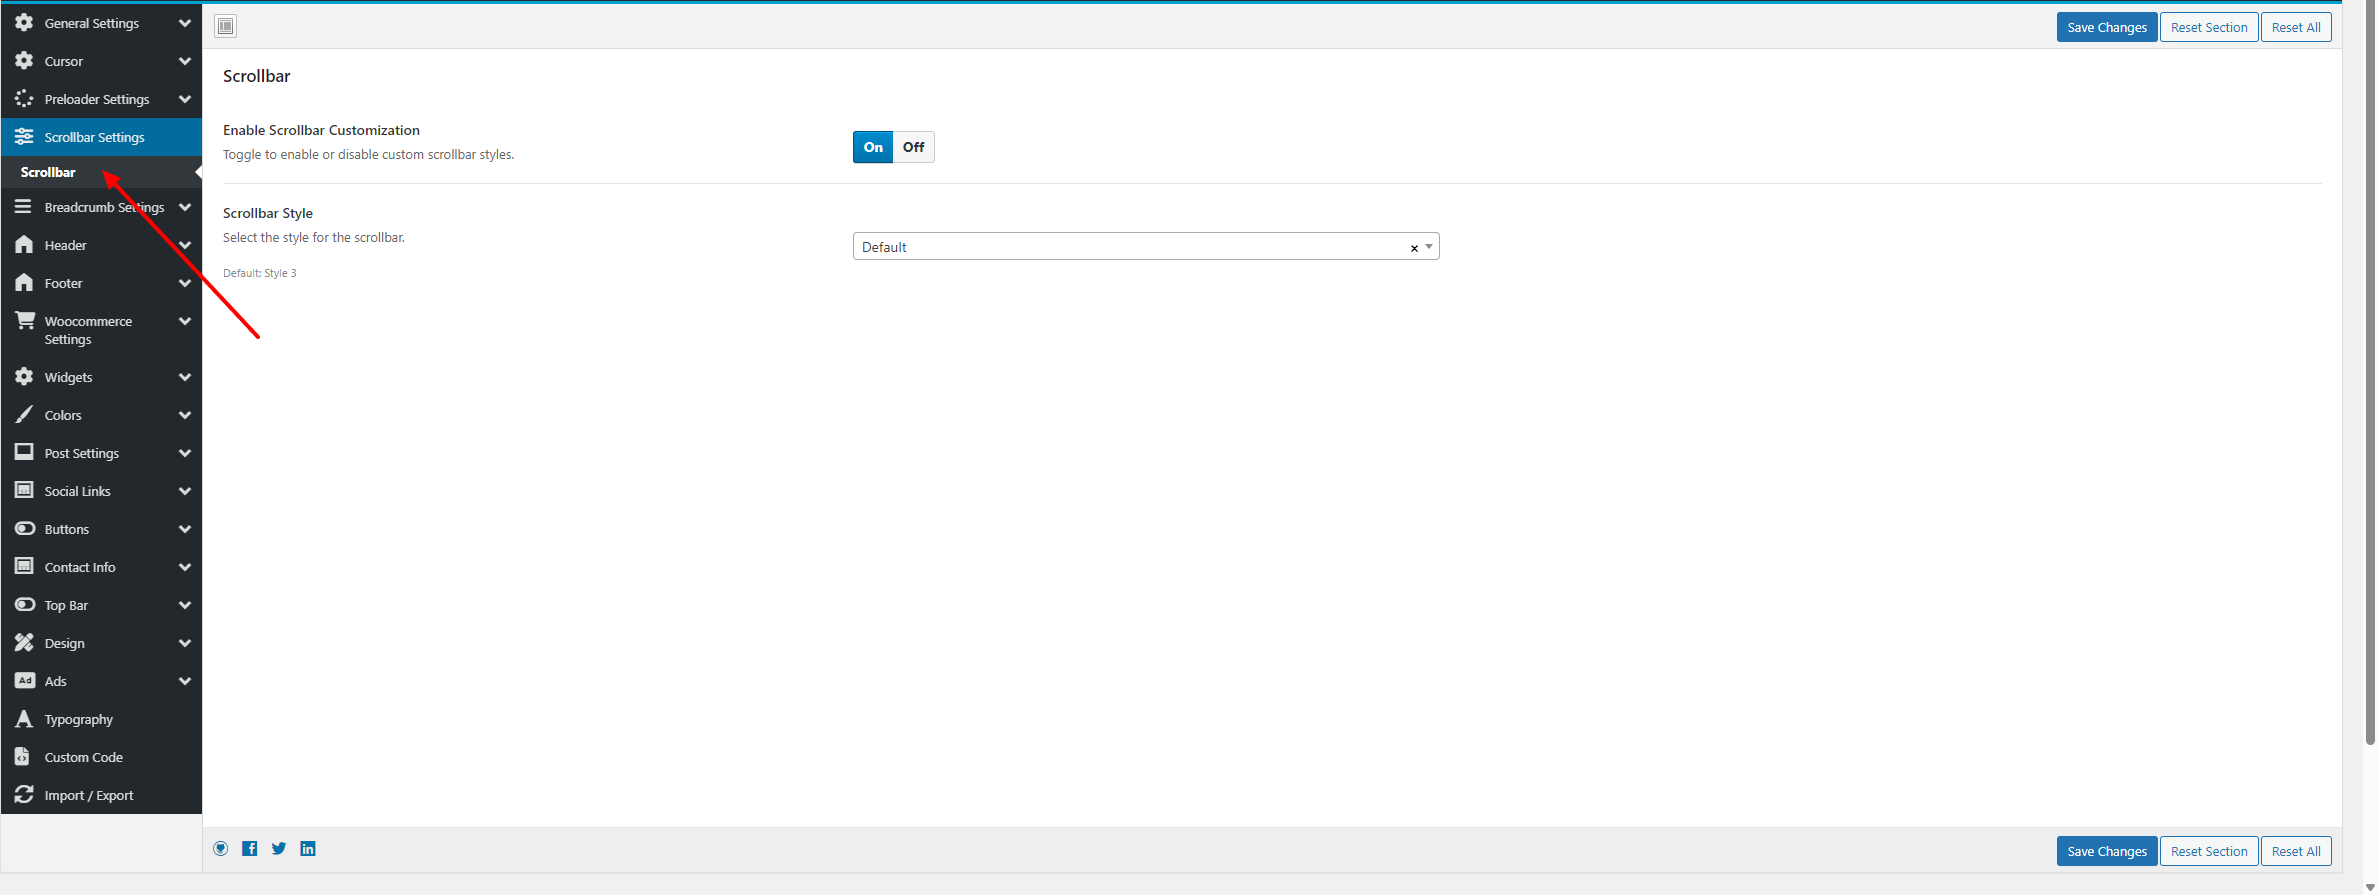
- Scrollbar – 16 Scrollbar styles available, choose any style you want make your website look unique.
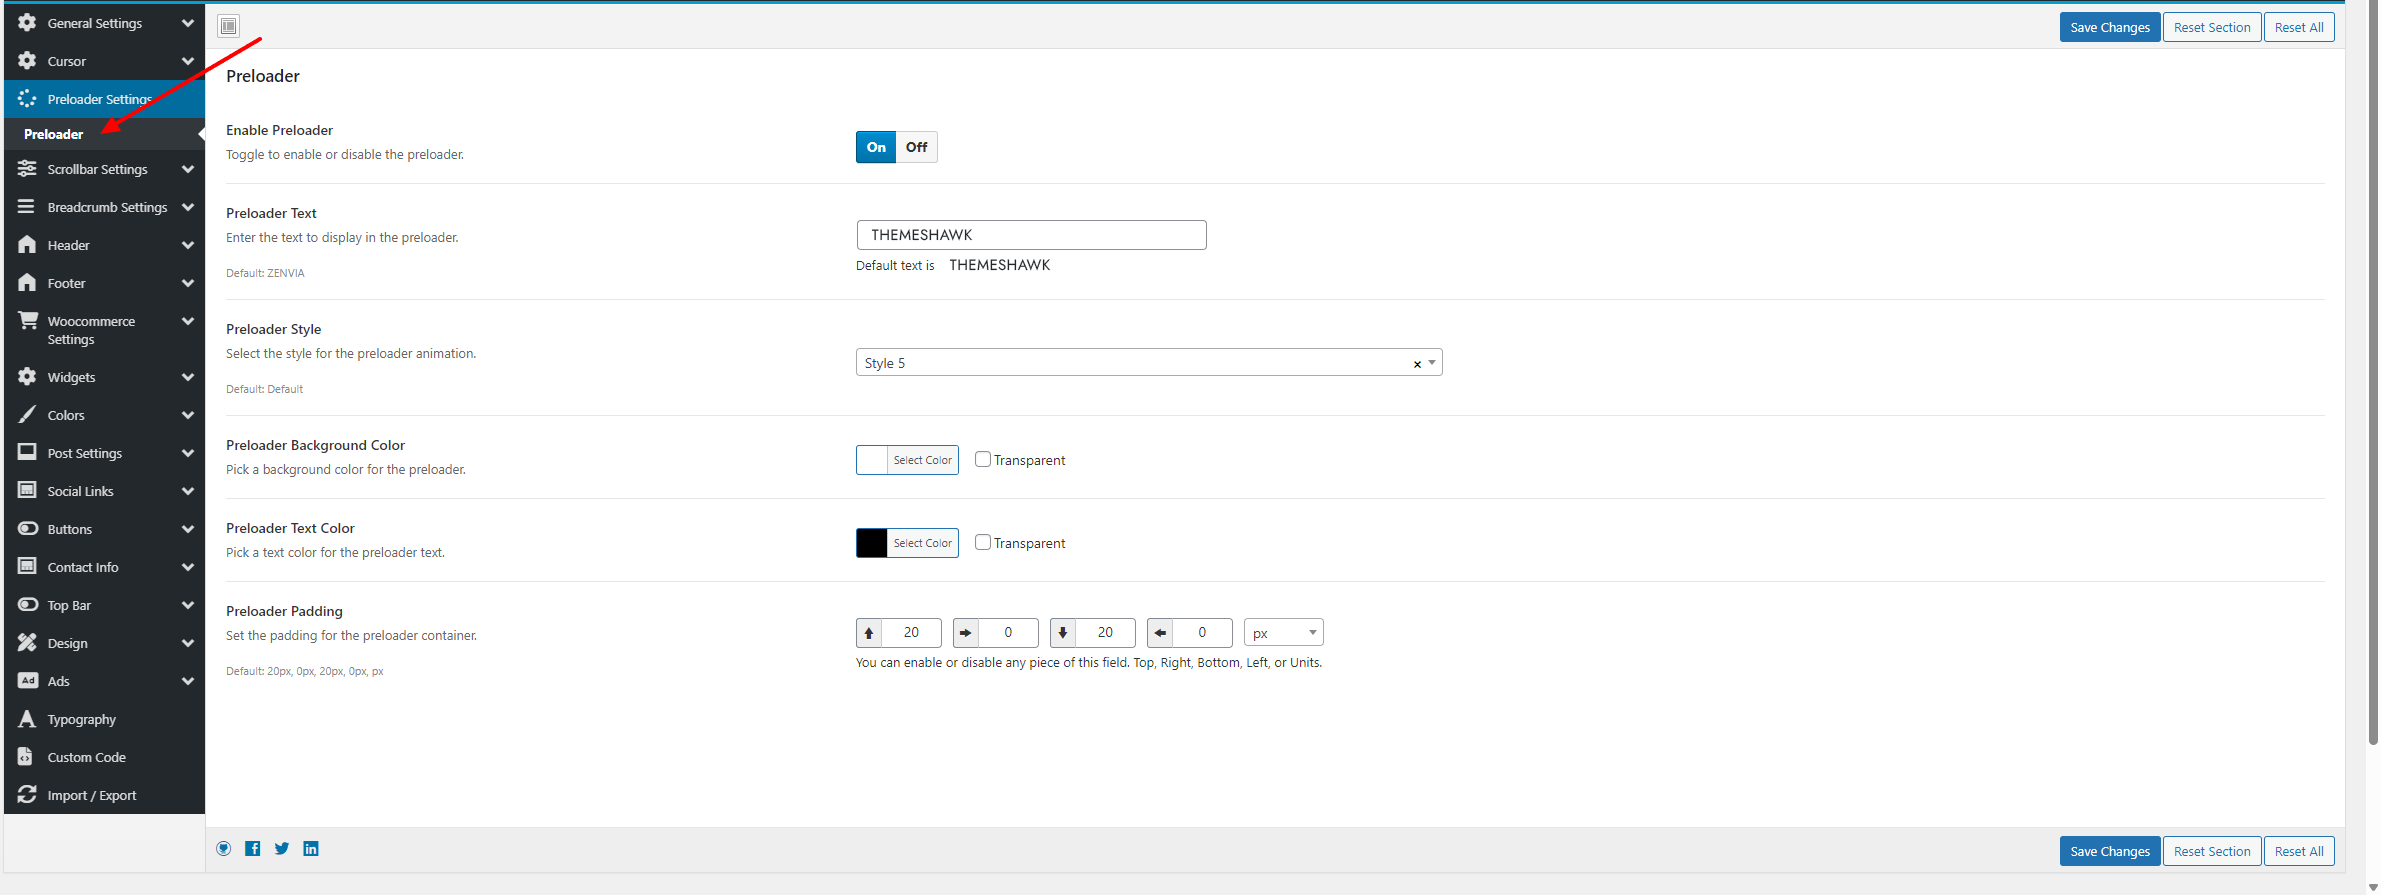
- Preloader – 8 Preloader styles available, choose any style you want make your website look unique. You can change the preloader text to any text you want
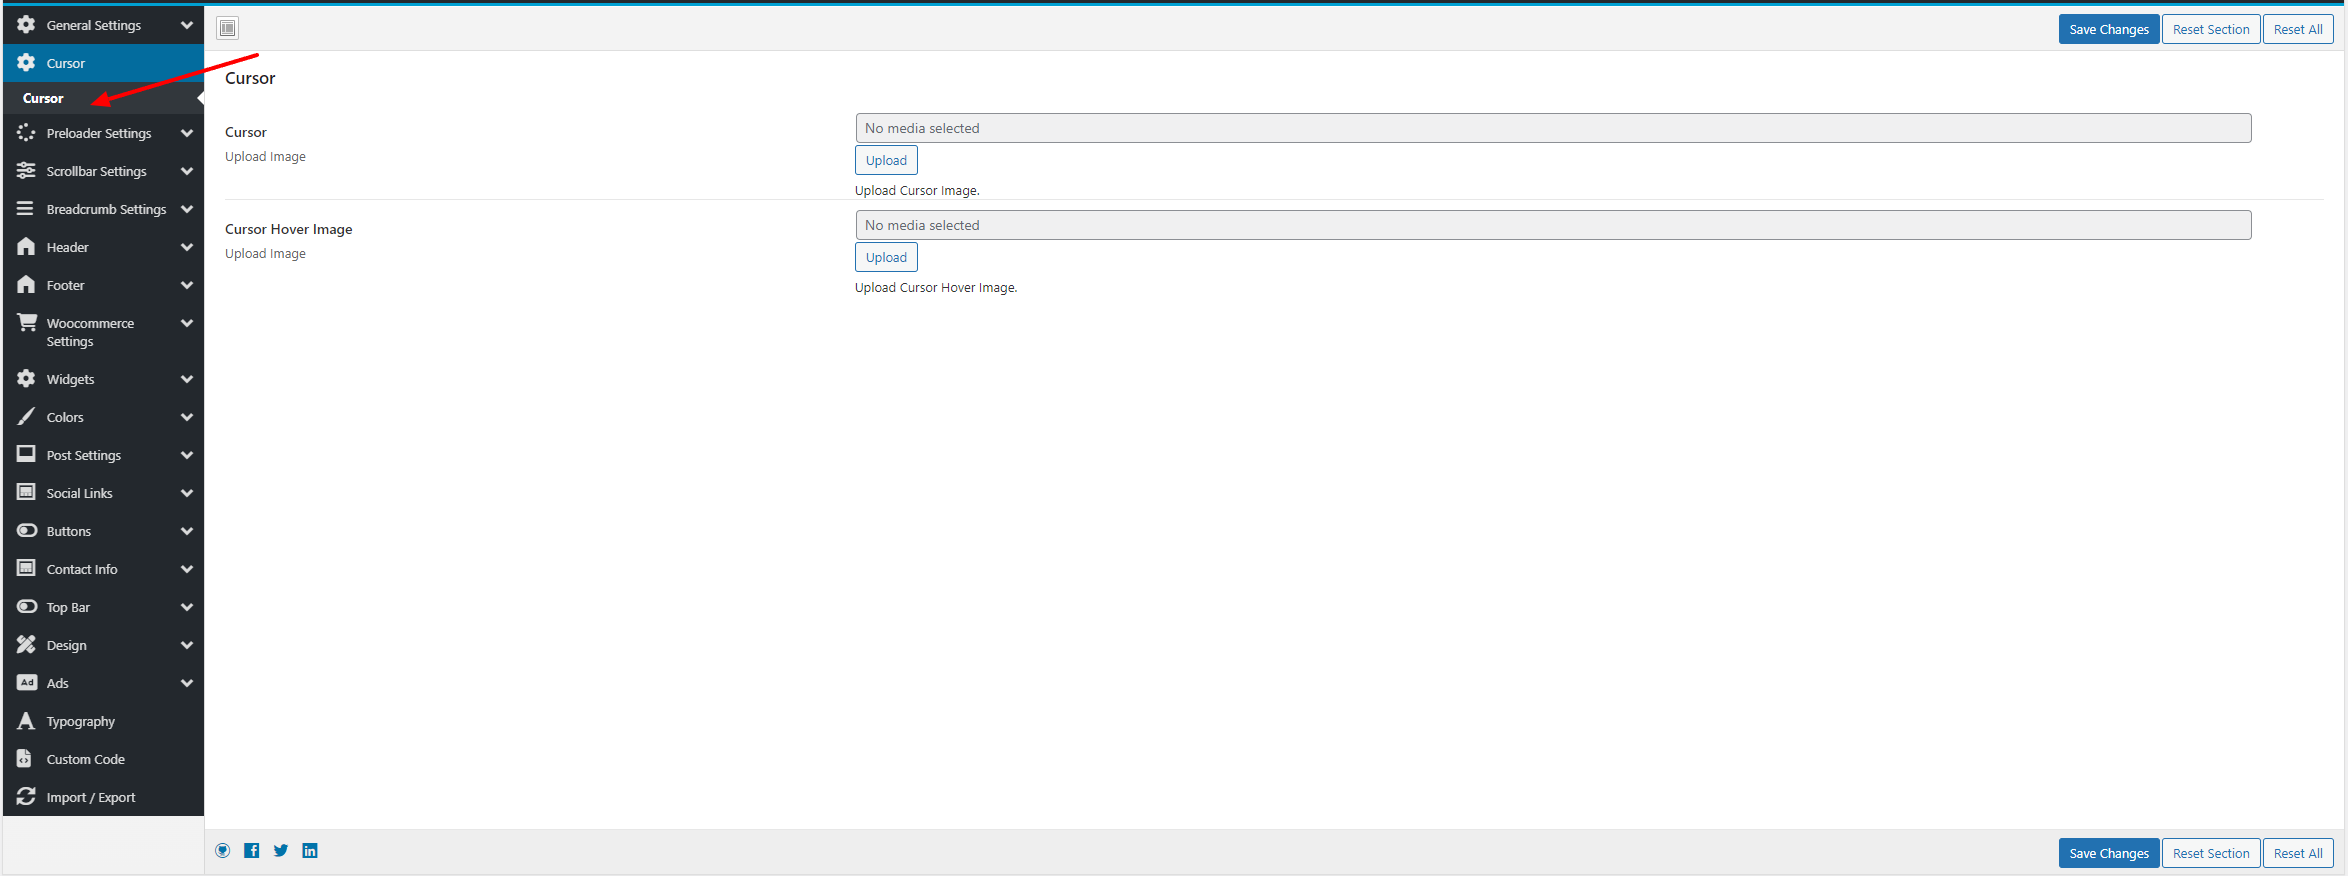
- Cursor - Choose active and hover custom cursor. You can choose any image as cursor image
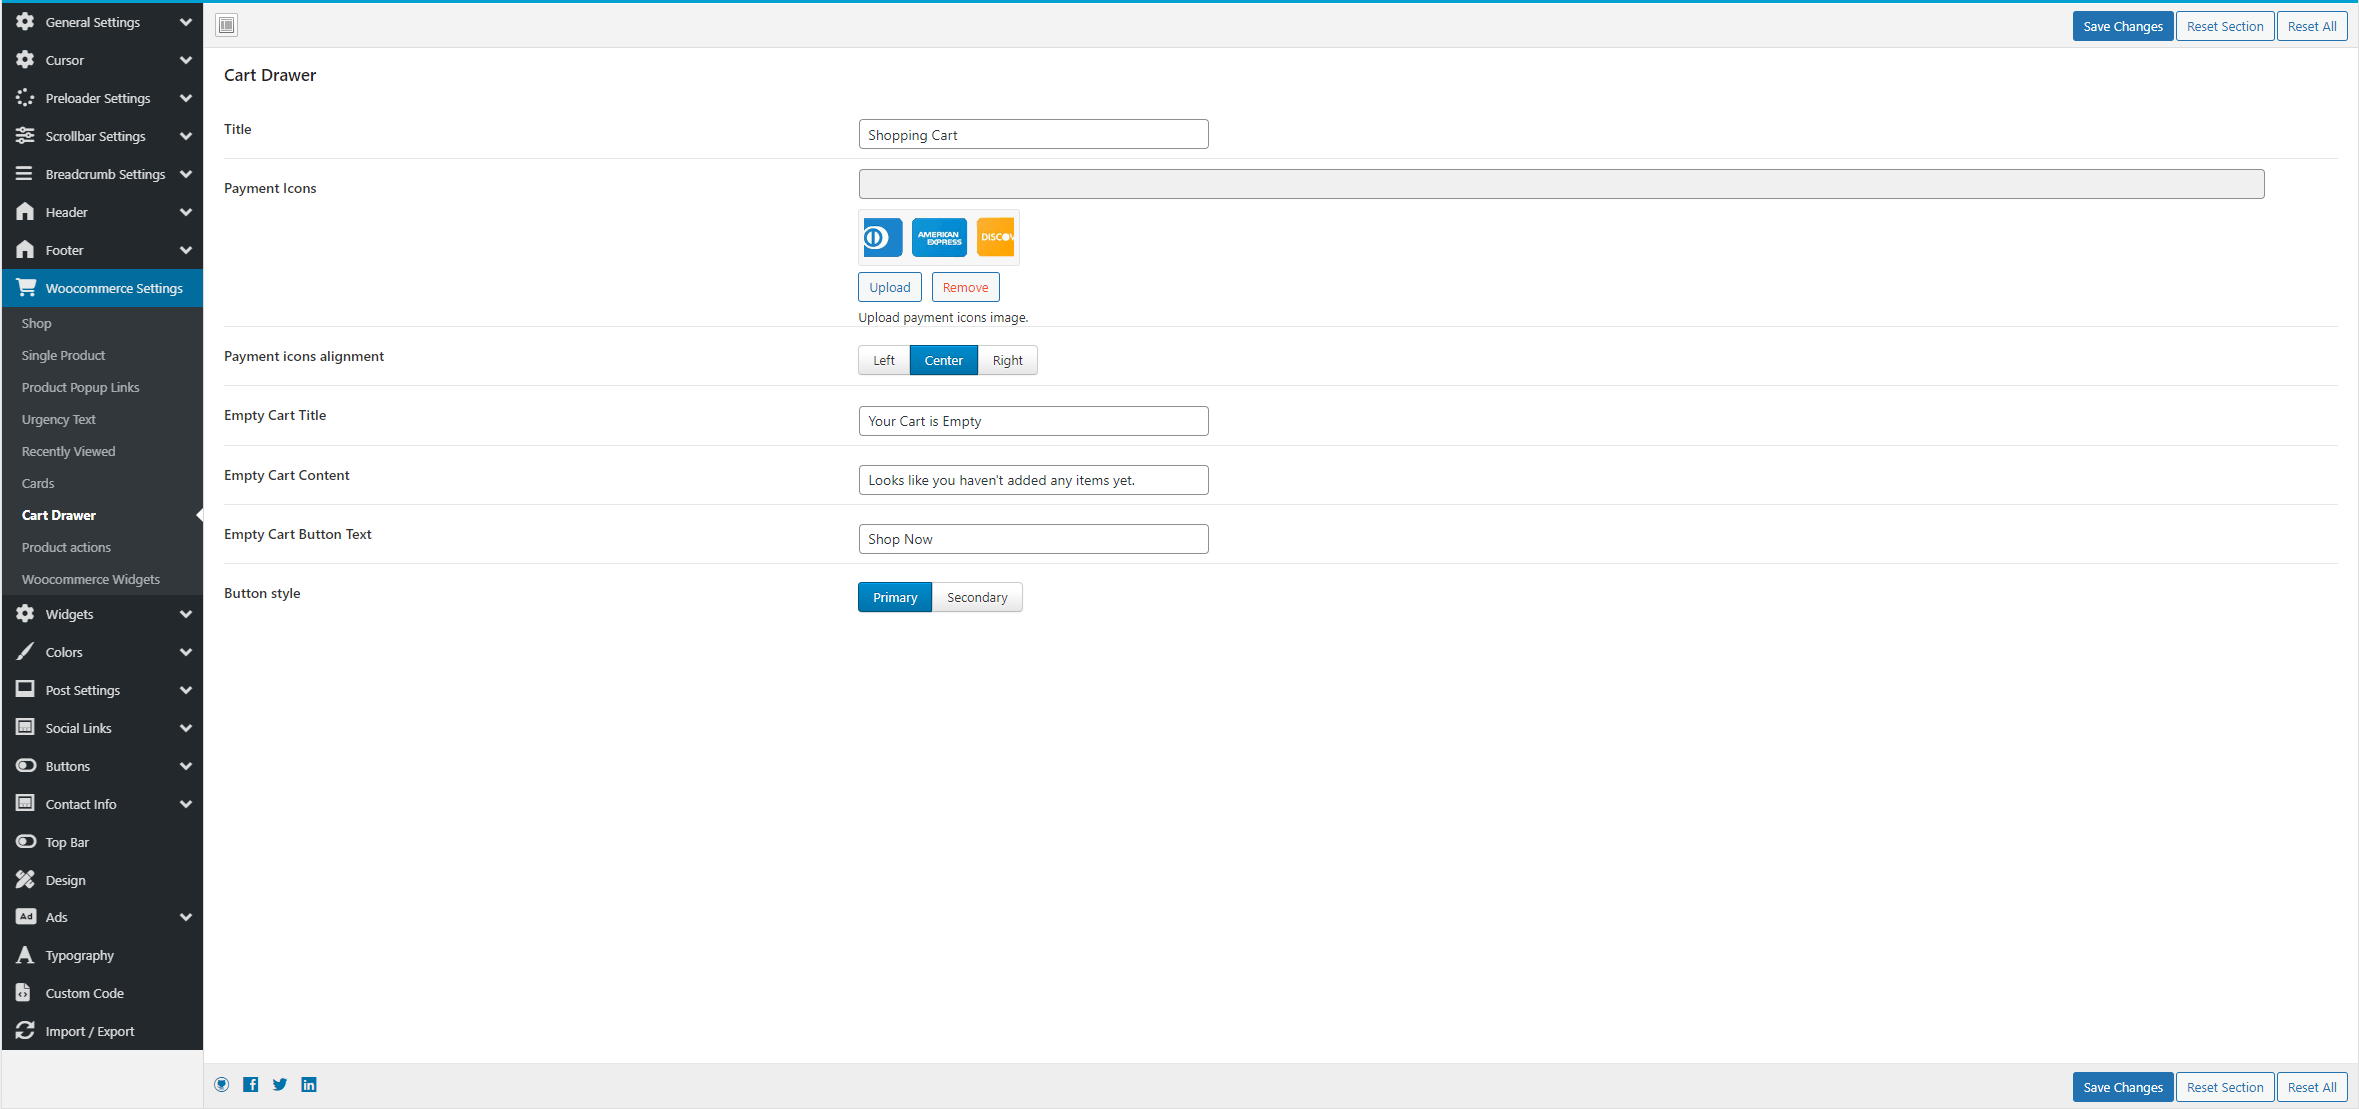
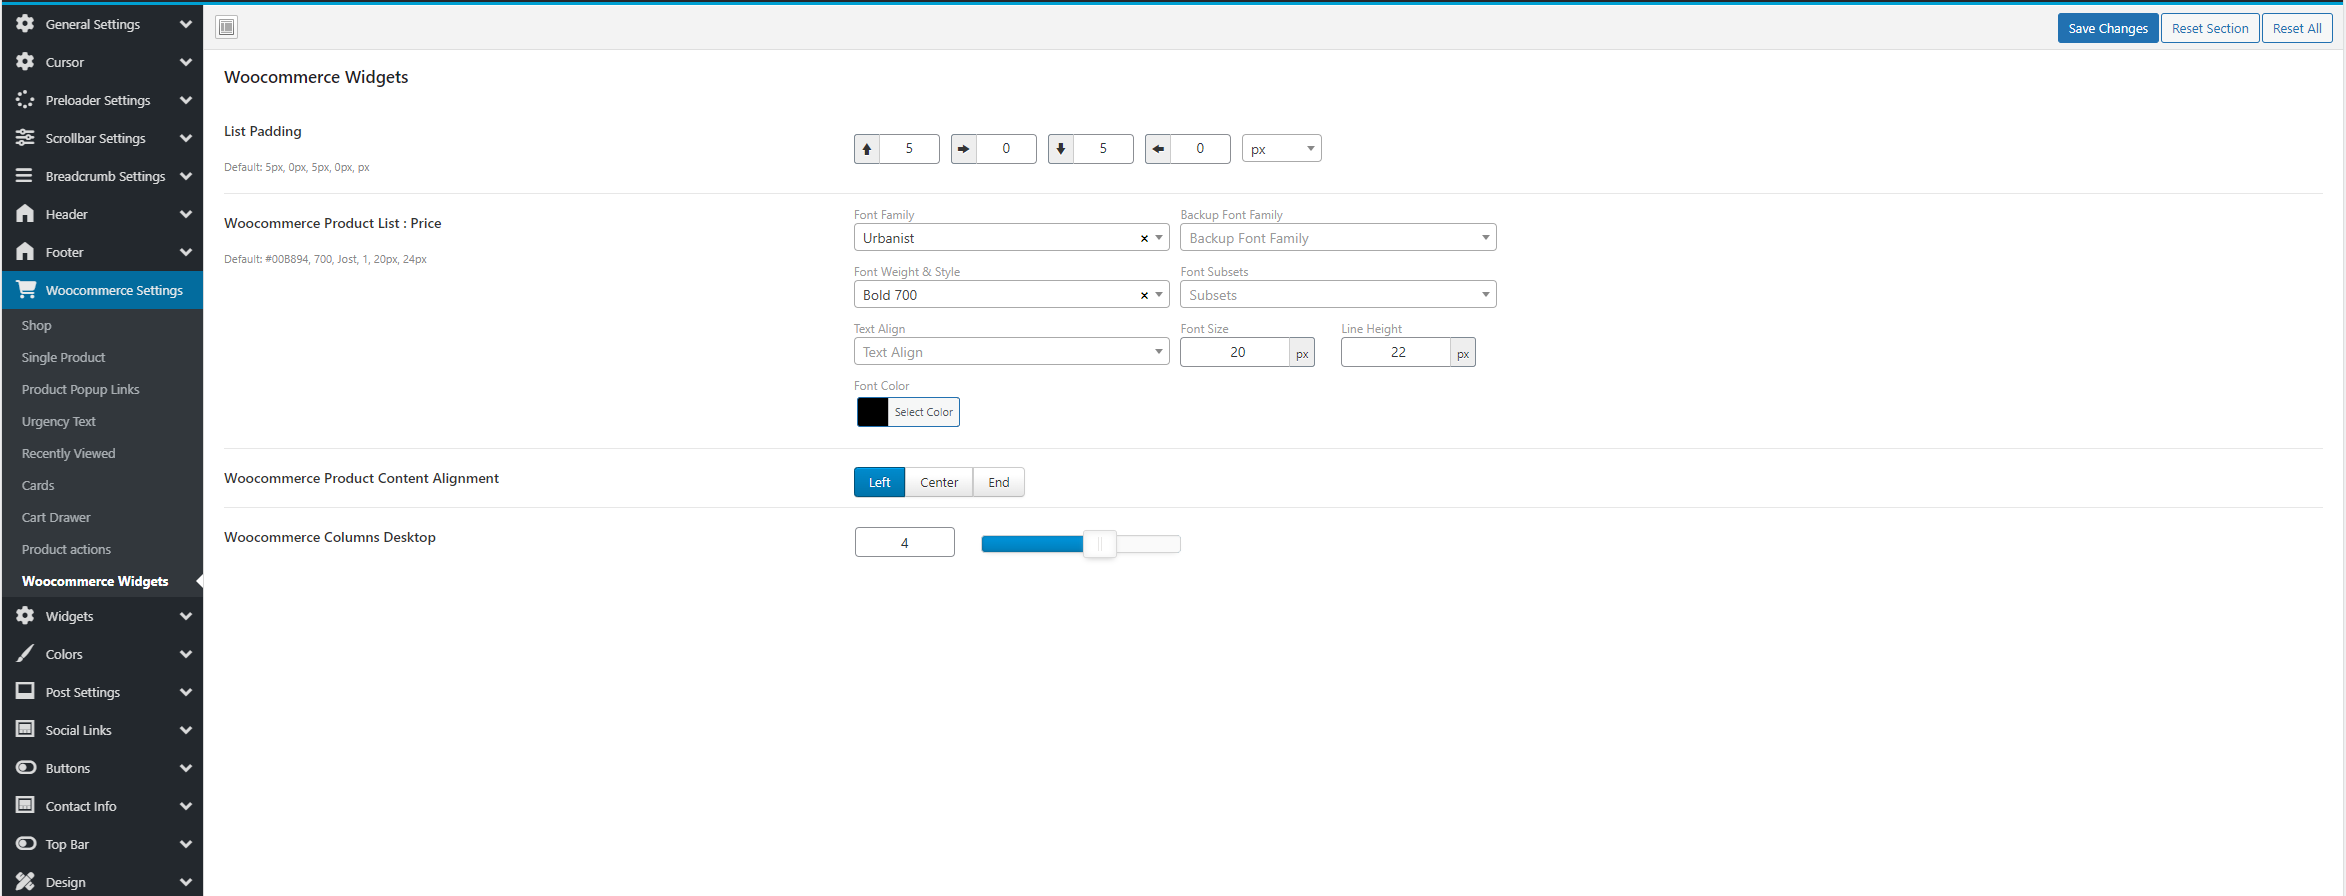
- Woocommerce settings


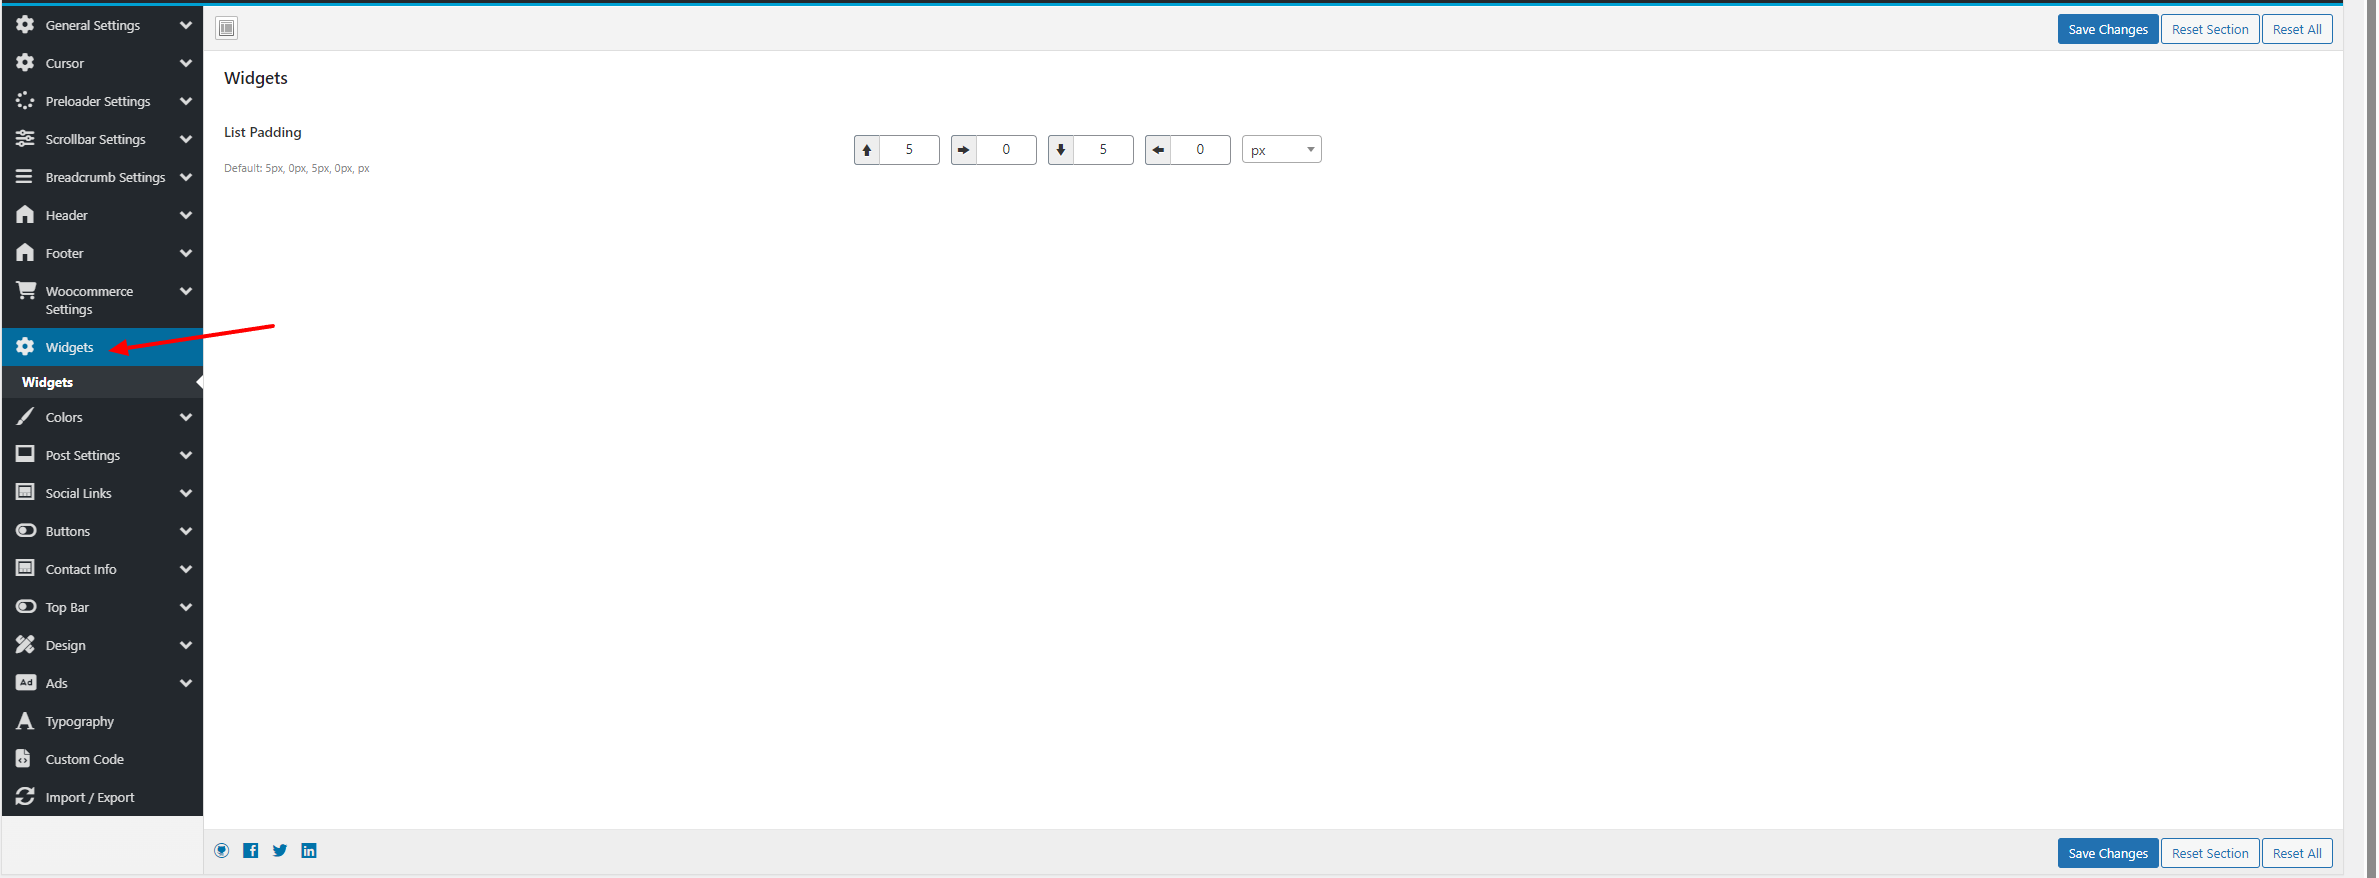
- Widgets settings
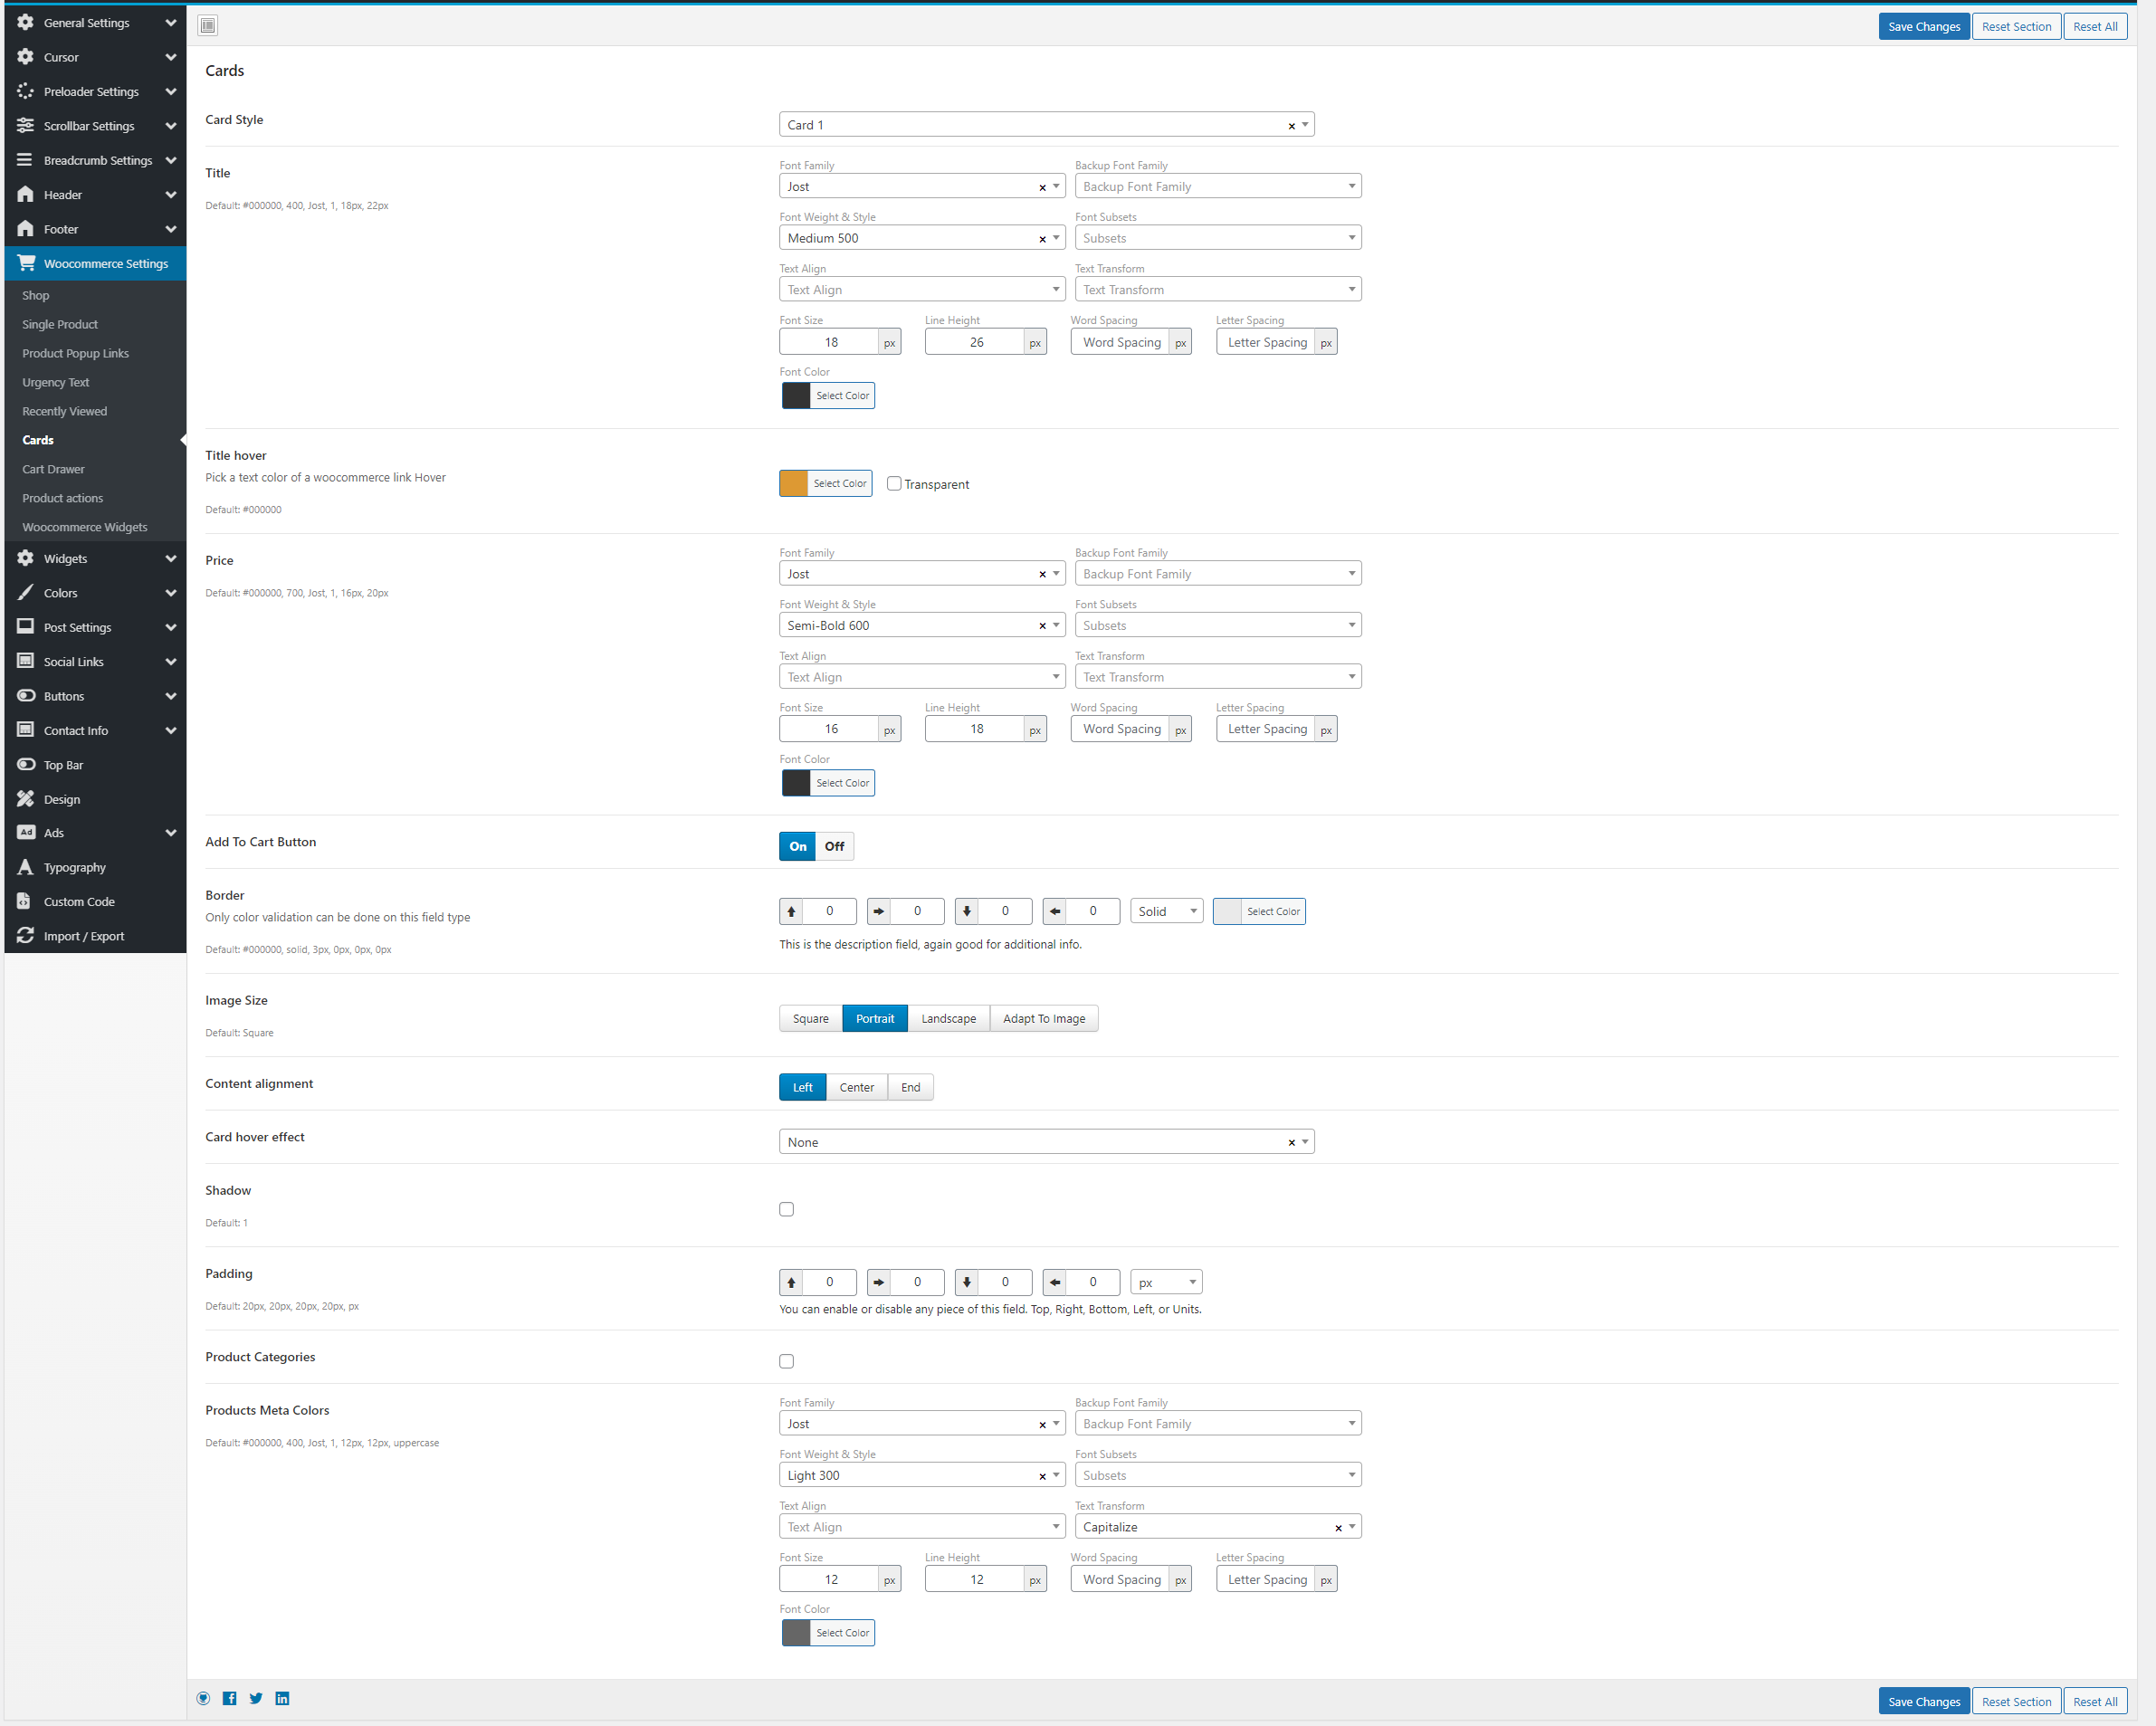
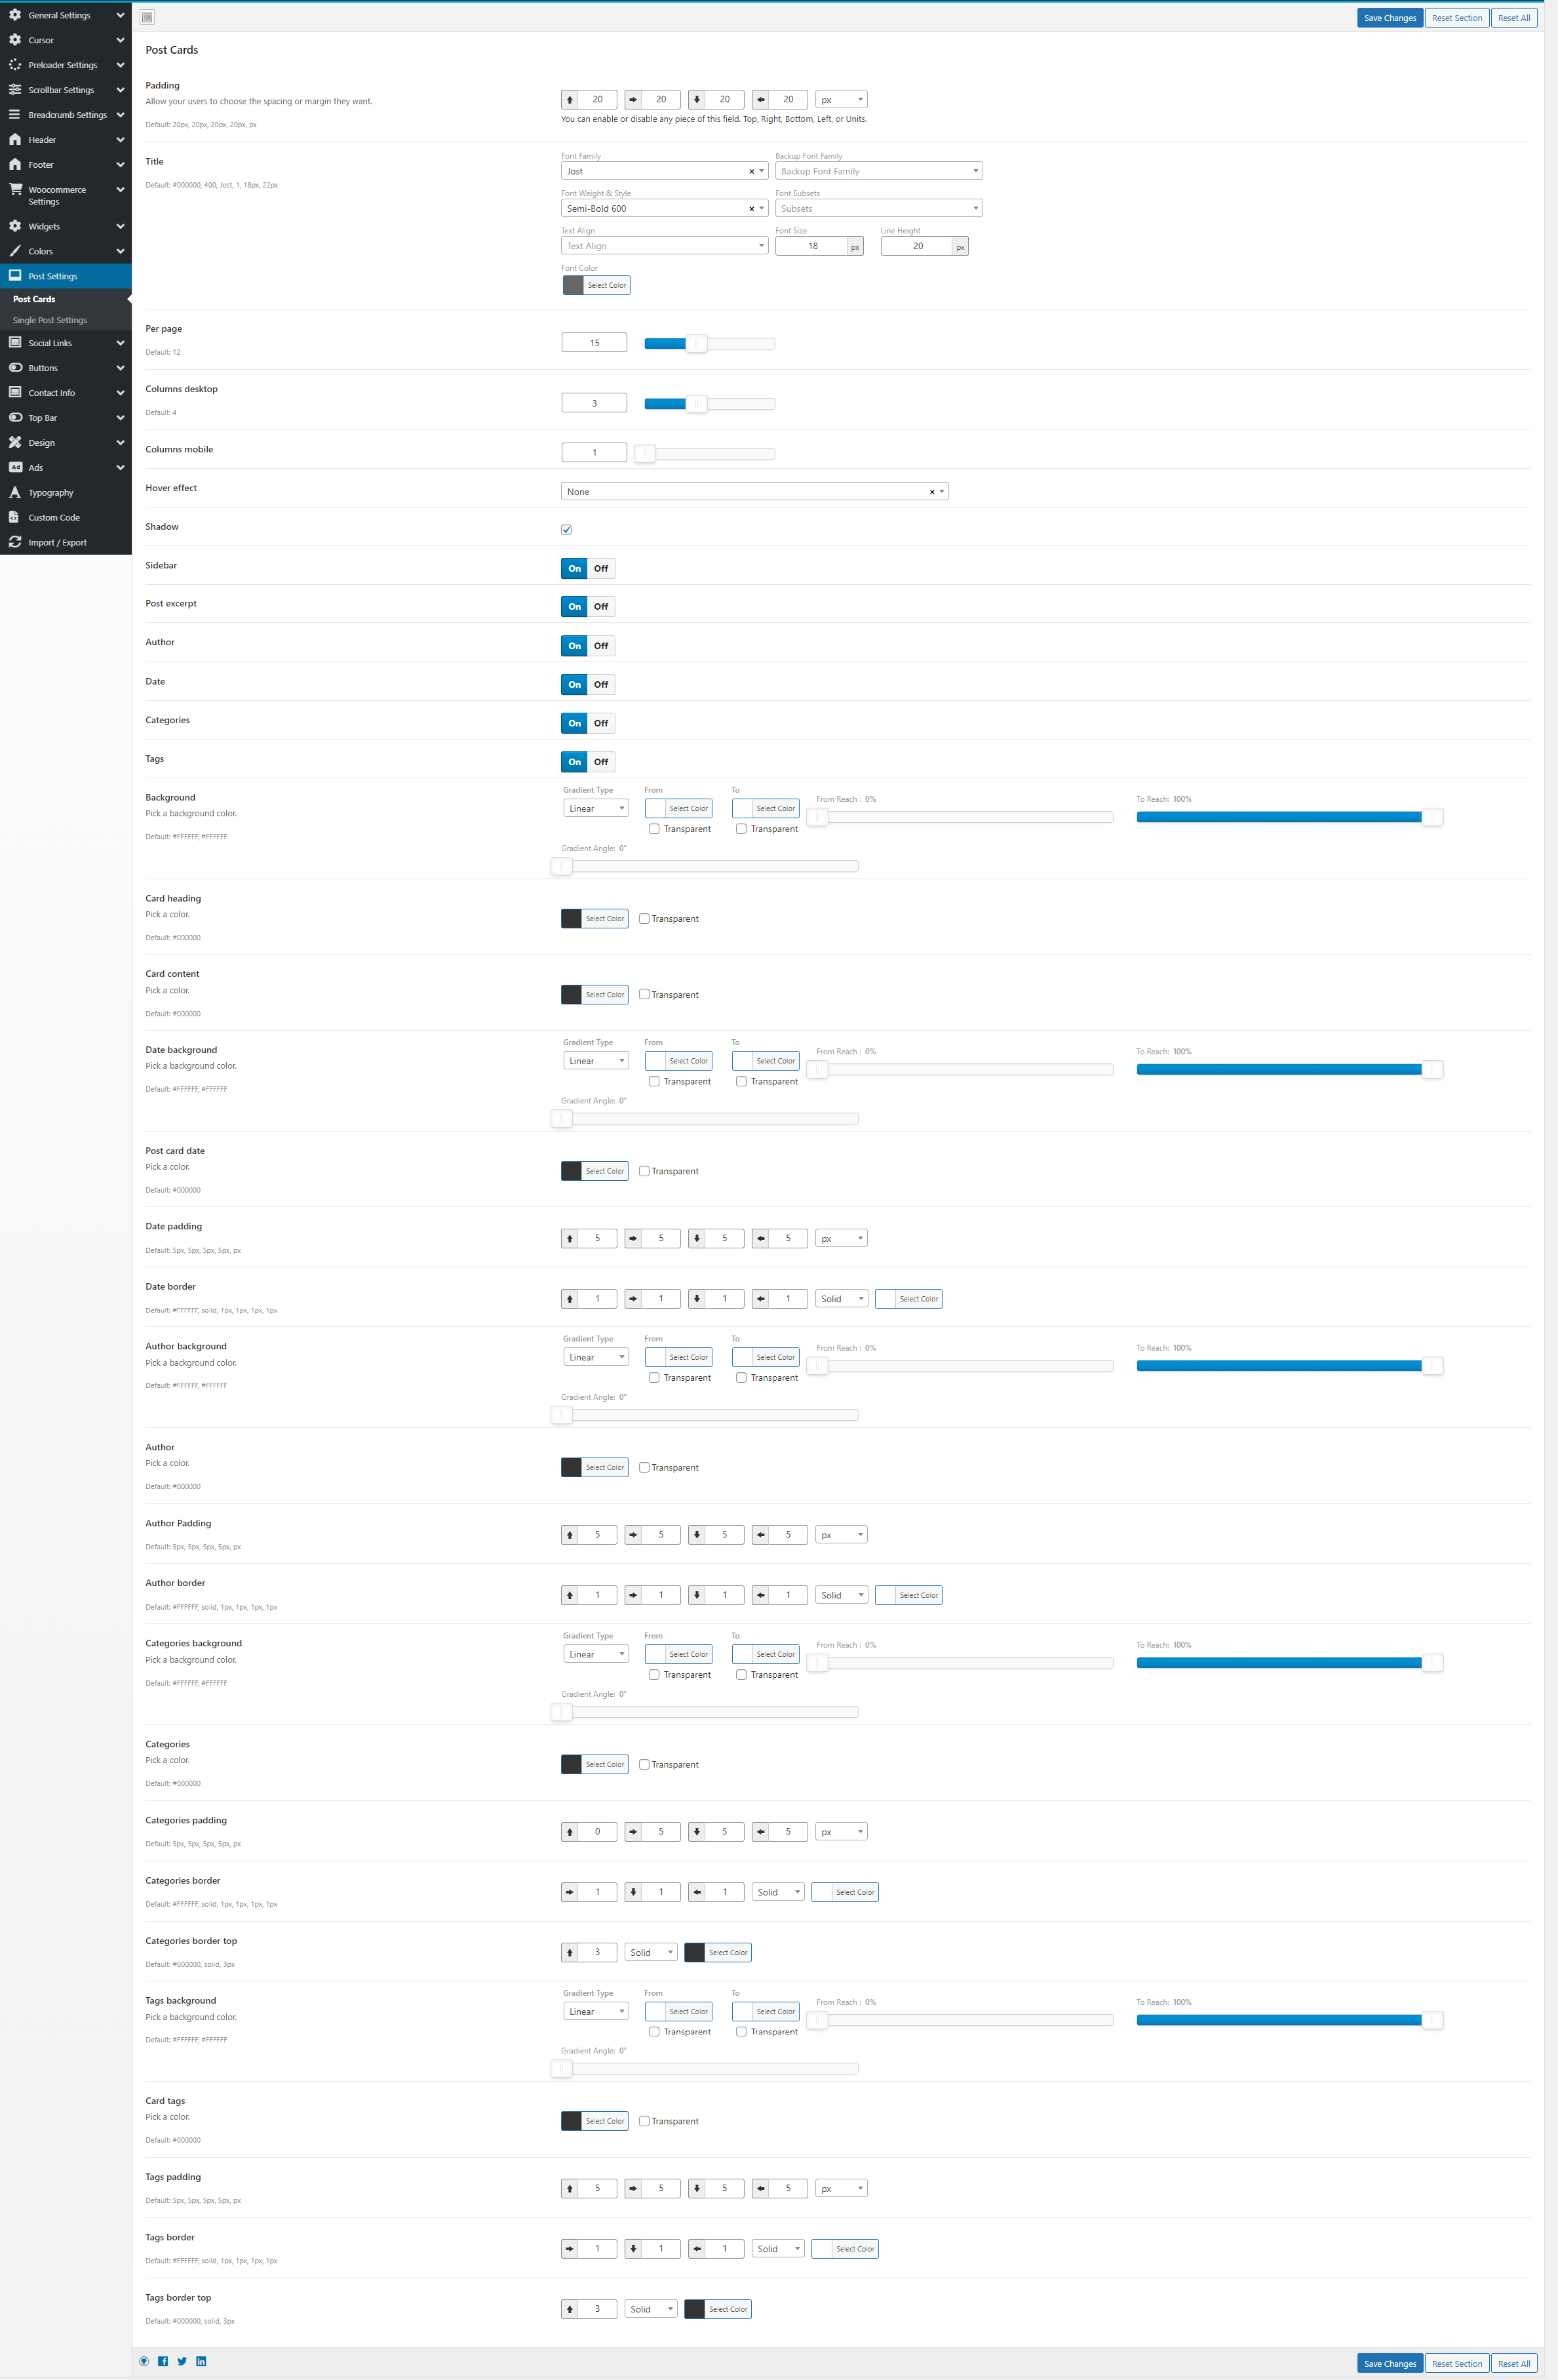
- Blogs/Posts settings : Post Cards
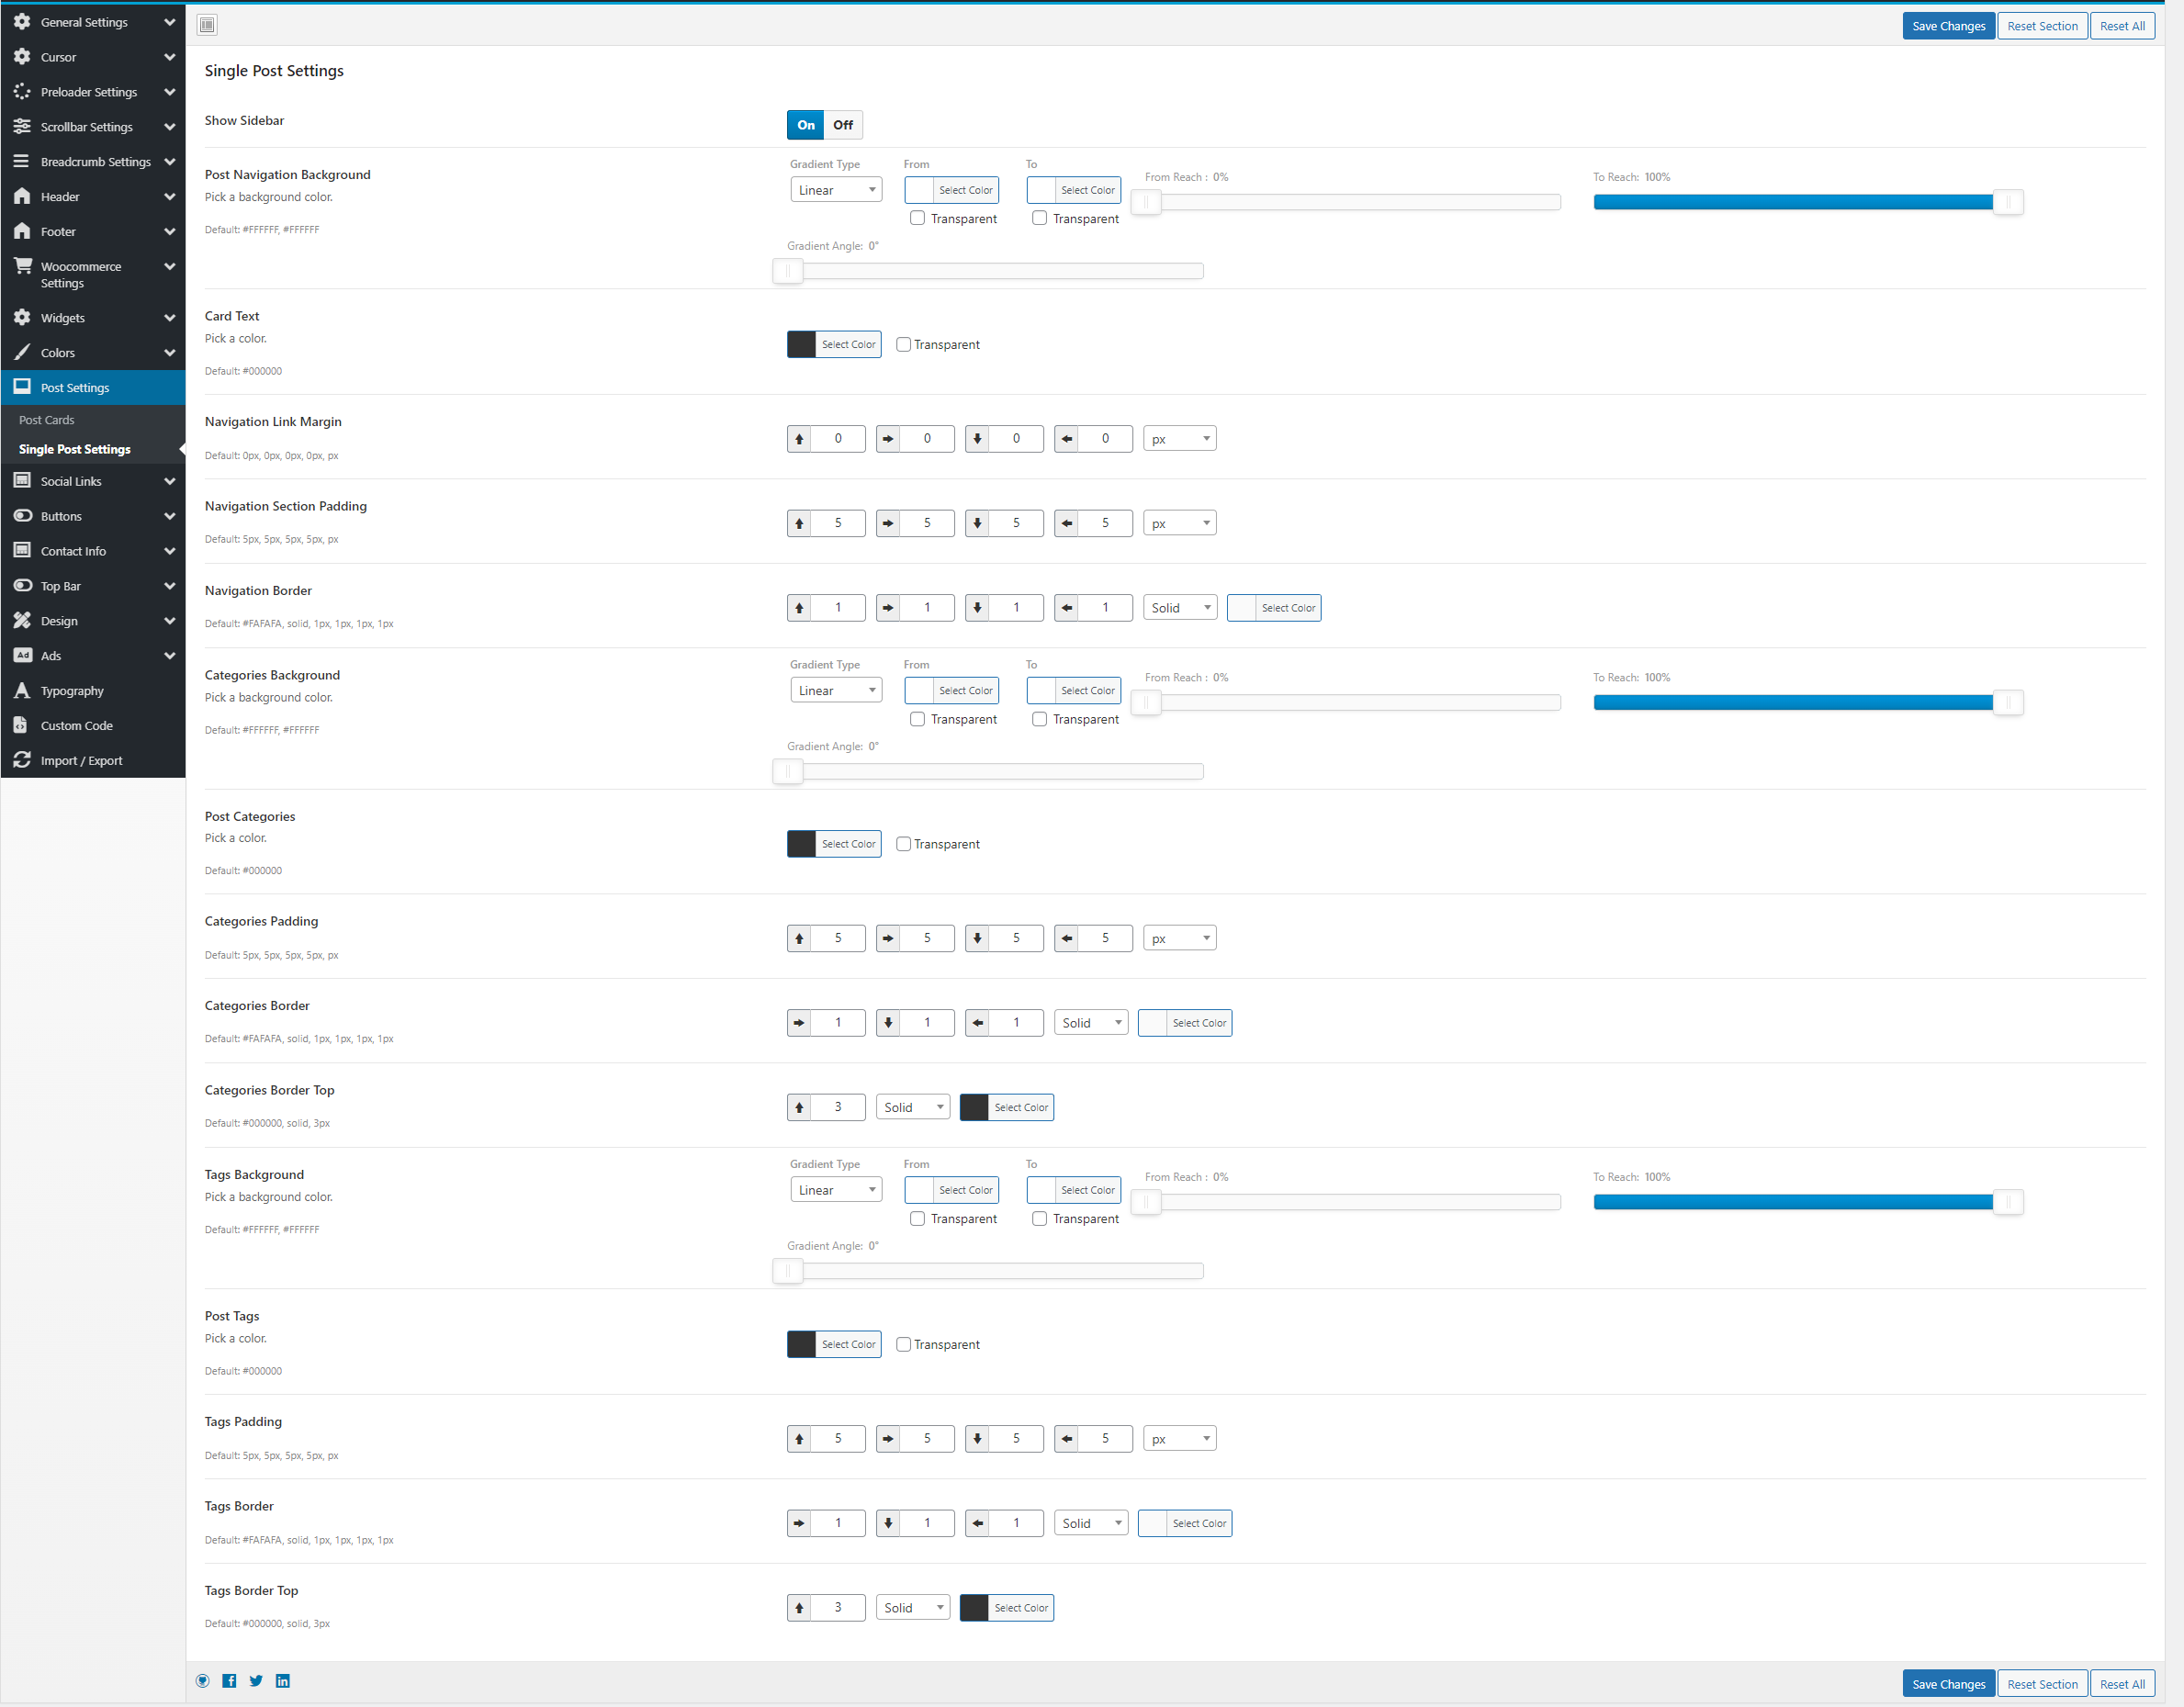
- Blogs/Posts settings : Single Post
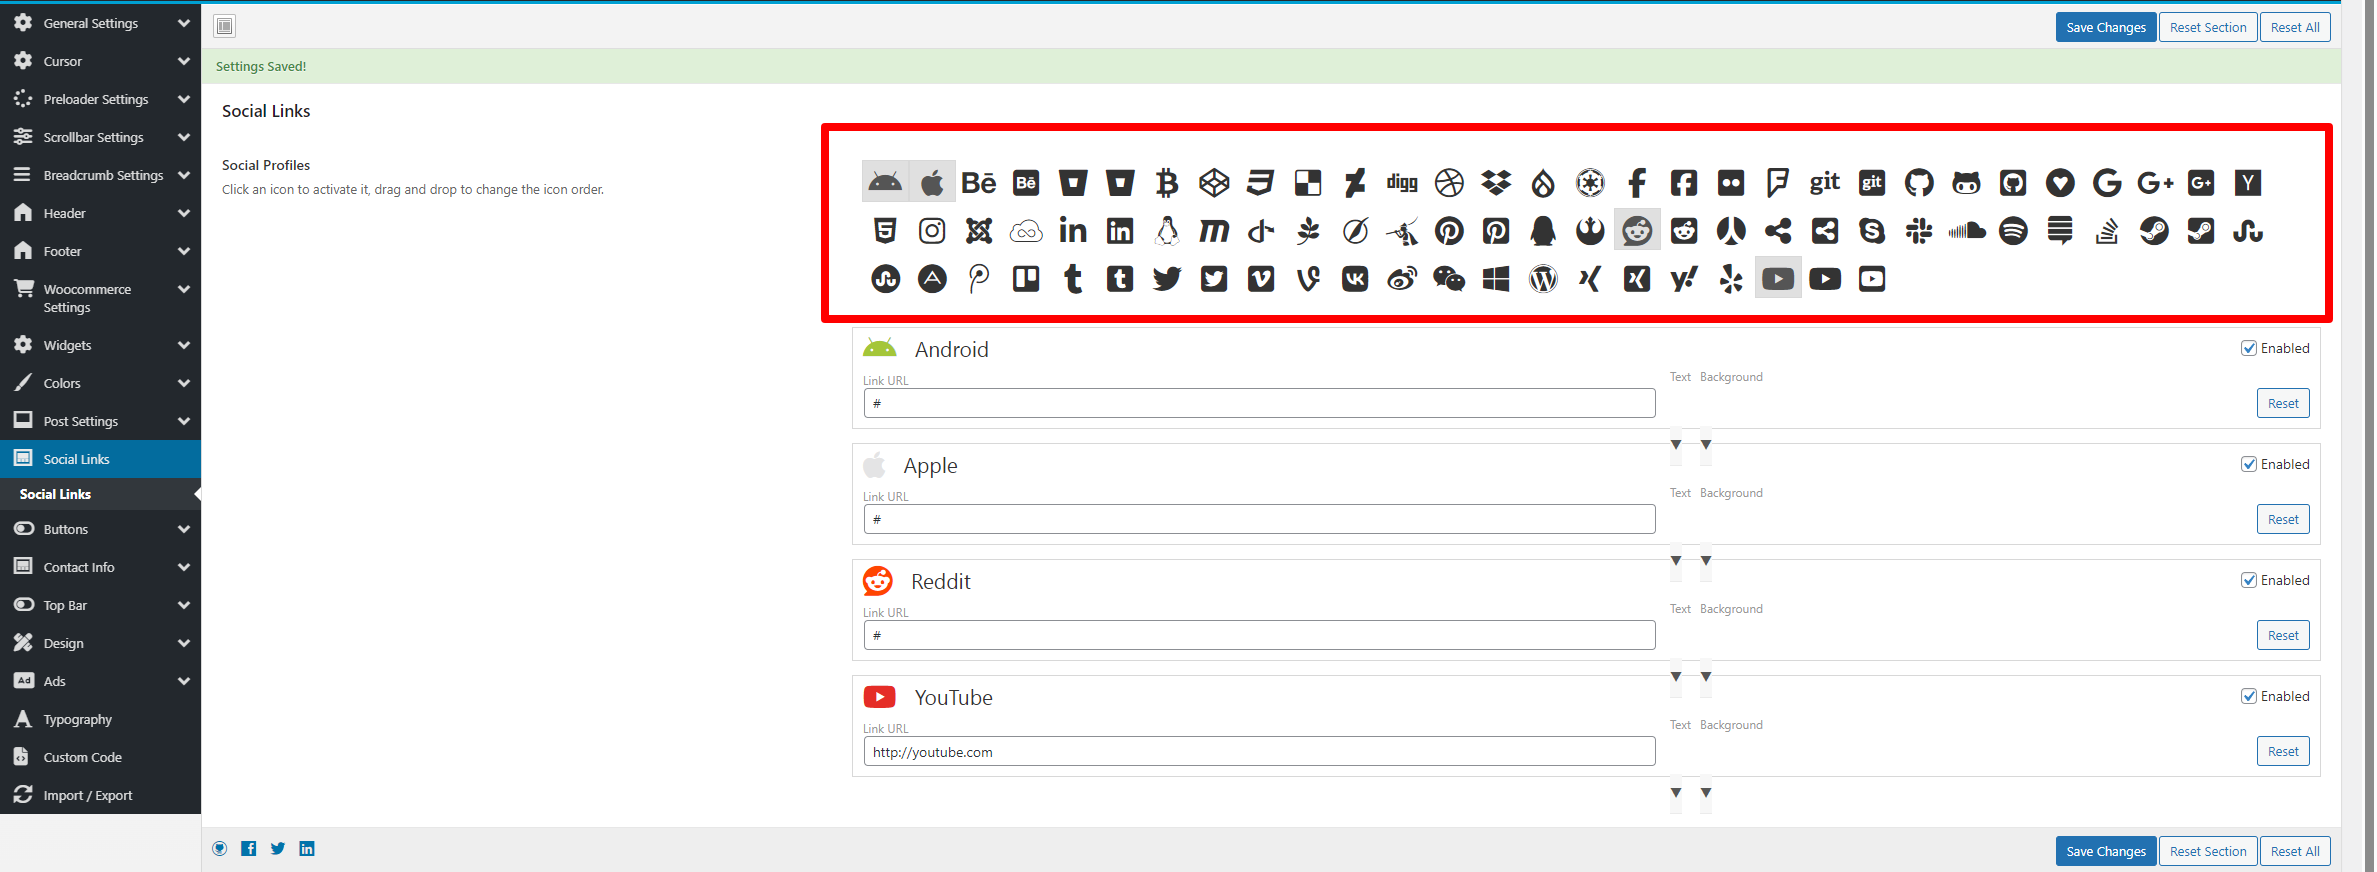
- Social Links
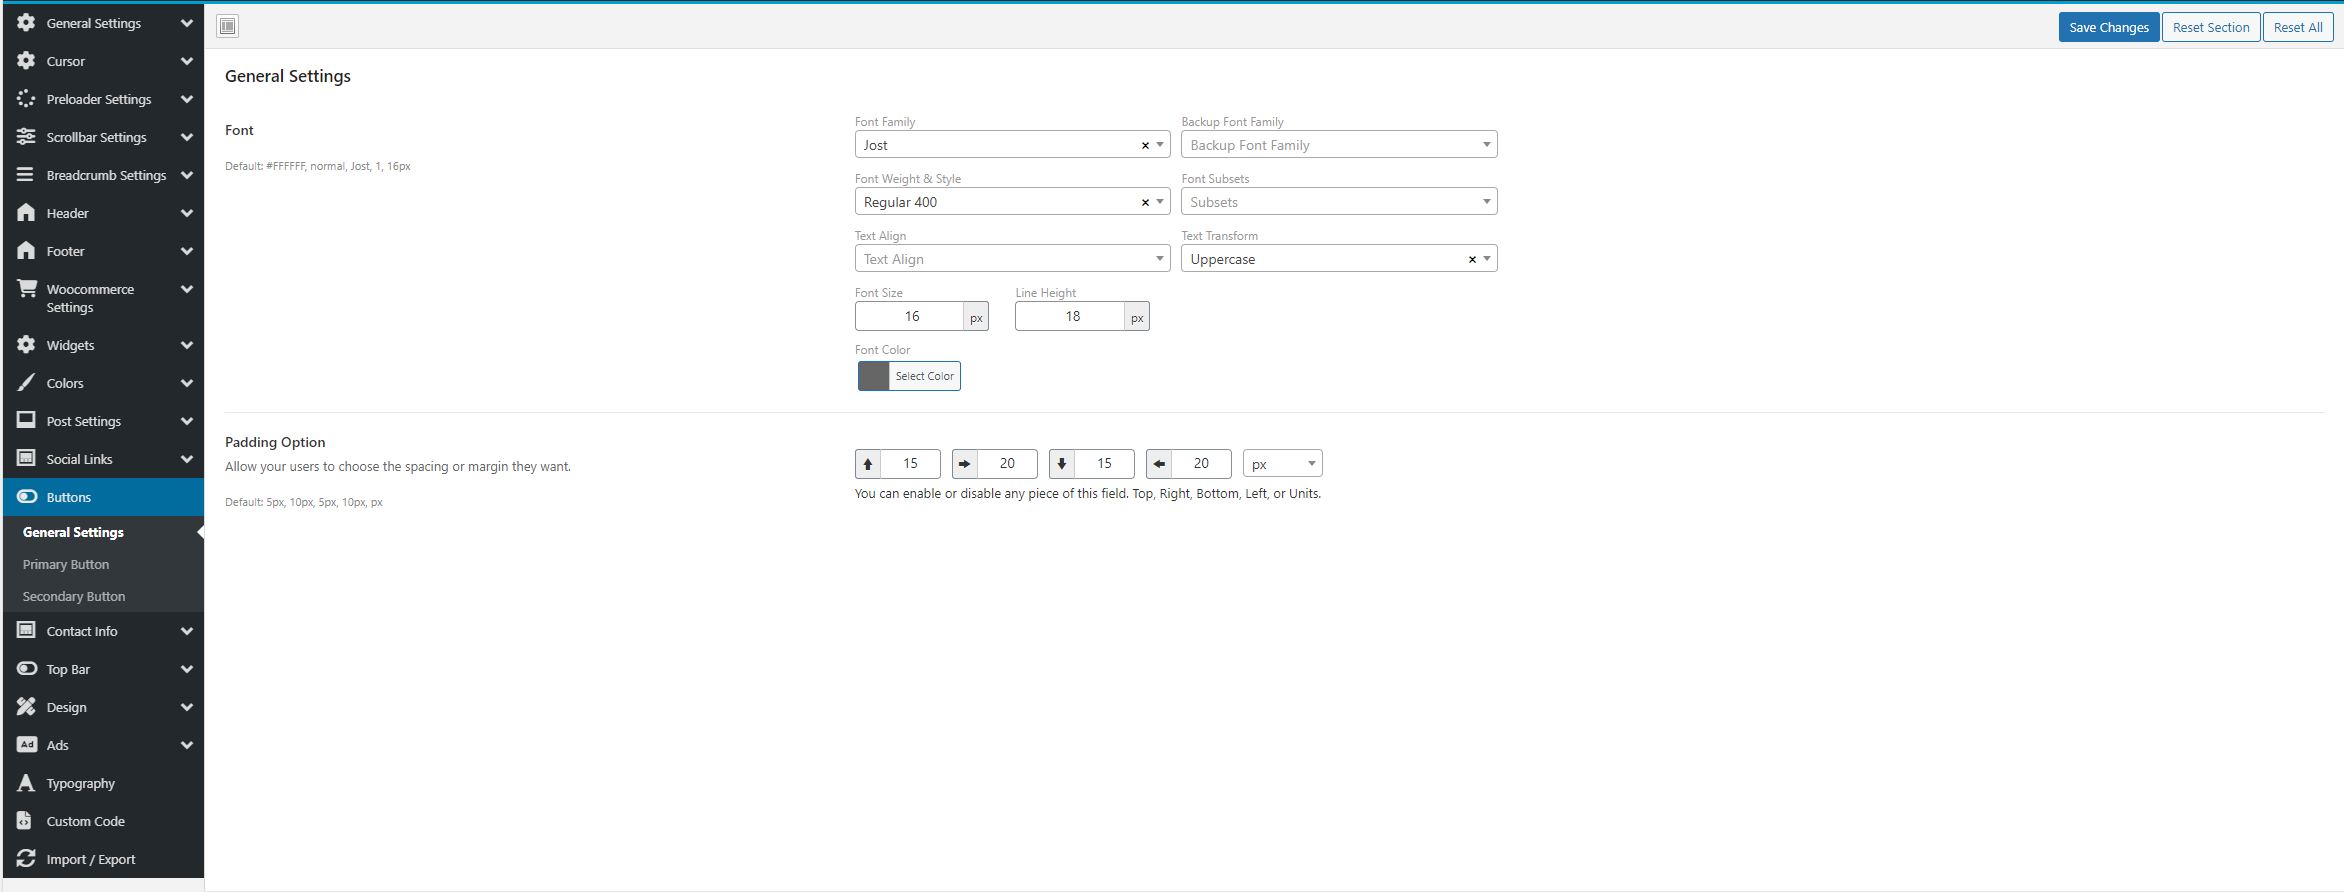
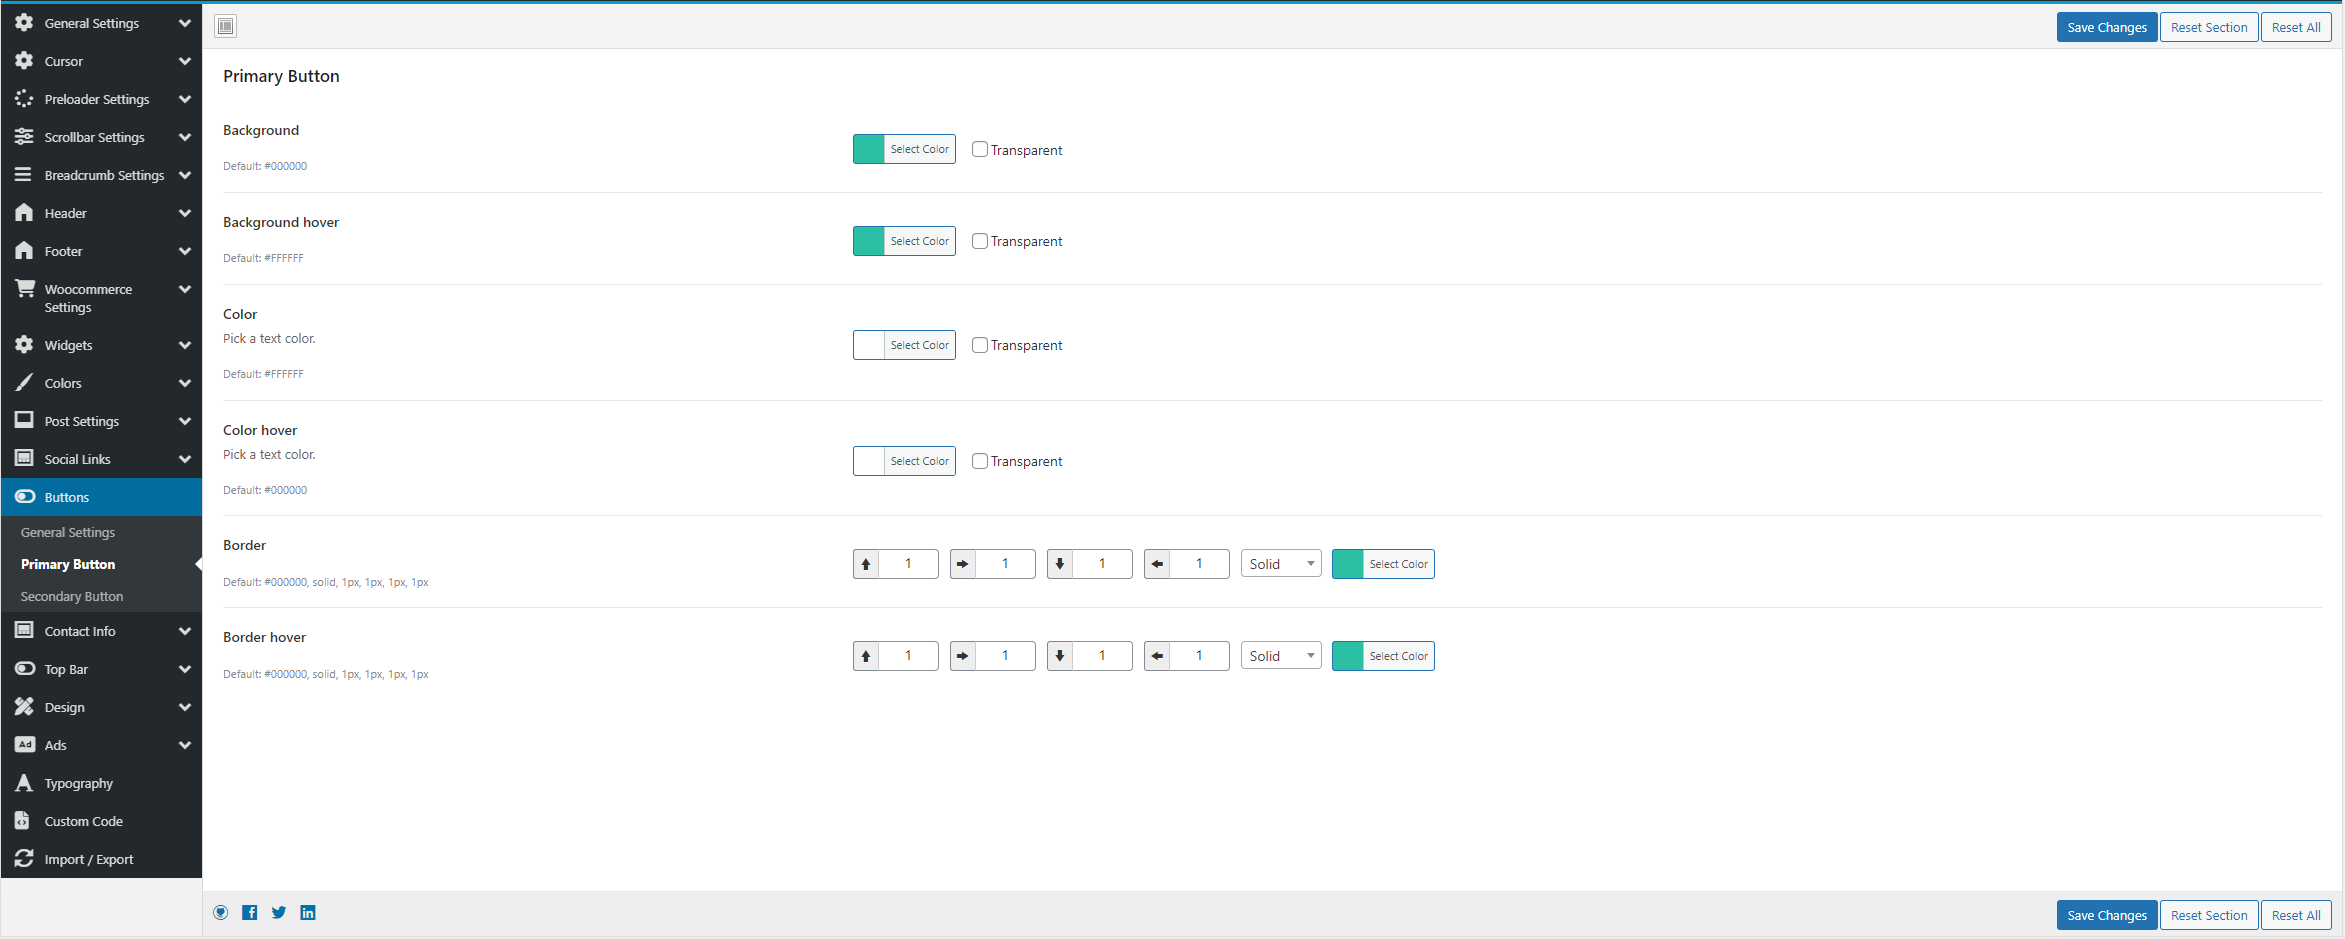
- Buttons
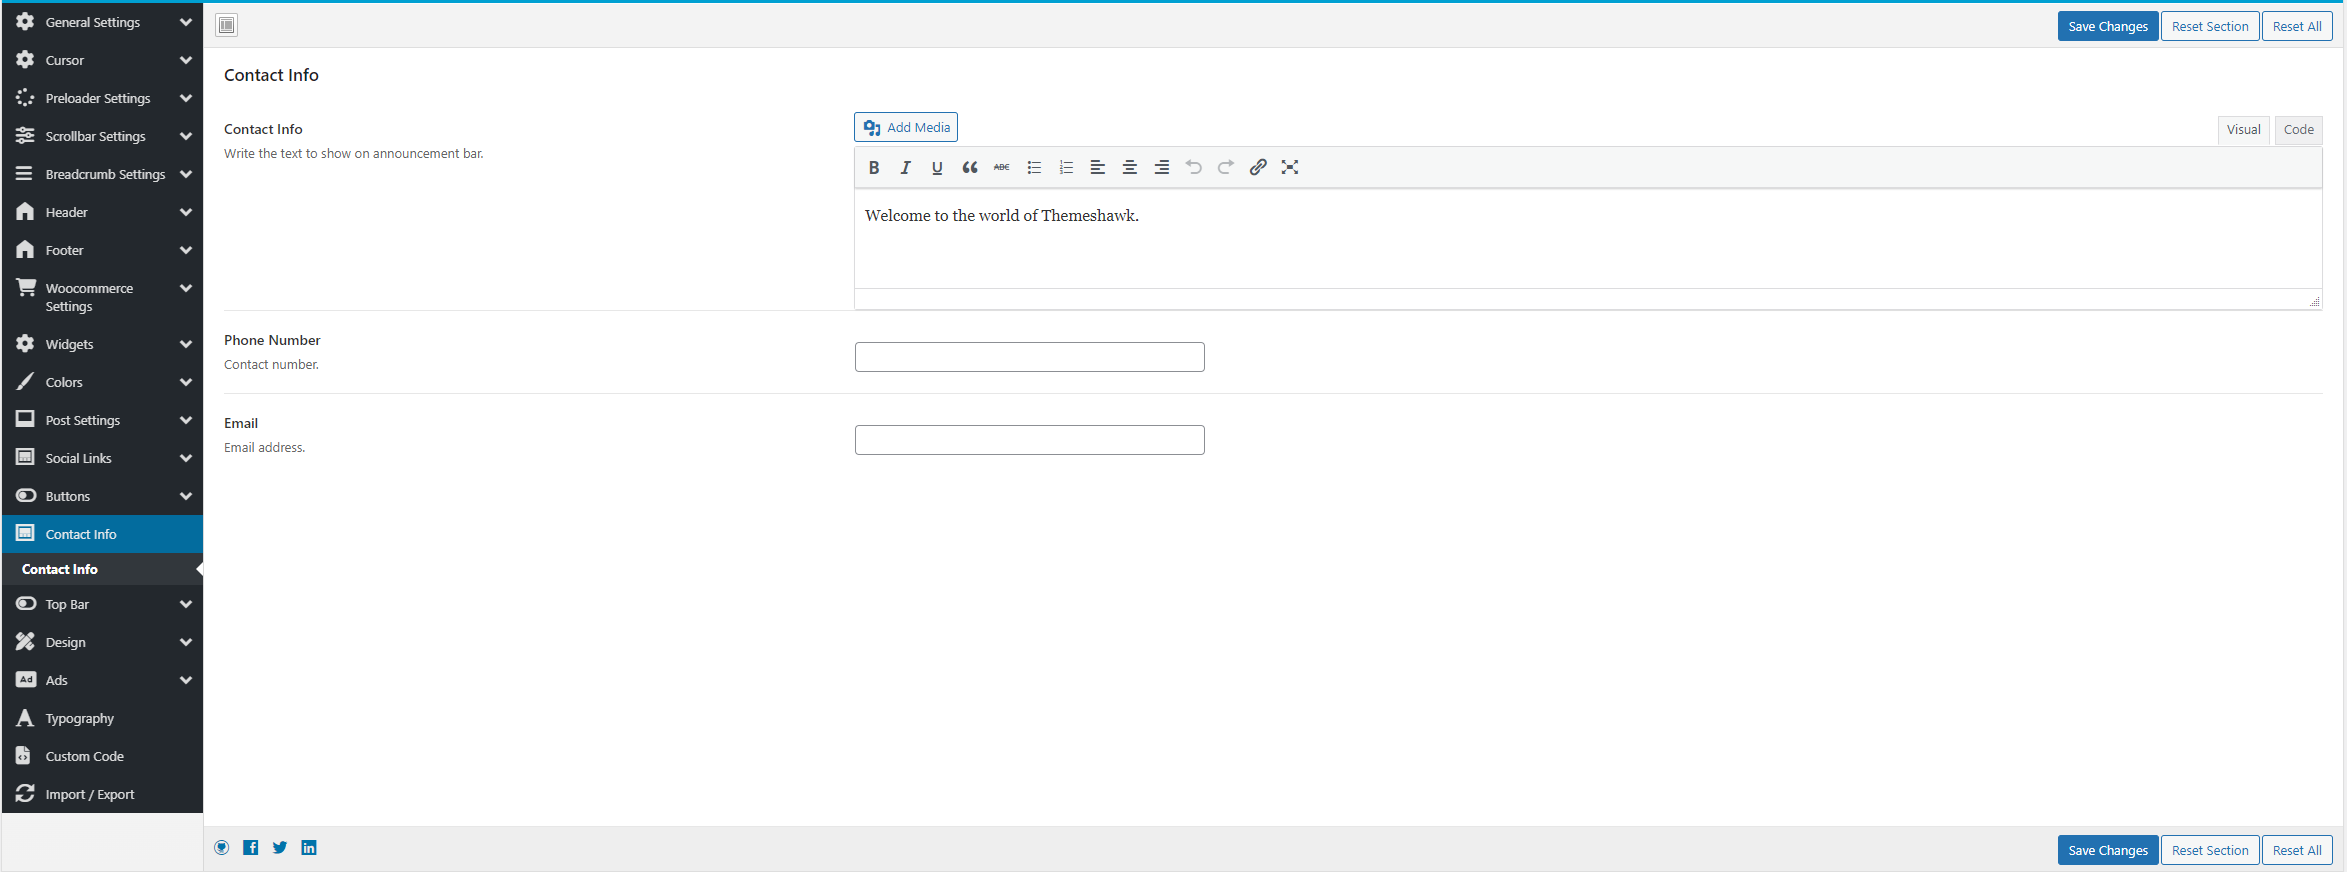
- Contact Info
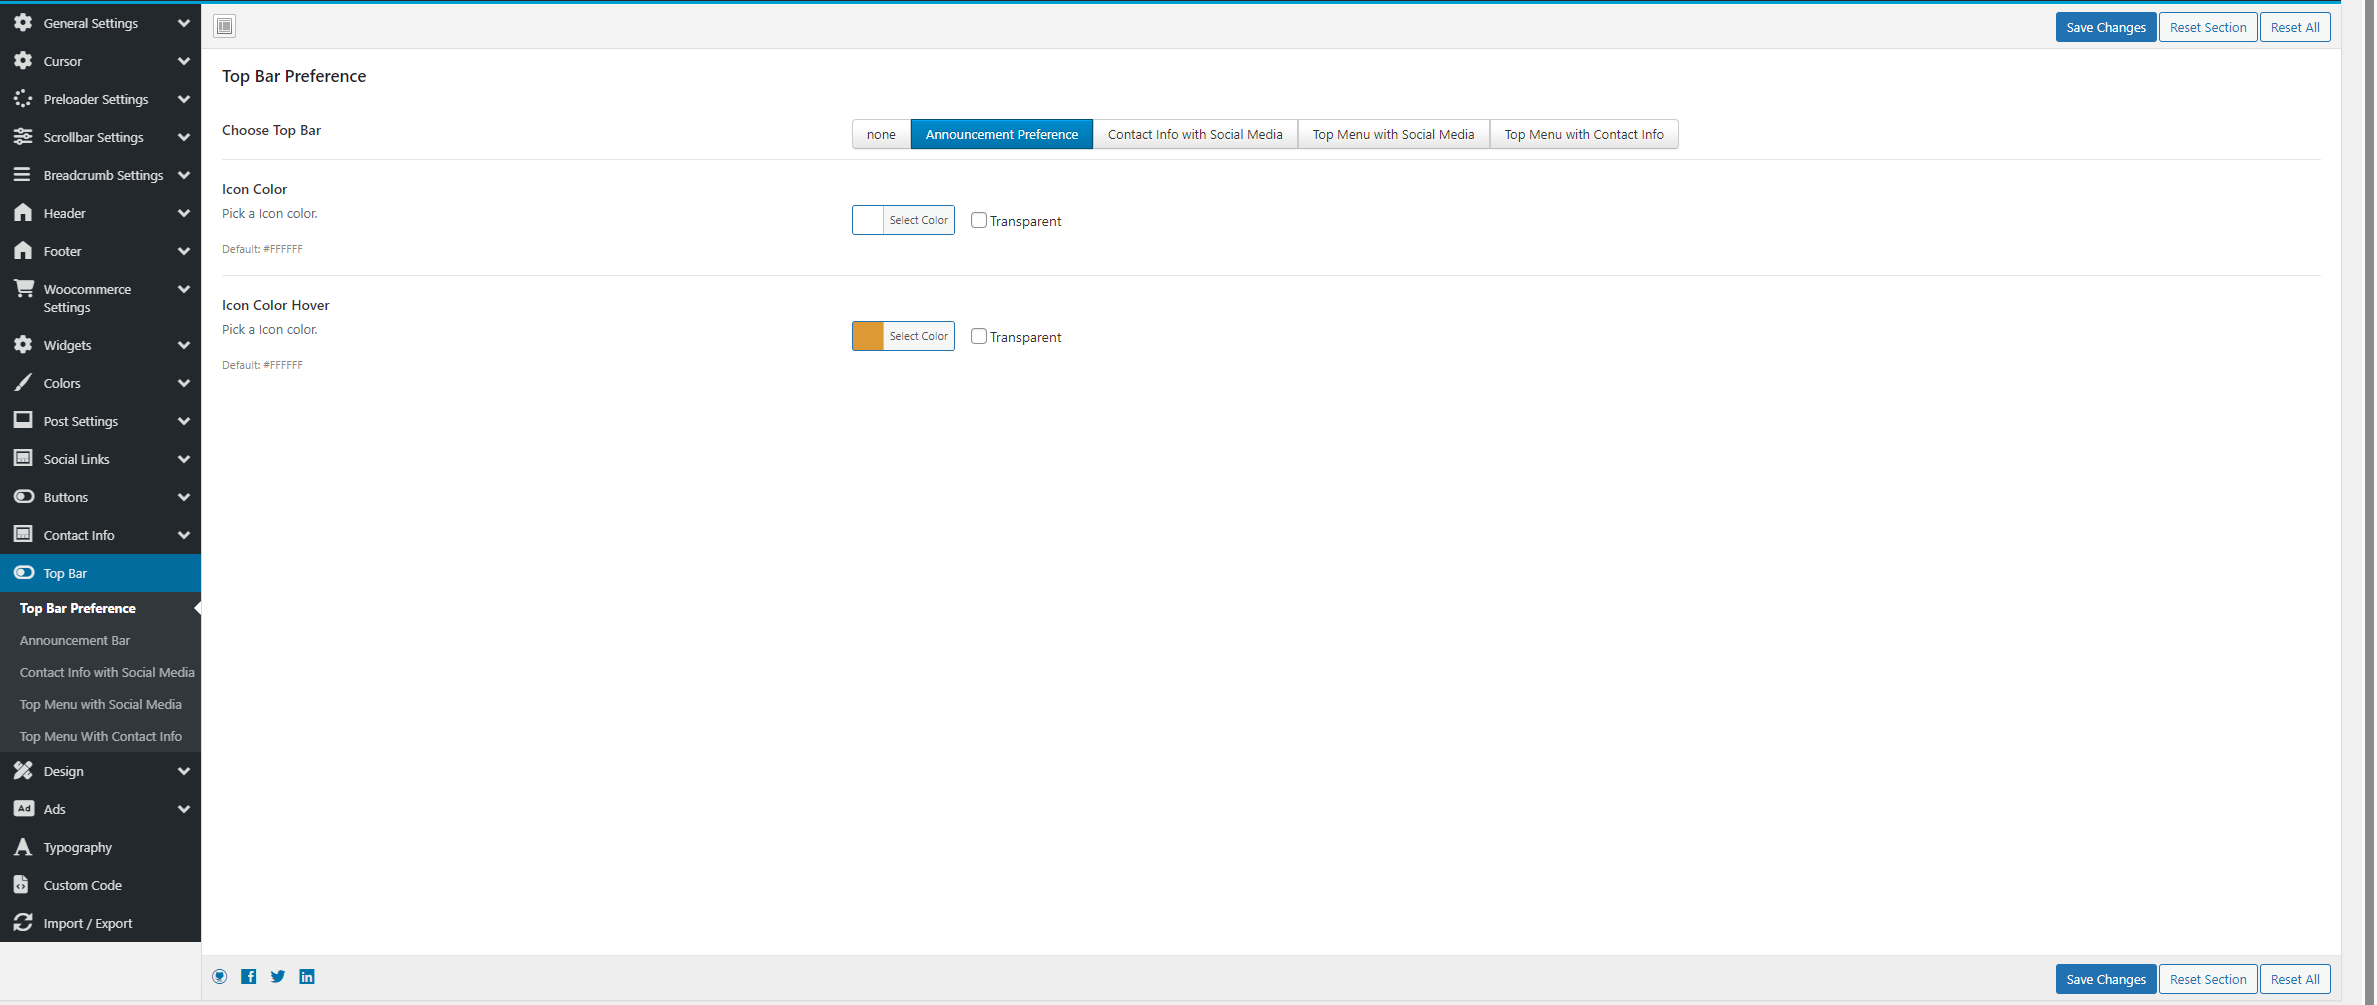
- Top Bar - 3 Topbars Available, you can choose any topbar you want
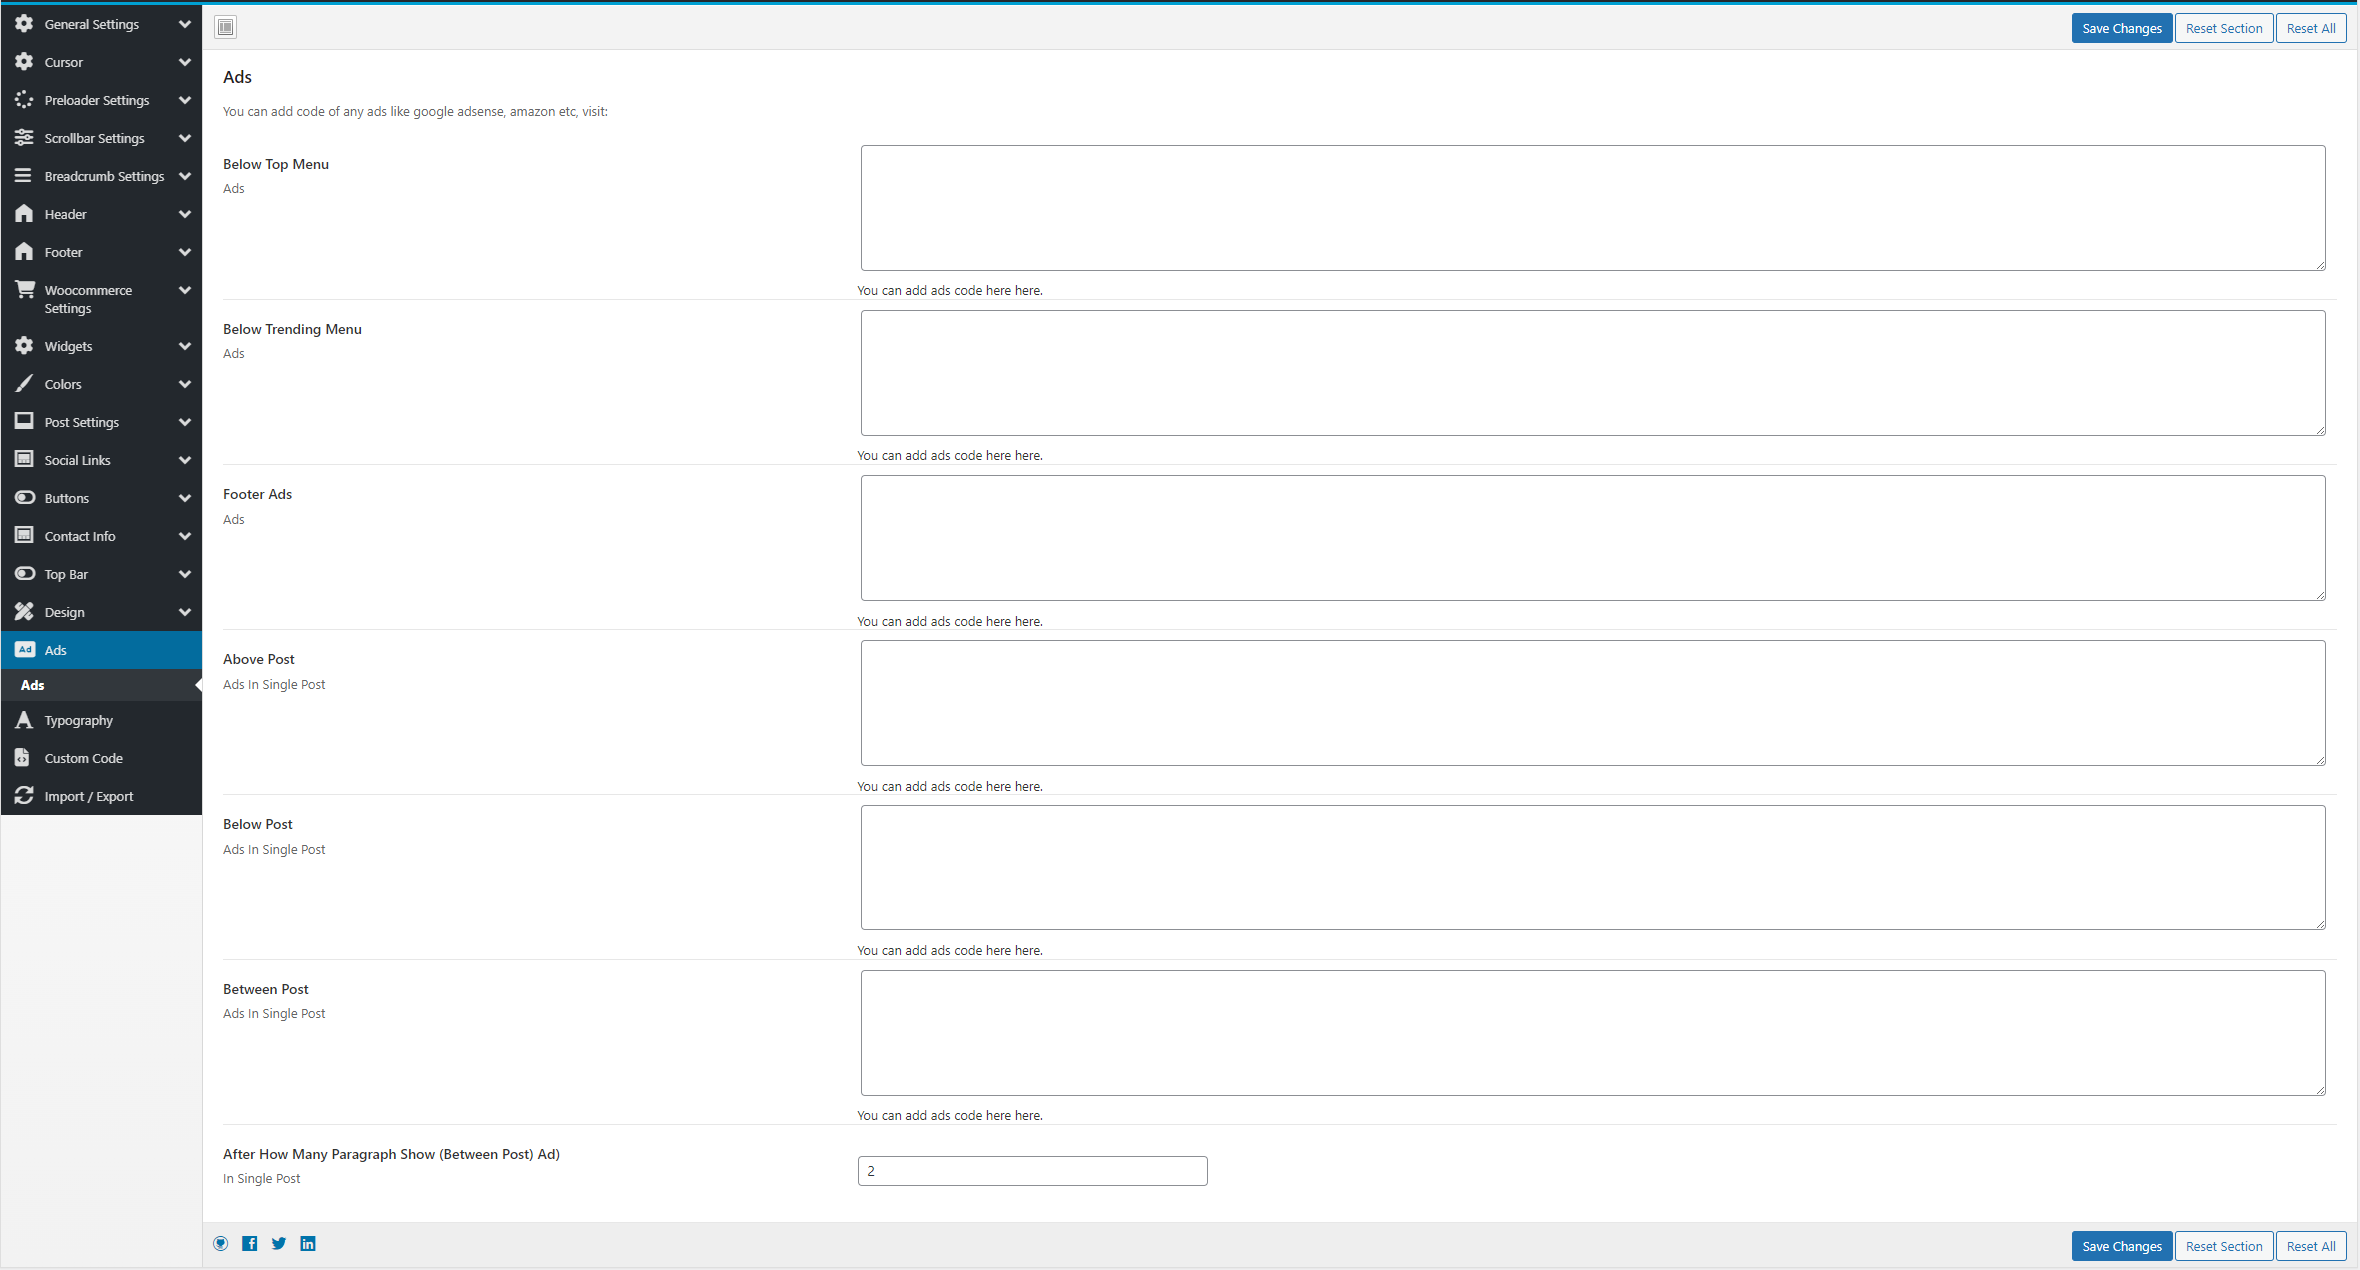
- Ads - Add any code like google adsense and it will be displayed at different parts depending on where you paste it.
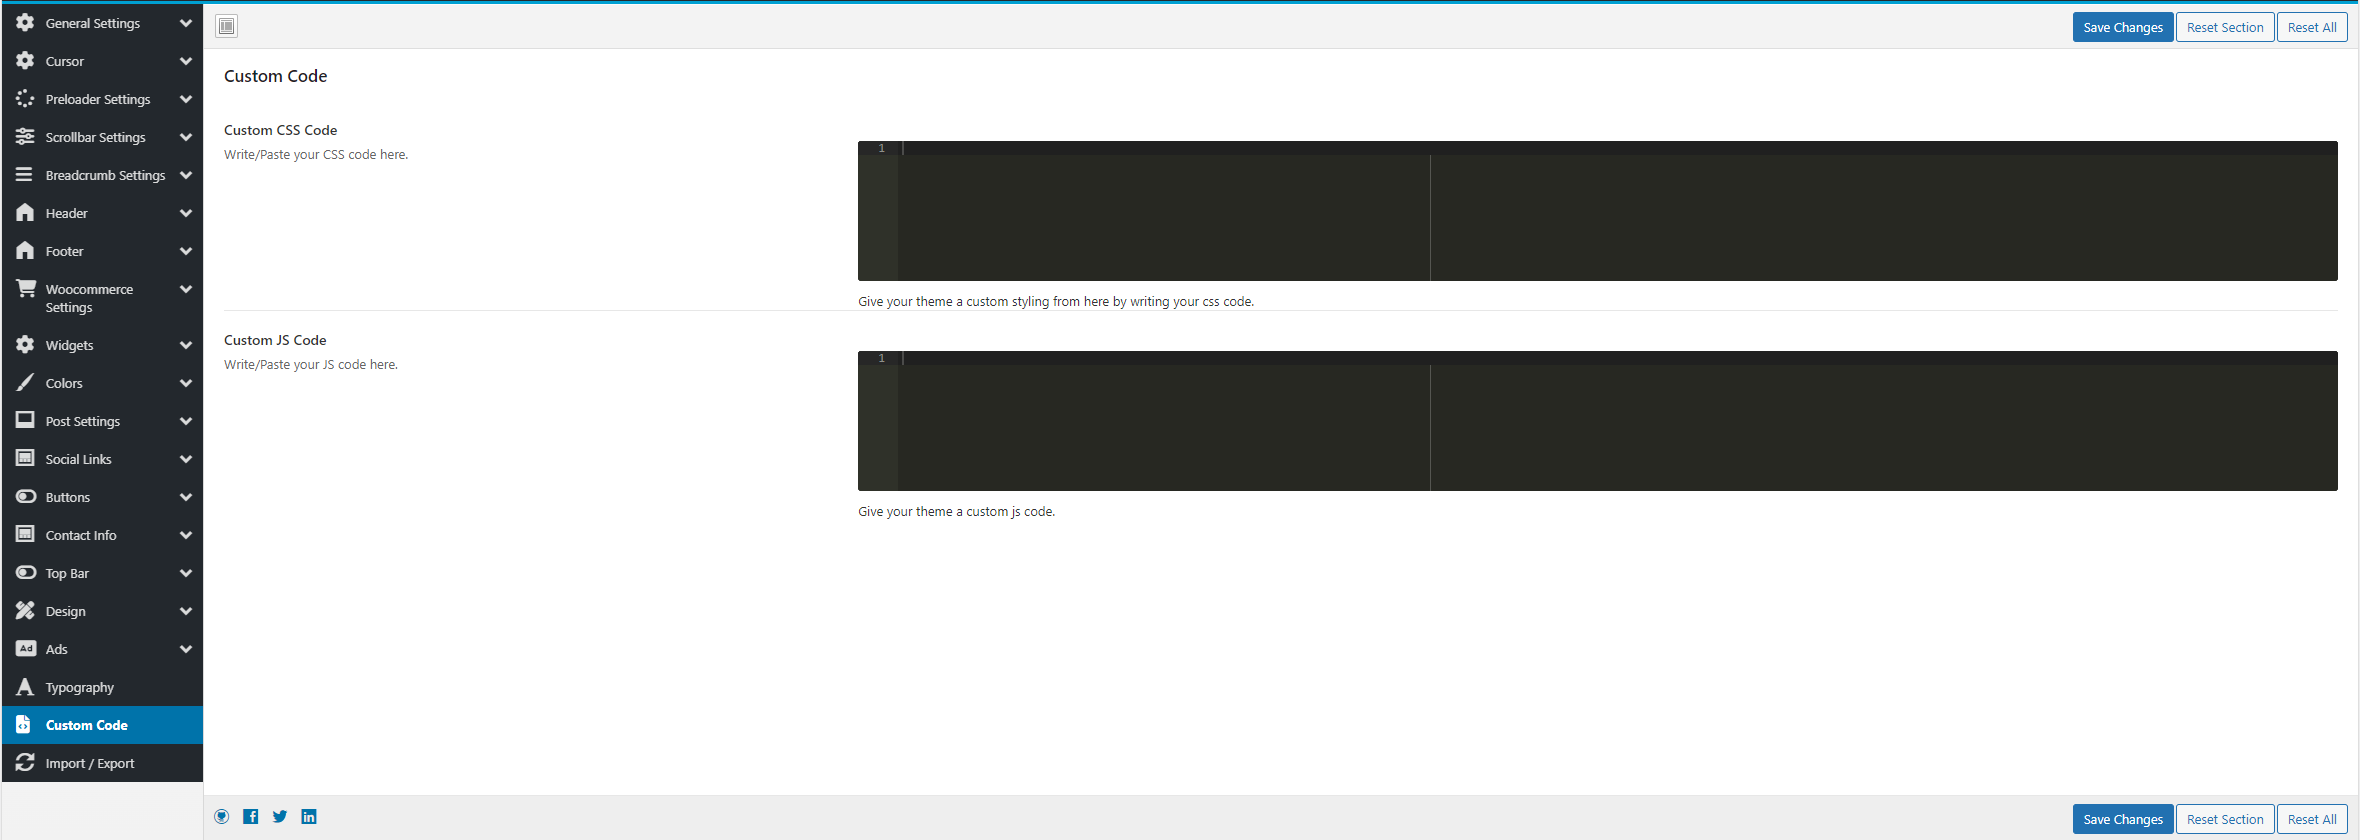
- Add custom JS or CSS code which you can use to customize or add on your theme/website
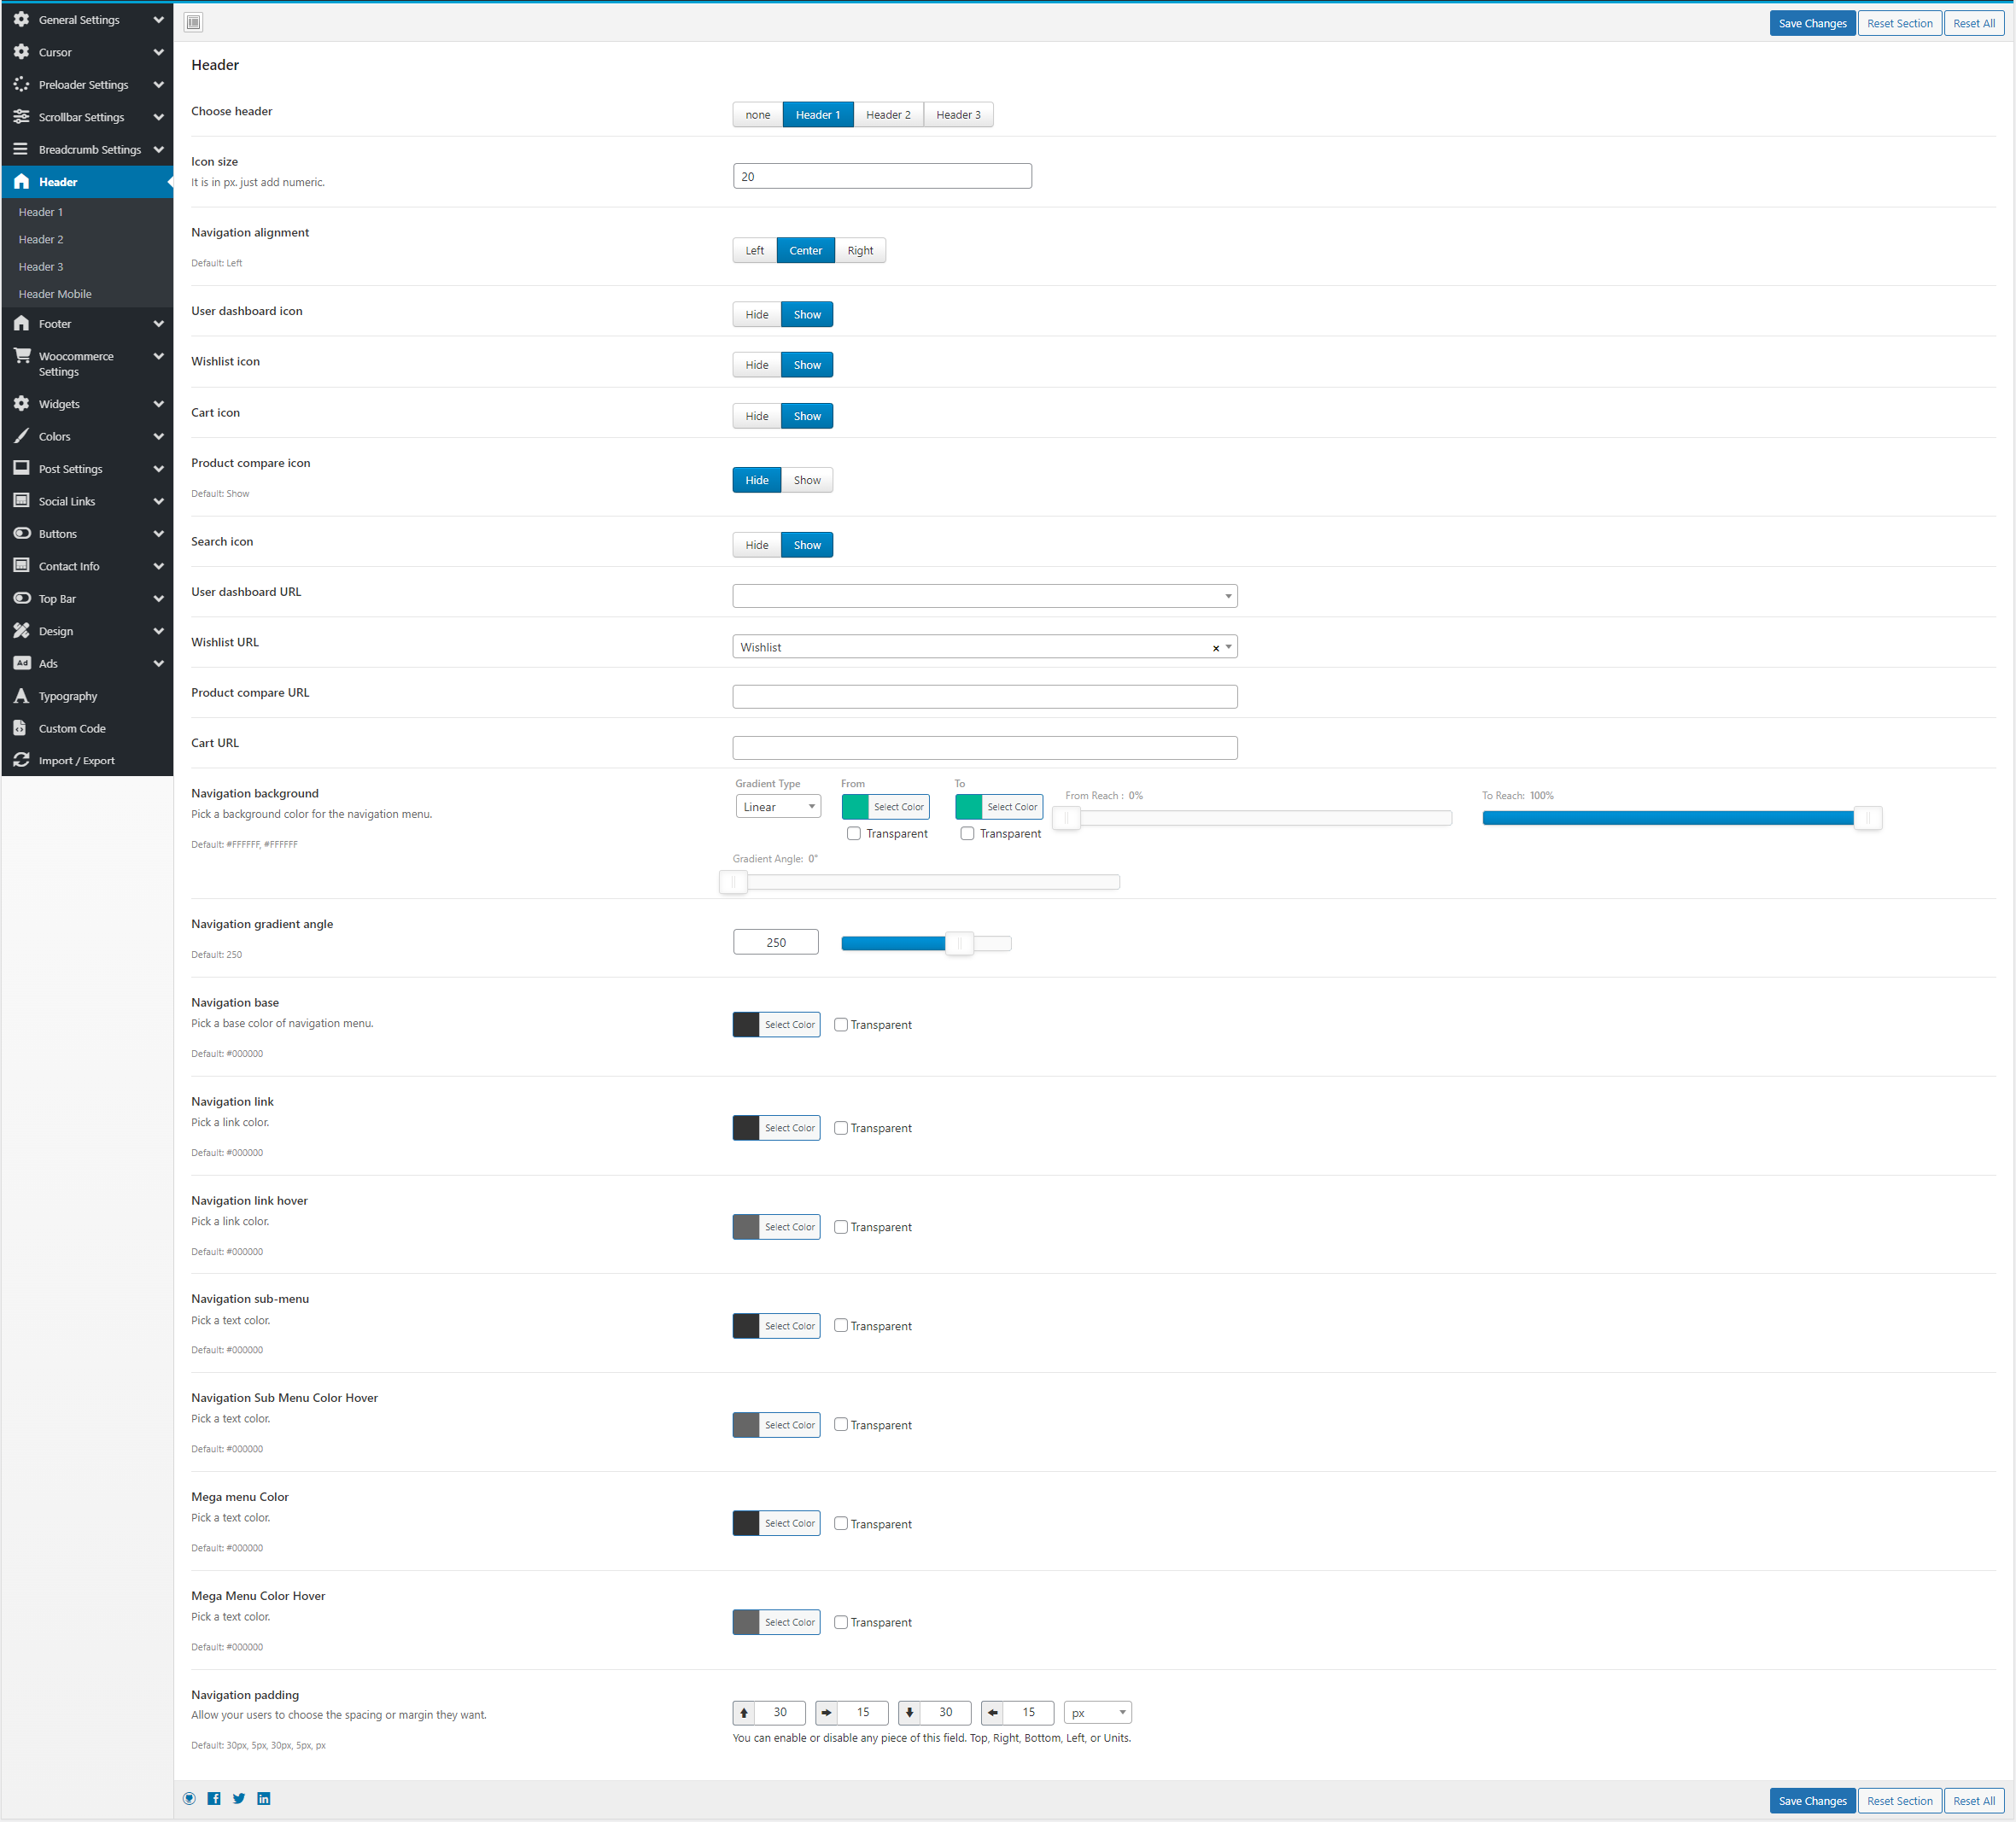
Header & Footer:
Follow the steps mentioned below- Header Layout – Choose between multiple header styles.
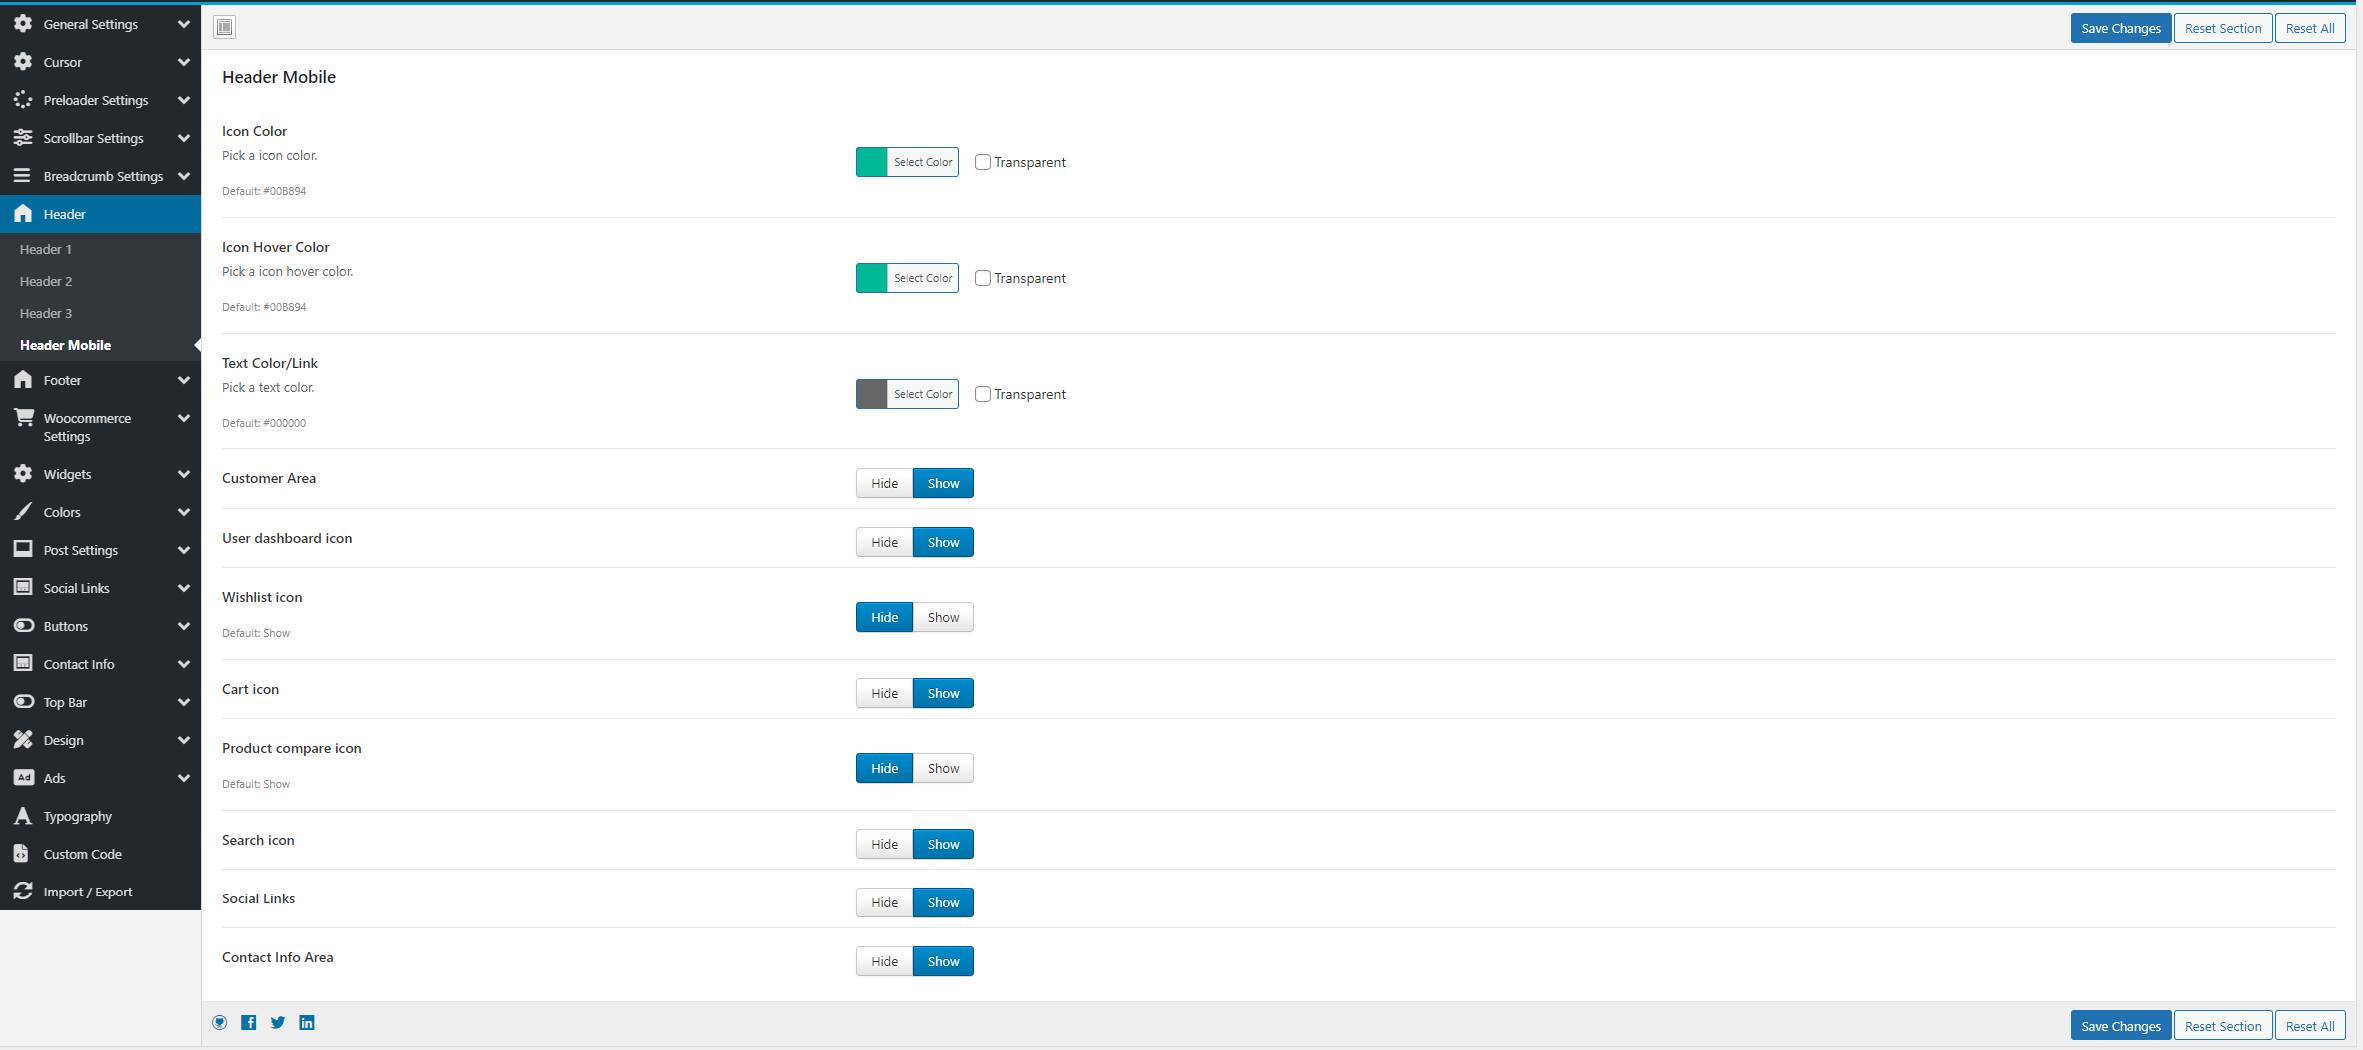
- Header Mobile - There is a separate header for mobile available which you can customize from theme settings.
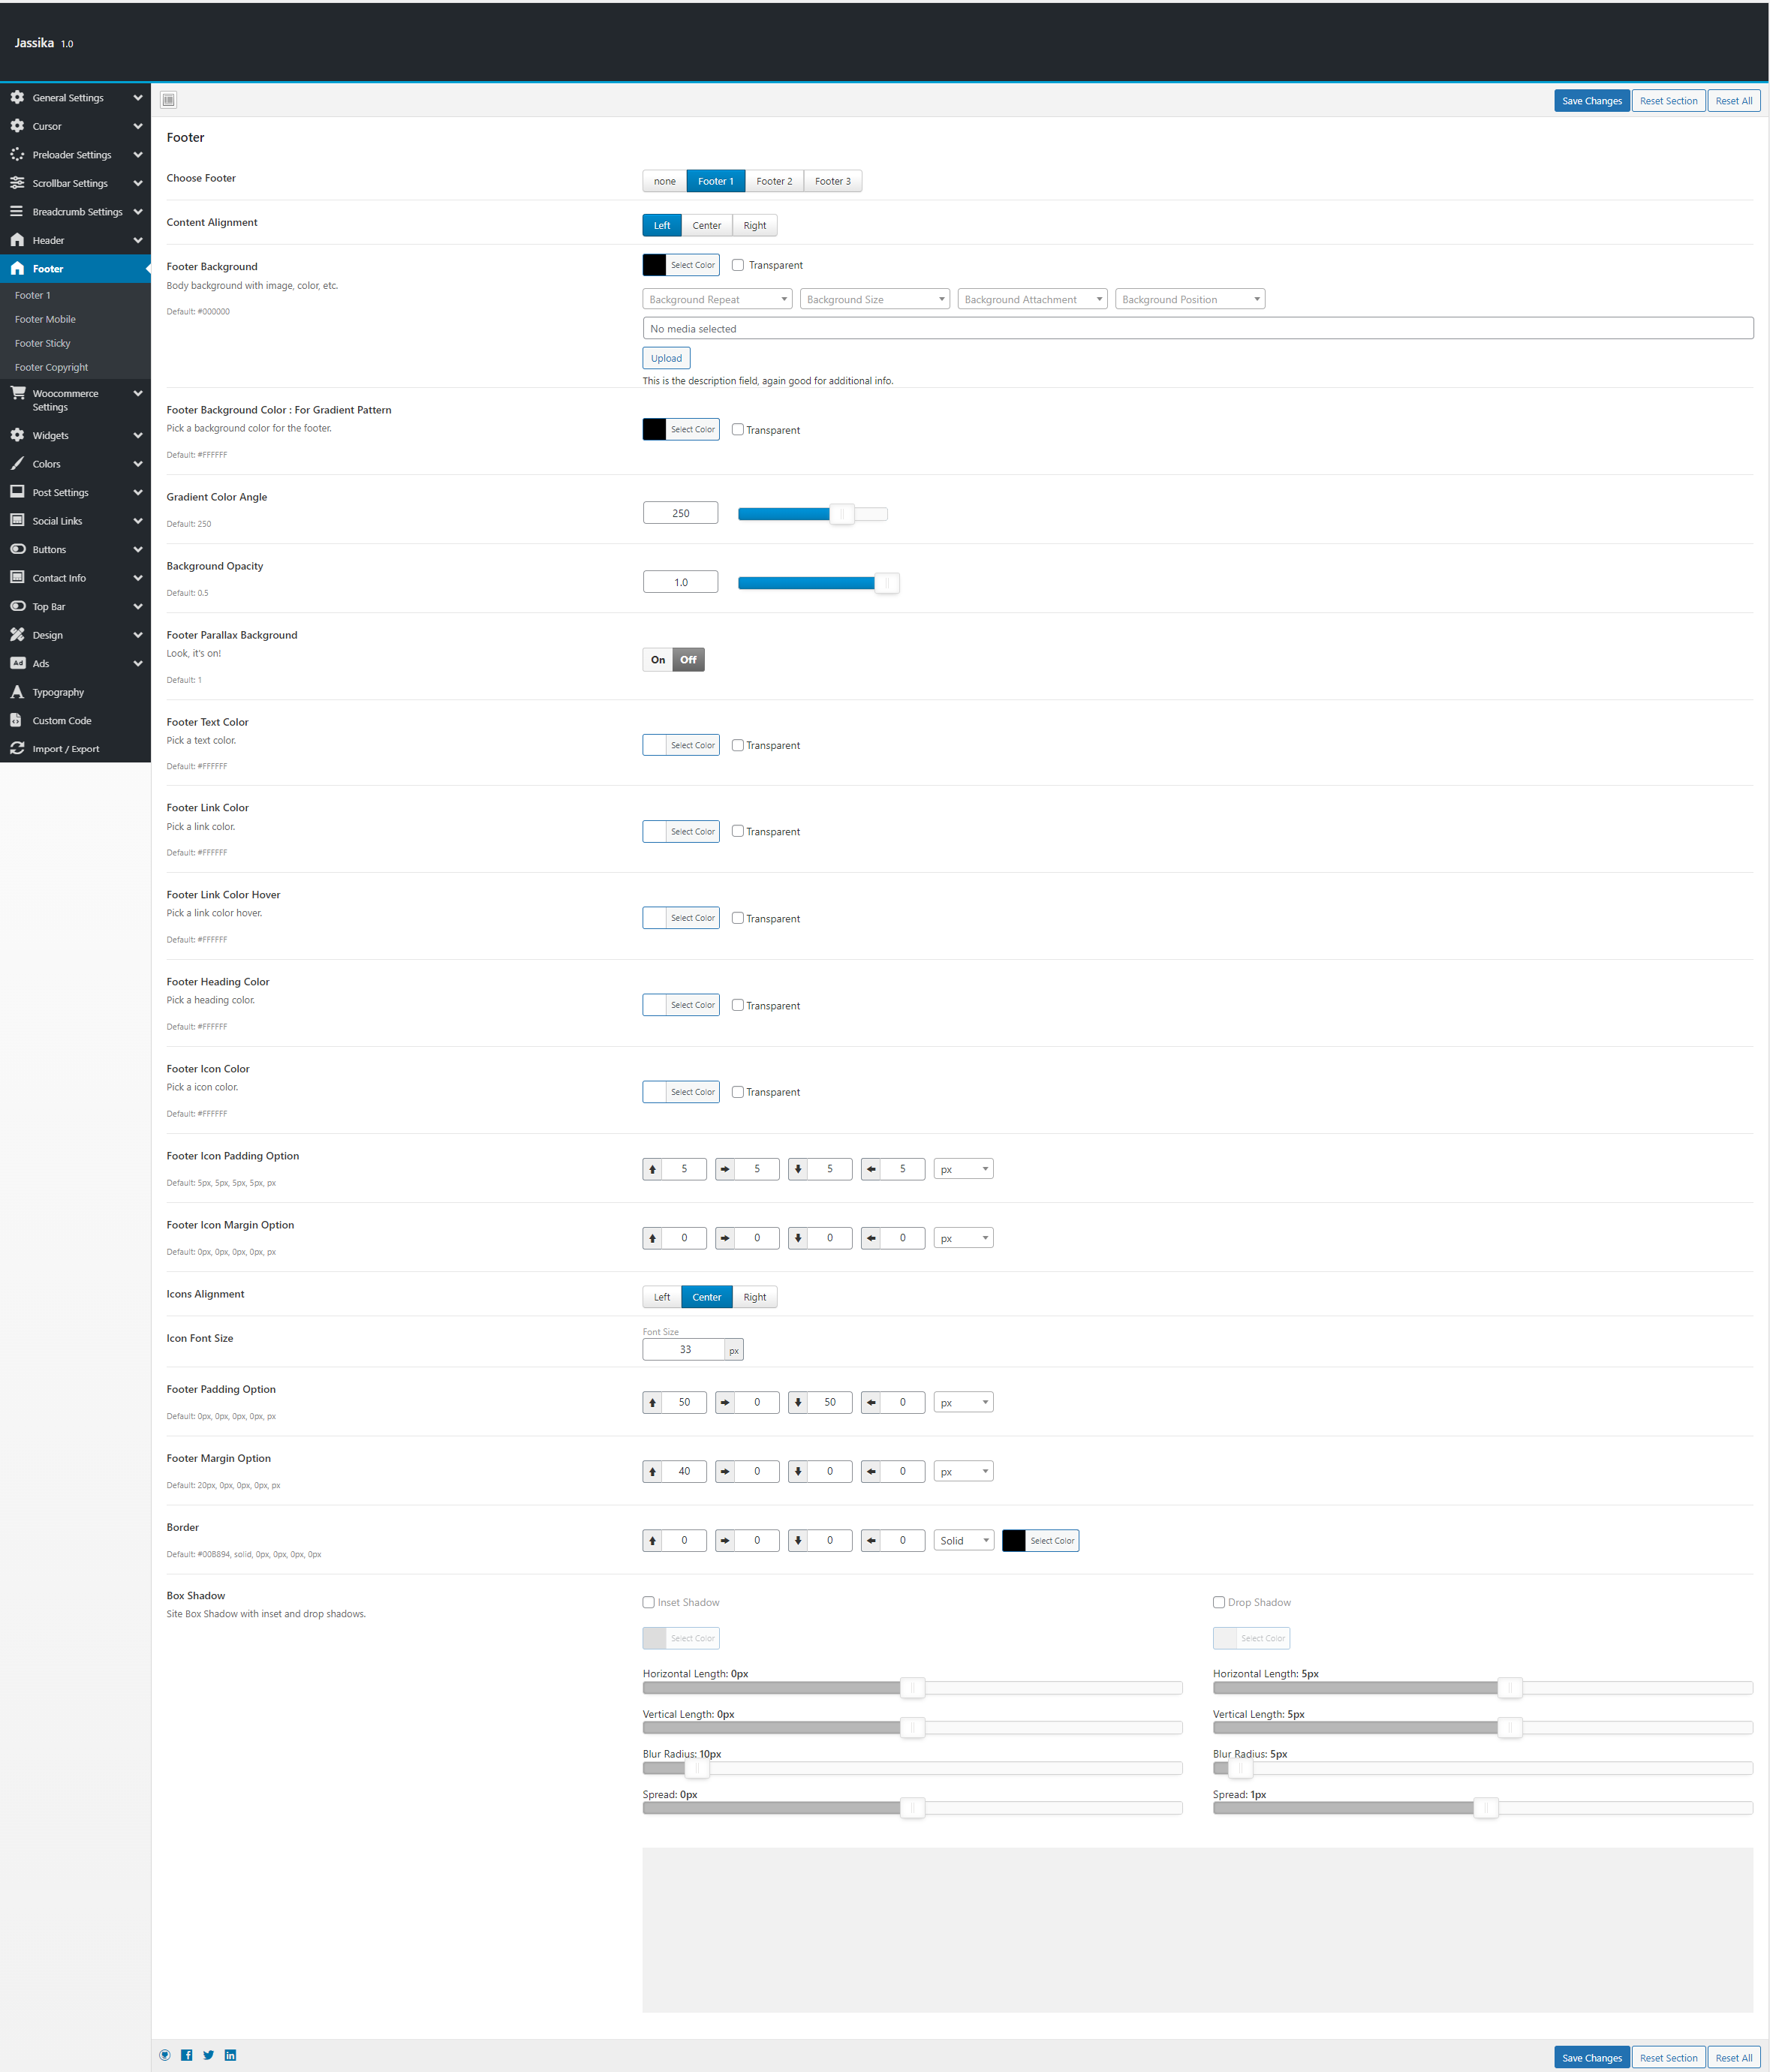
- Footer – Configure footer columns and widget areas.
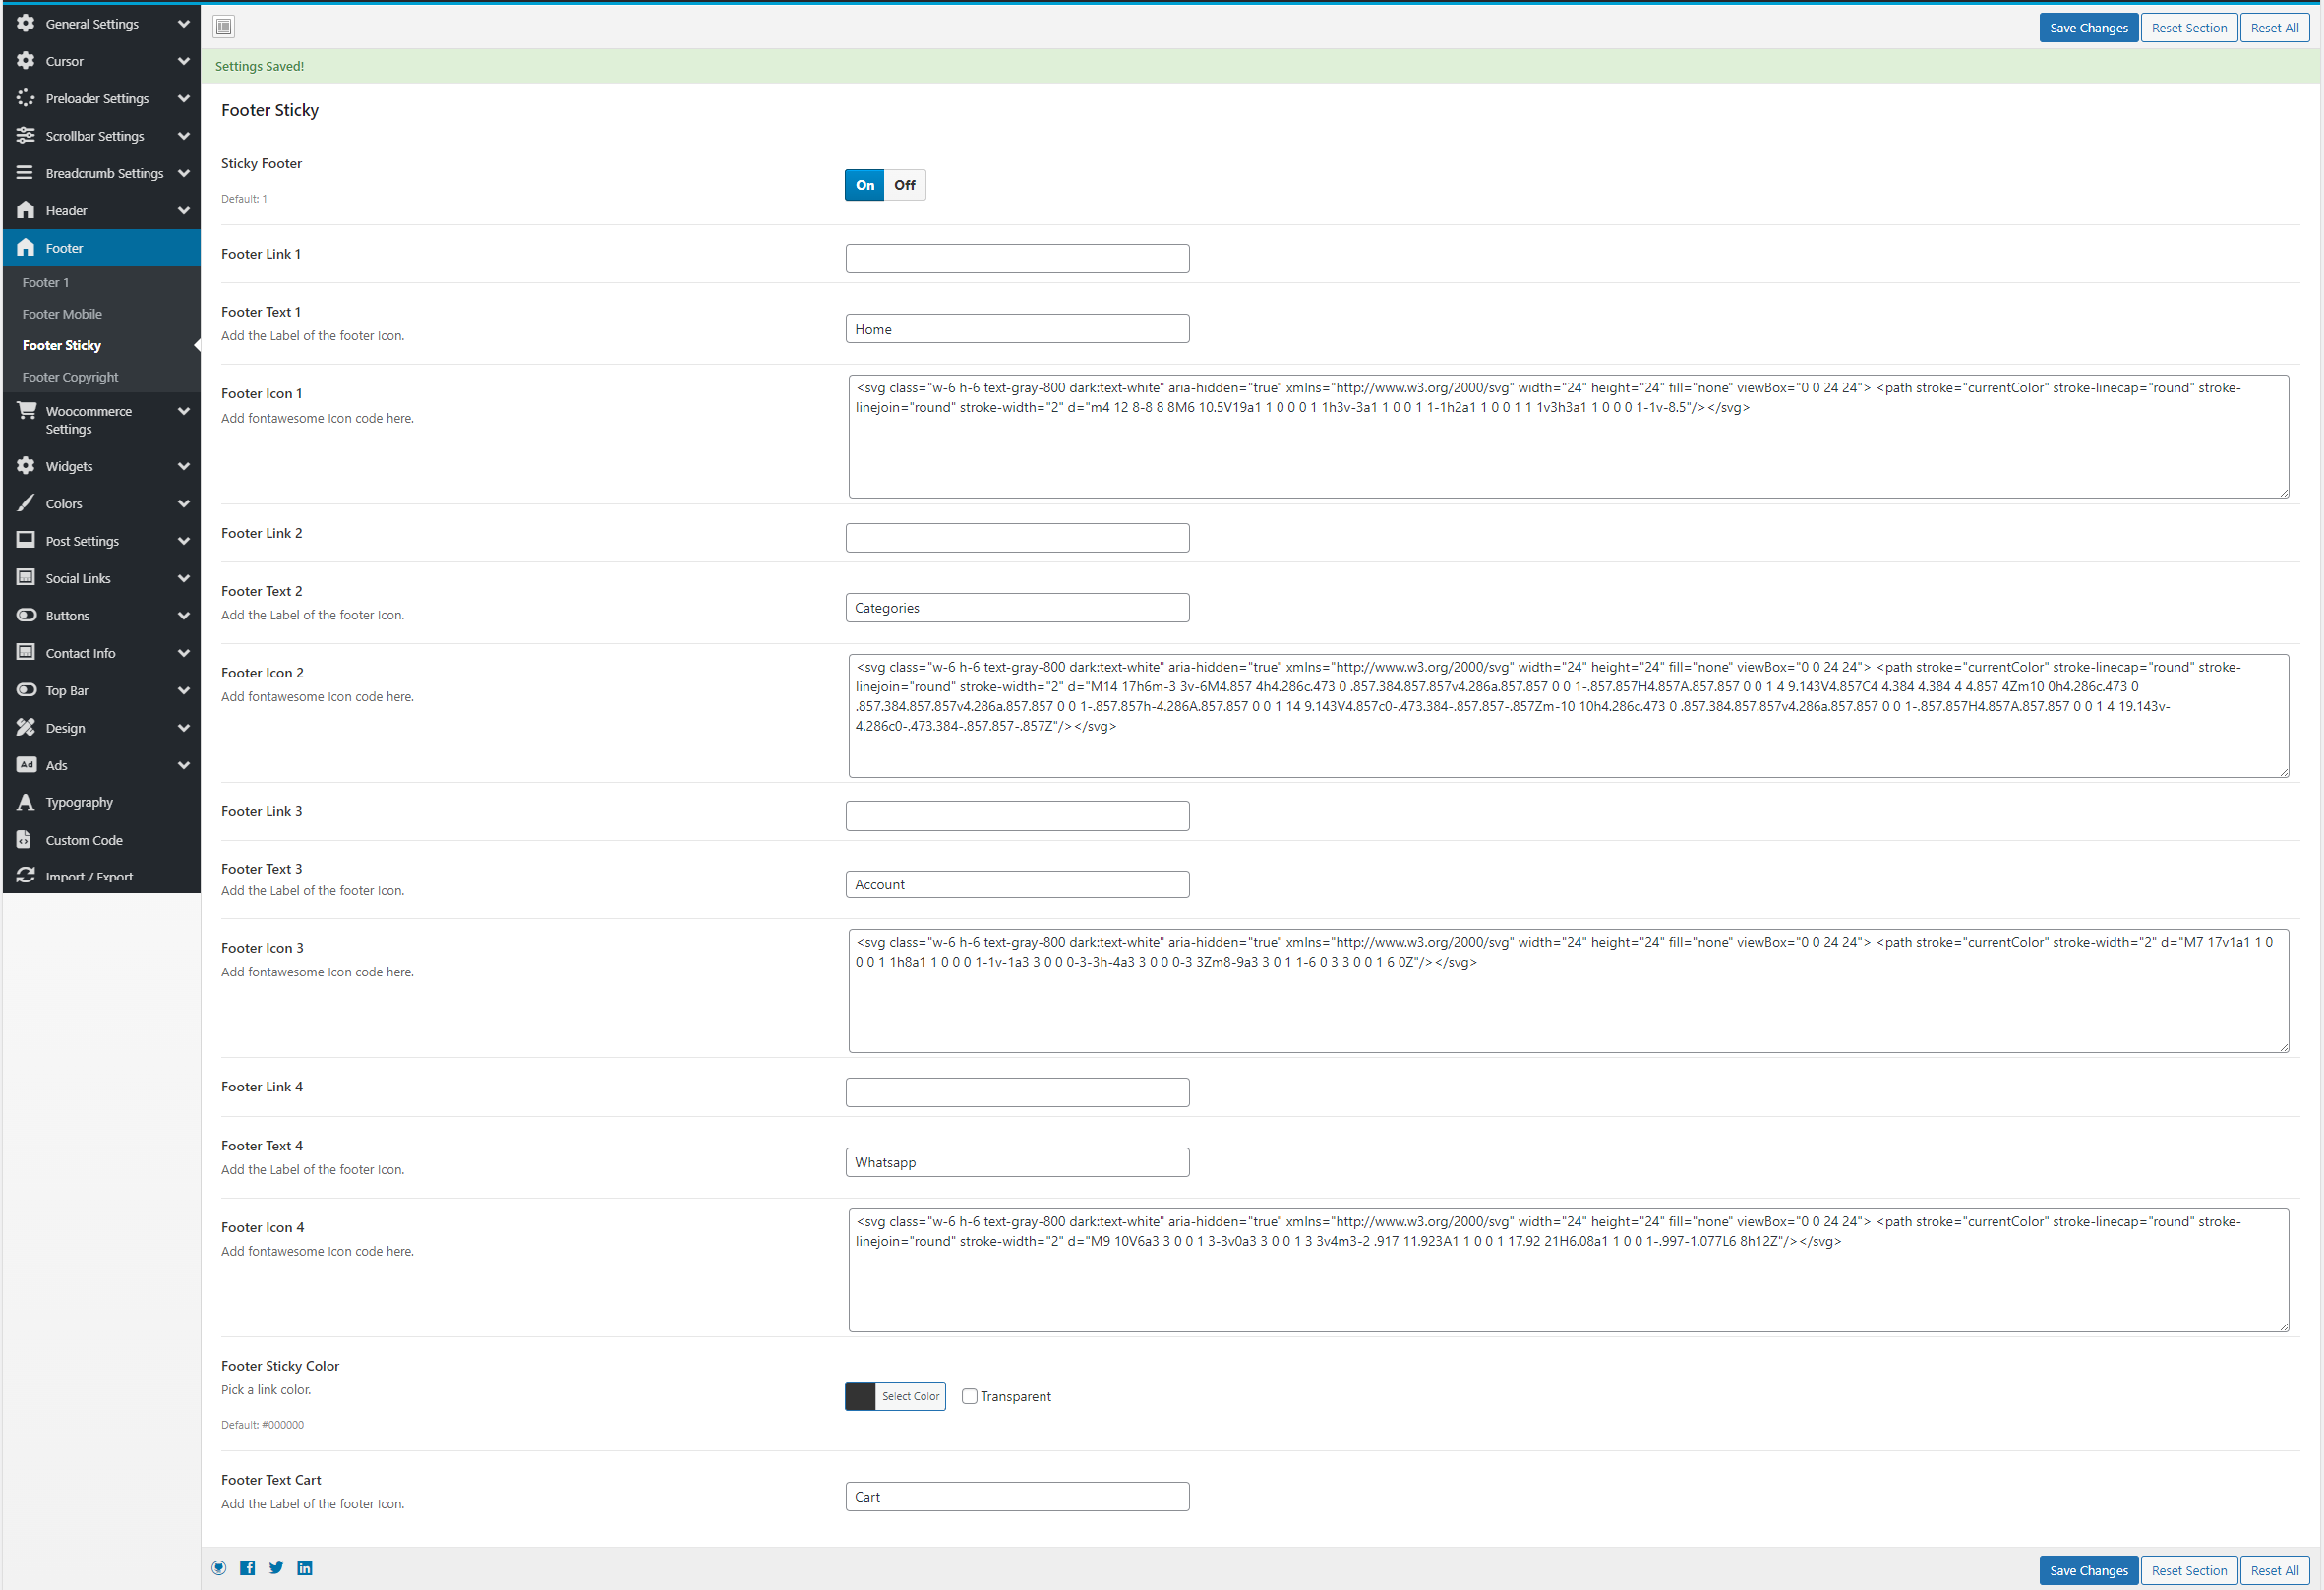
- Footer Sticky – Configure sticky footer for mobile.
Homepage Setup:
Follow the steps mentioned below- Go To pages → Add new page.
- Add page title and click on edit with elementor button.
- Now drag and drop premade elementor widgets to design the page of your choice.
Blog & Single Post Settings:
Follow the steps mentioned below- Go To Themeshawk Theme Options → Post settings.
- Choose Post cards or Single post settings.
- Customize as per your need.
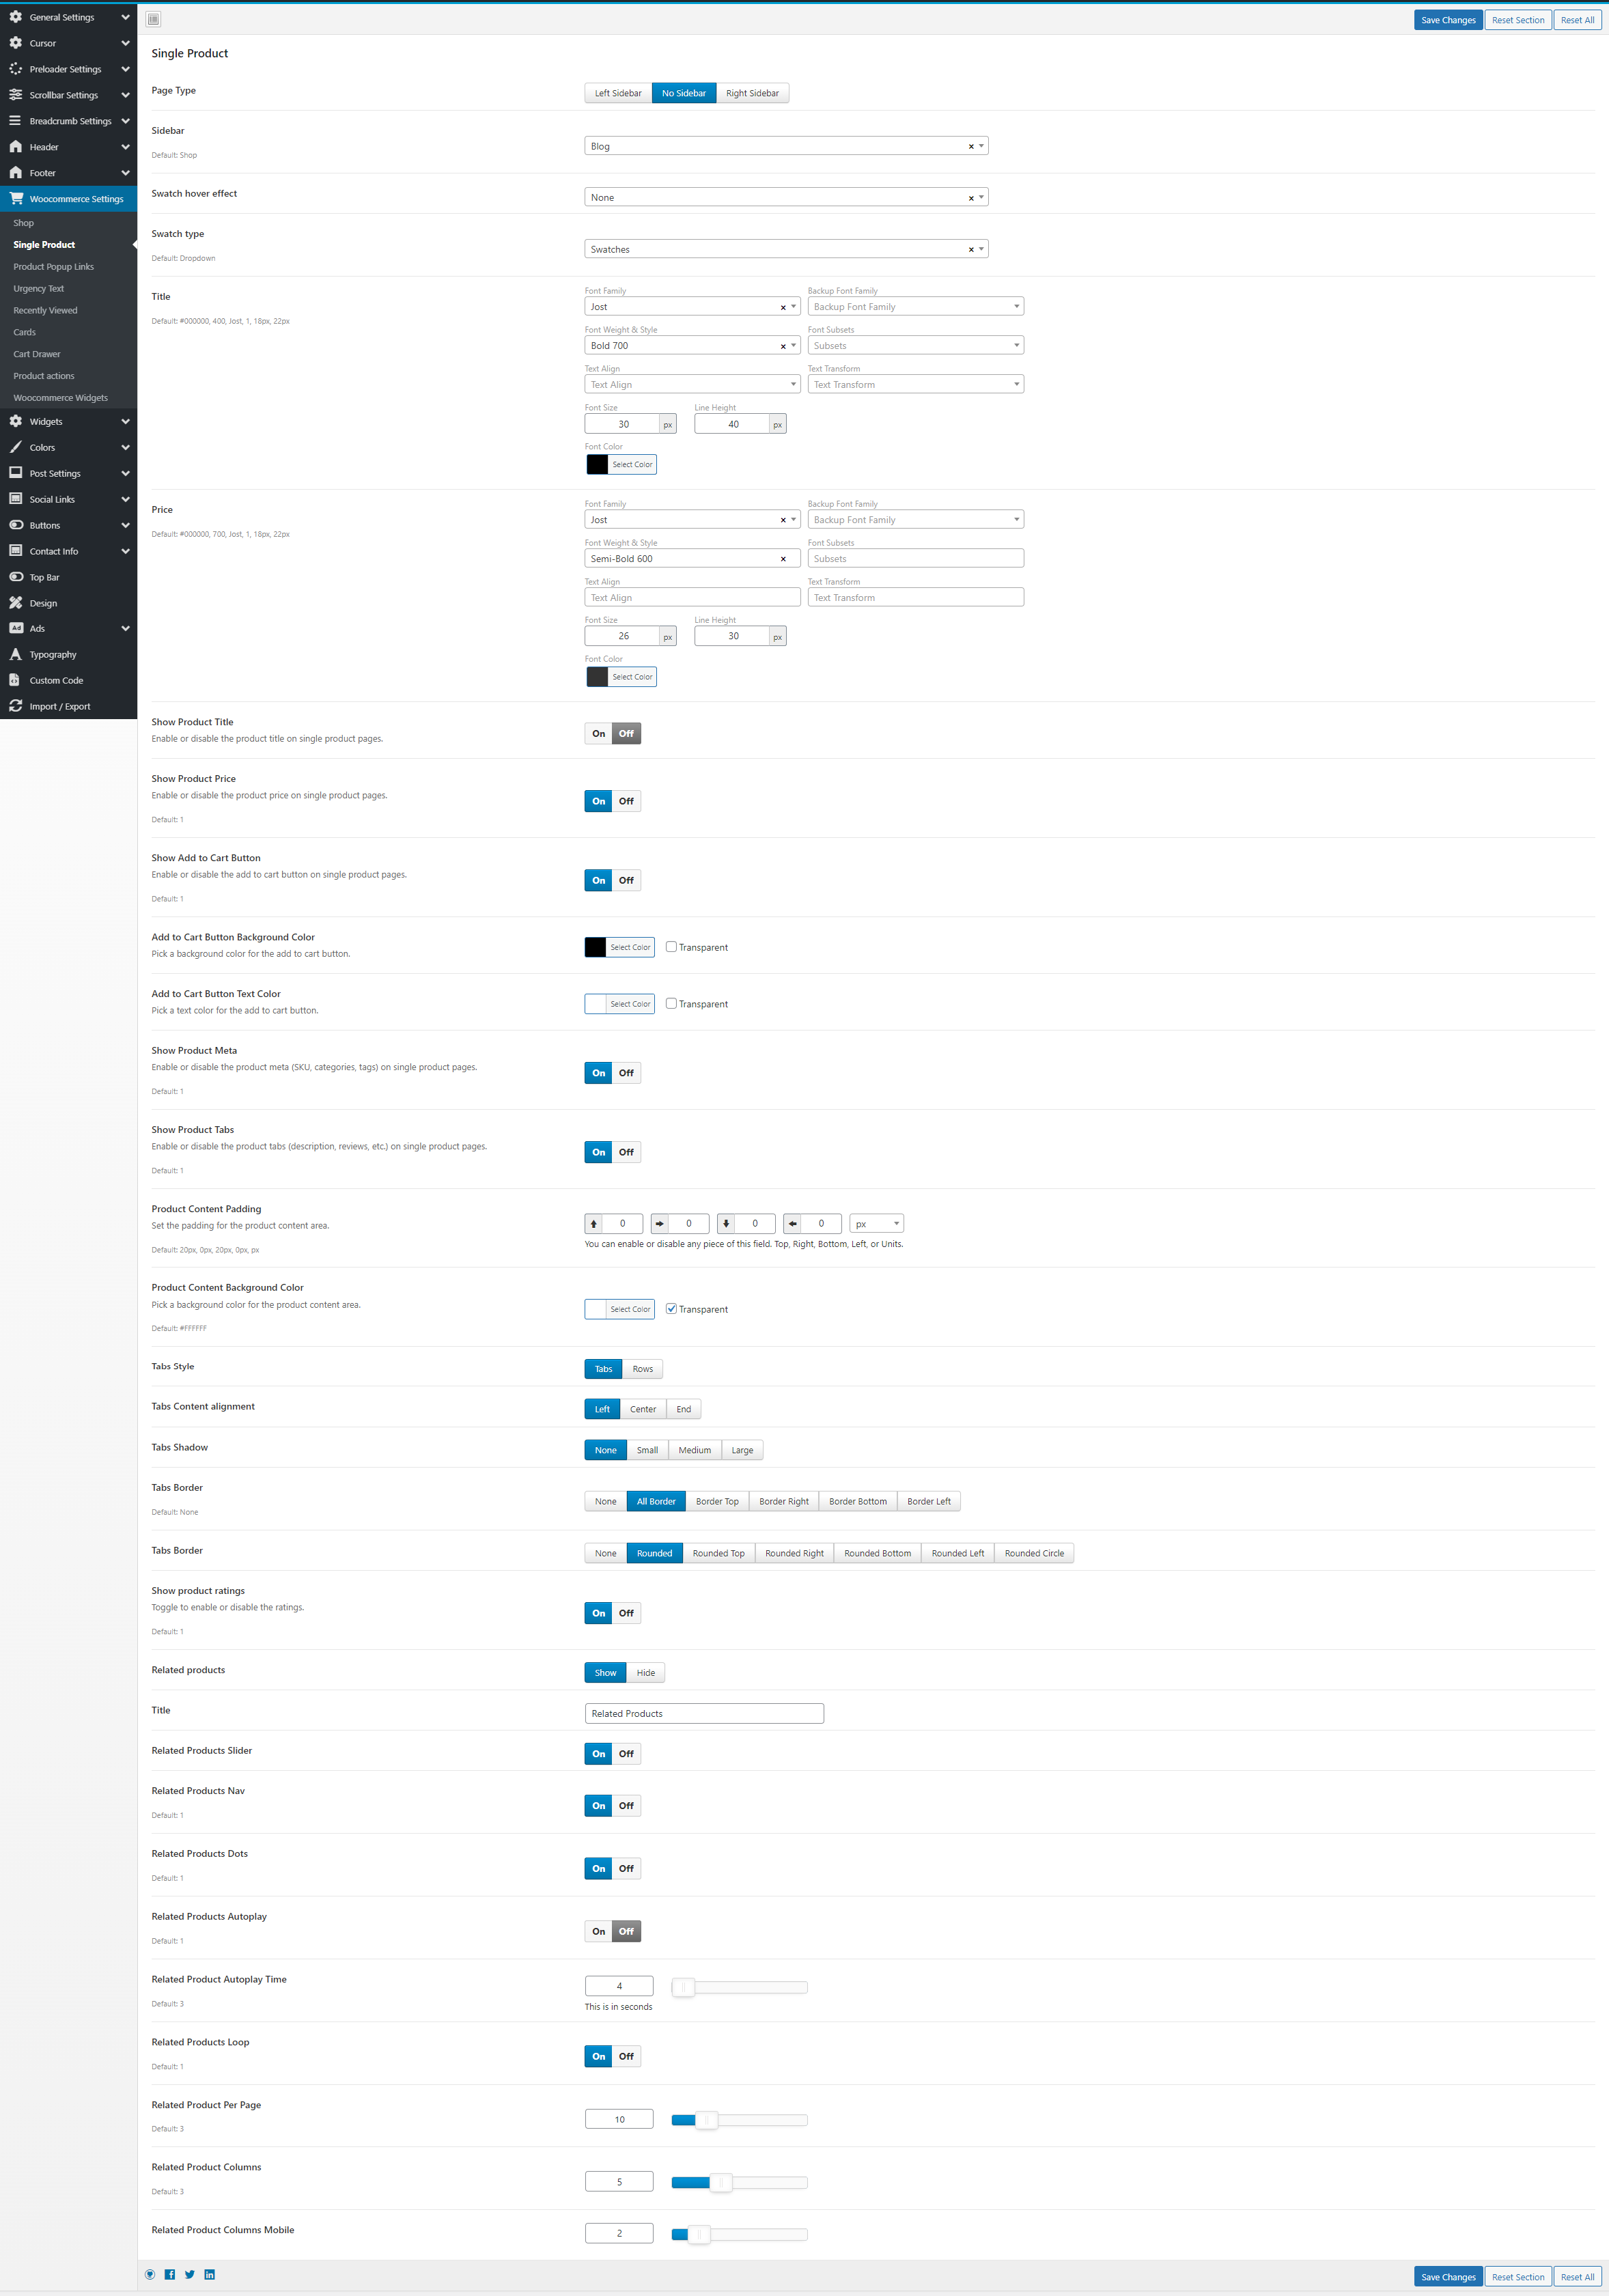
Shop & Product Pages (WooCommerce) Settings:
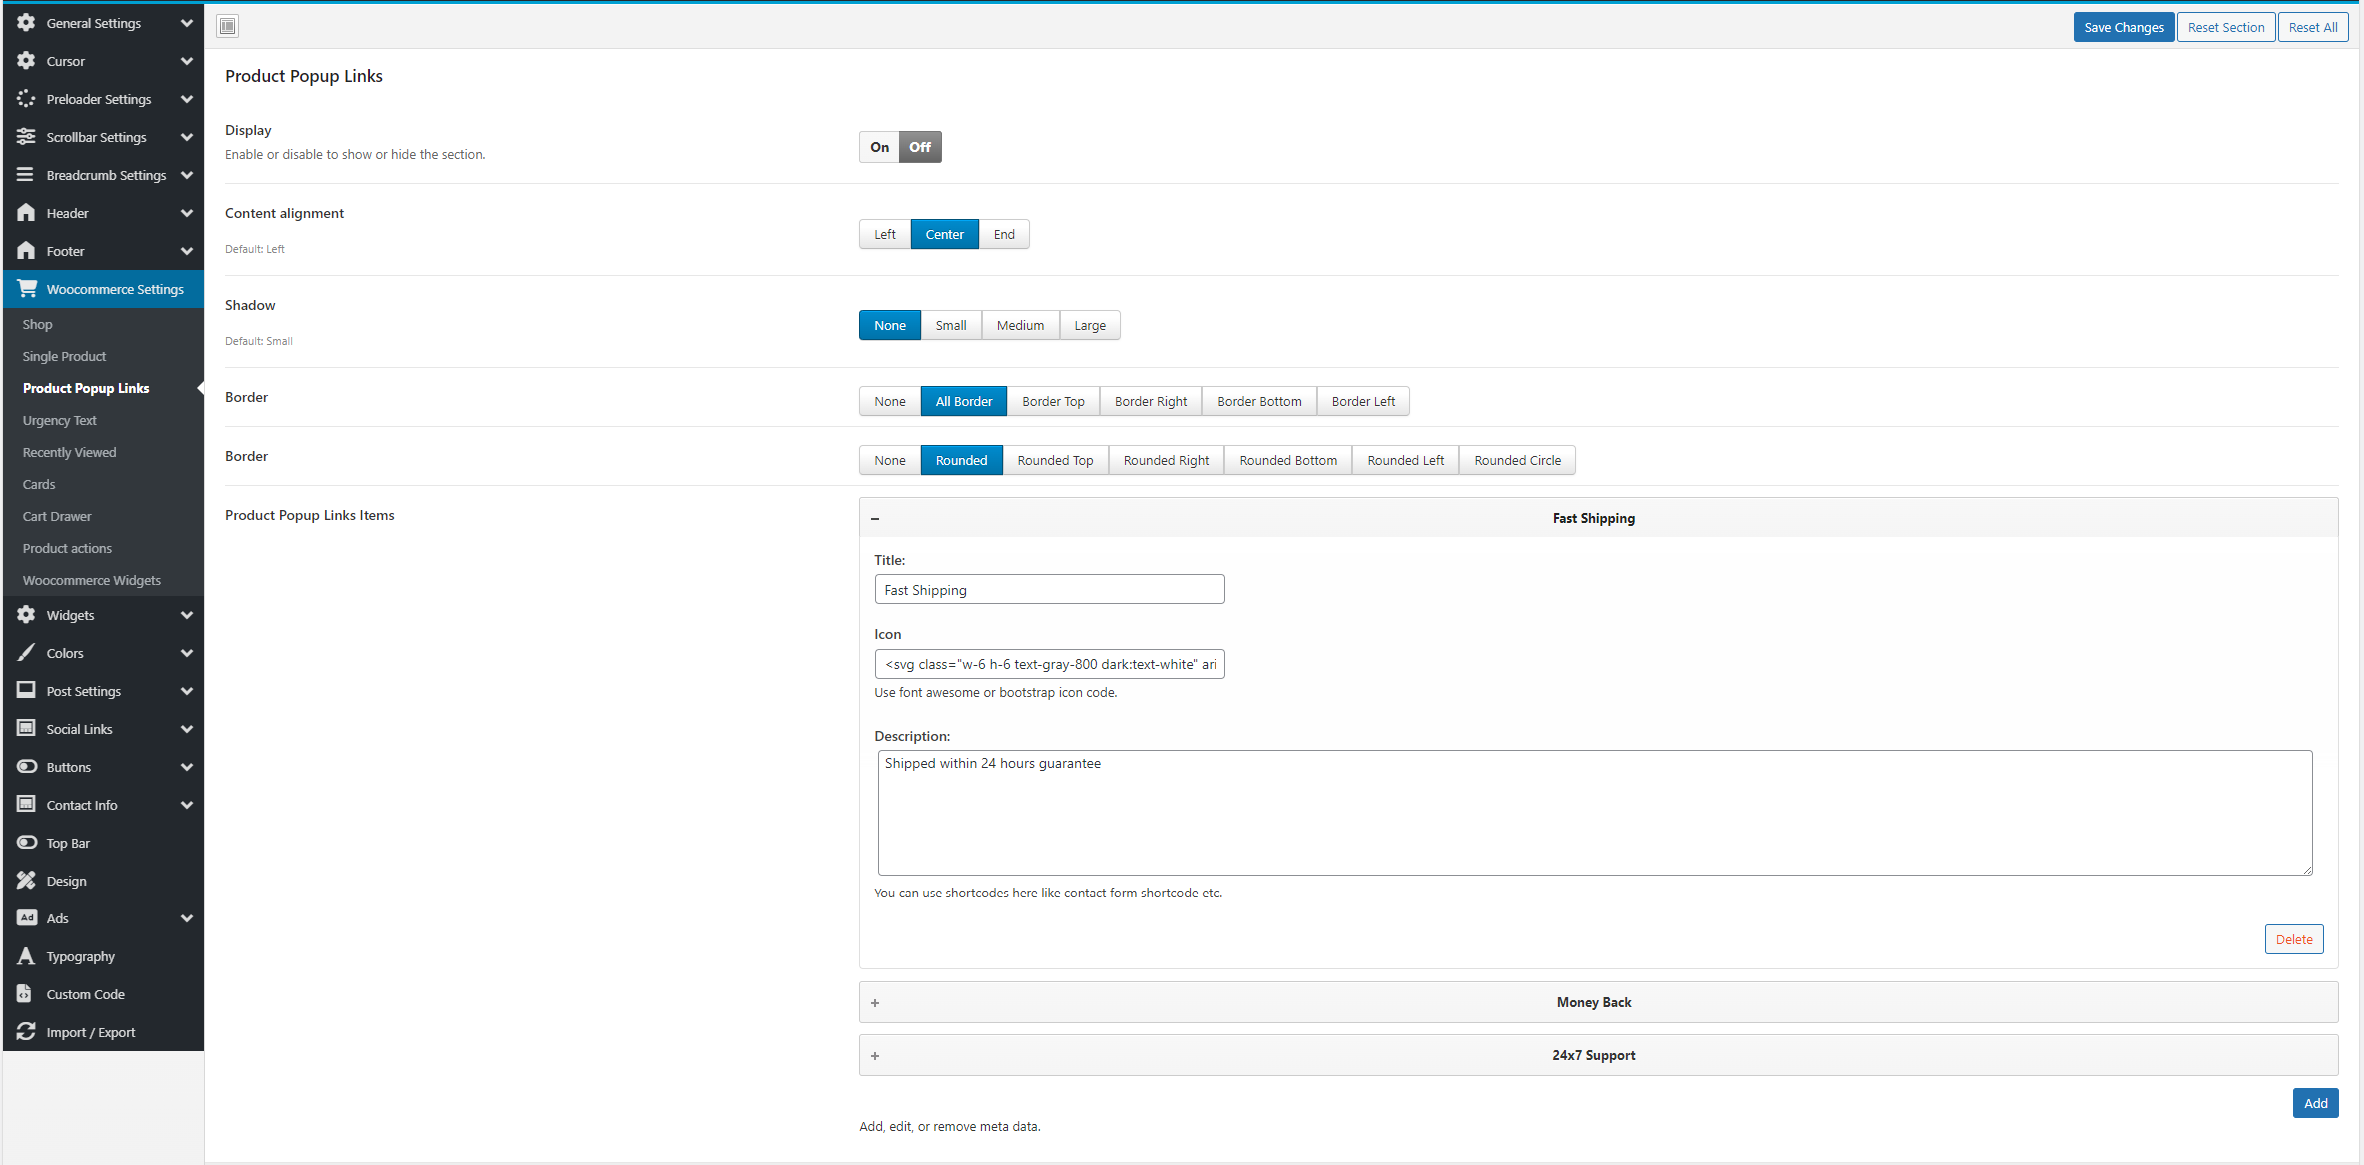
Follow the steps mentioned below- Go To Themeshawk Theme Options → Woocommerce settings.
- Choose Shop or Single product settings.
- Customize as per your need.
Using Elementor to Edit Pages:
Follow the steps mentioned below- Go to Pages → Add New.
- Click Edit with Elementor.
- Drag and drop widgets to design your page.
- Click Publish to save your changes.
Setting Up WooCommerce:
Follow the steps mentioned below- Install and activate WooCommerce.
- Follow the setup wizard to configure currency, payment options, and shipping.
- Add products via Products → Add New.
- Click Publish to save your changes.
Customizing Shop Pages:
Follow the steps mentioned below- Go to Appearance → Customize → WooCommerce.
- Modify Shop Page Layout, Product Display, and Checkout Settings..
- Widgets & Sidebars.
Widgets & Sidebars:
Your theme includes customizable widgets and sidebars. Follow the steps mentioned below- Add widgets via Appearance → Widgets.
- Configure sidebar visibility in the Customizer.
- Adding Custom Code
Improve your site's speed by:
Follow the steps mentioned below- Installing a caching plugin (e.g., WP Rocket, W3 Total Cache).
- Optimizing images using Smush or Imagify.
- Using a CDN (e.g., Cloudflare).
SEO & Schema Markup:
For better search engine rankings Follow the steps mentioned below- Install Yoast SEO or Rank Math..
- Enable structured data for products and blog posts..
Troubleshooting:
Common Issues & Fixes- Issue: Theme settings not saving
Solution: Clear browser cache and try again. - Issue: Elementor not loading.
Solution: Check for plugin conflicts and increase memory limit. - Issue: Slow WooCommerce pages
Solution: Optimize product images and use caching plugins.
Support:
For support, contact:- Email: themeshawk@gmail.com
Mega Menu
For setting up mega menu, please follow the instruction
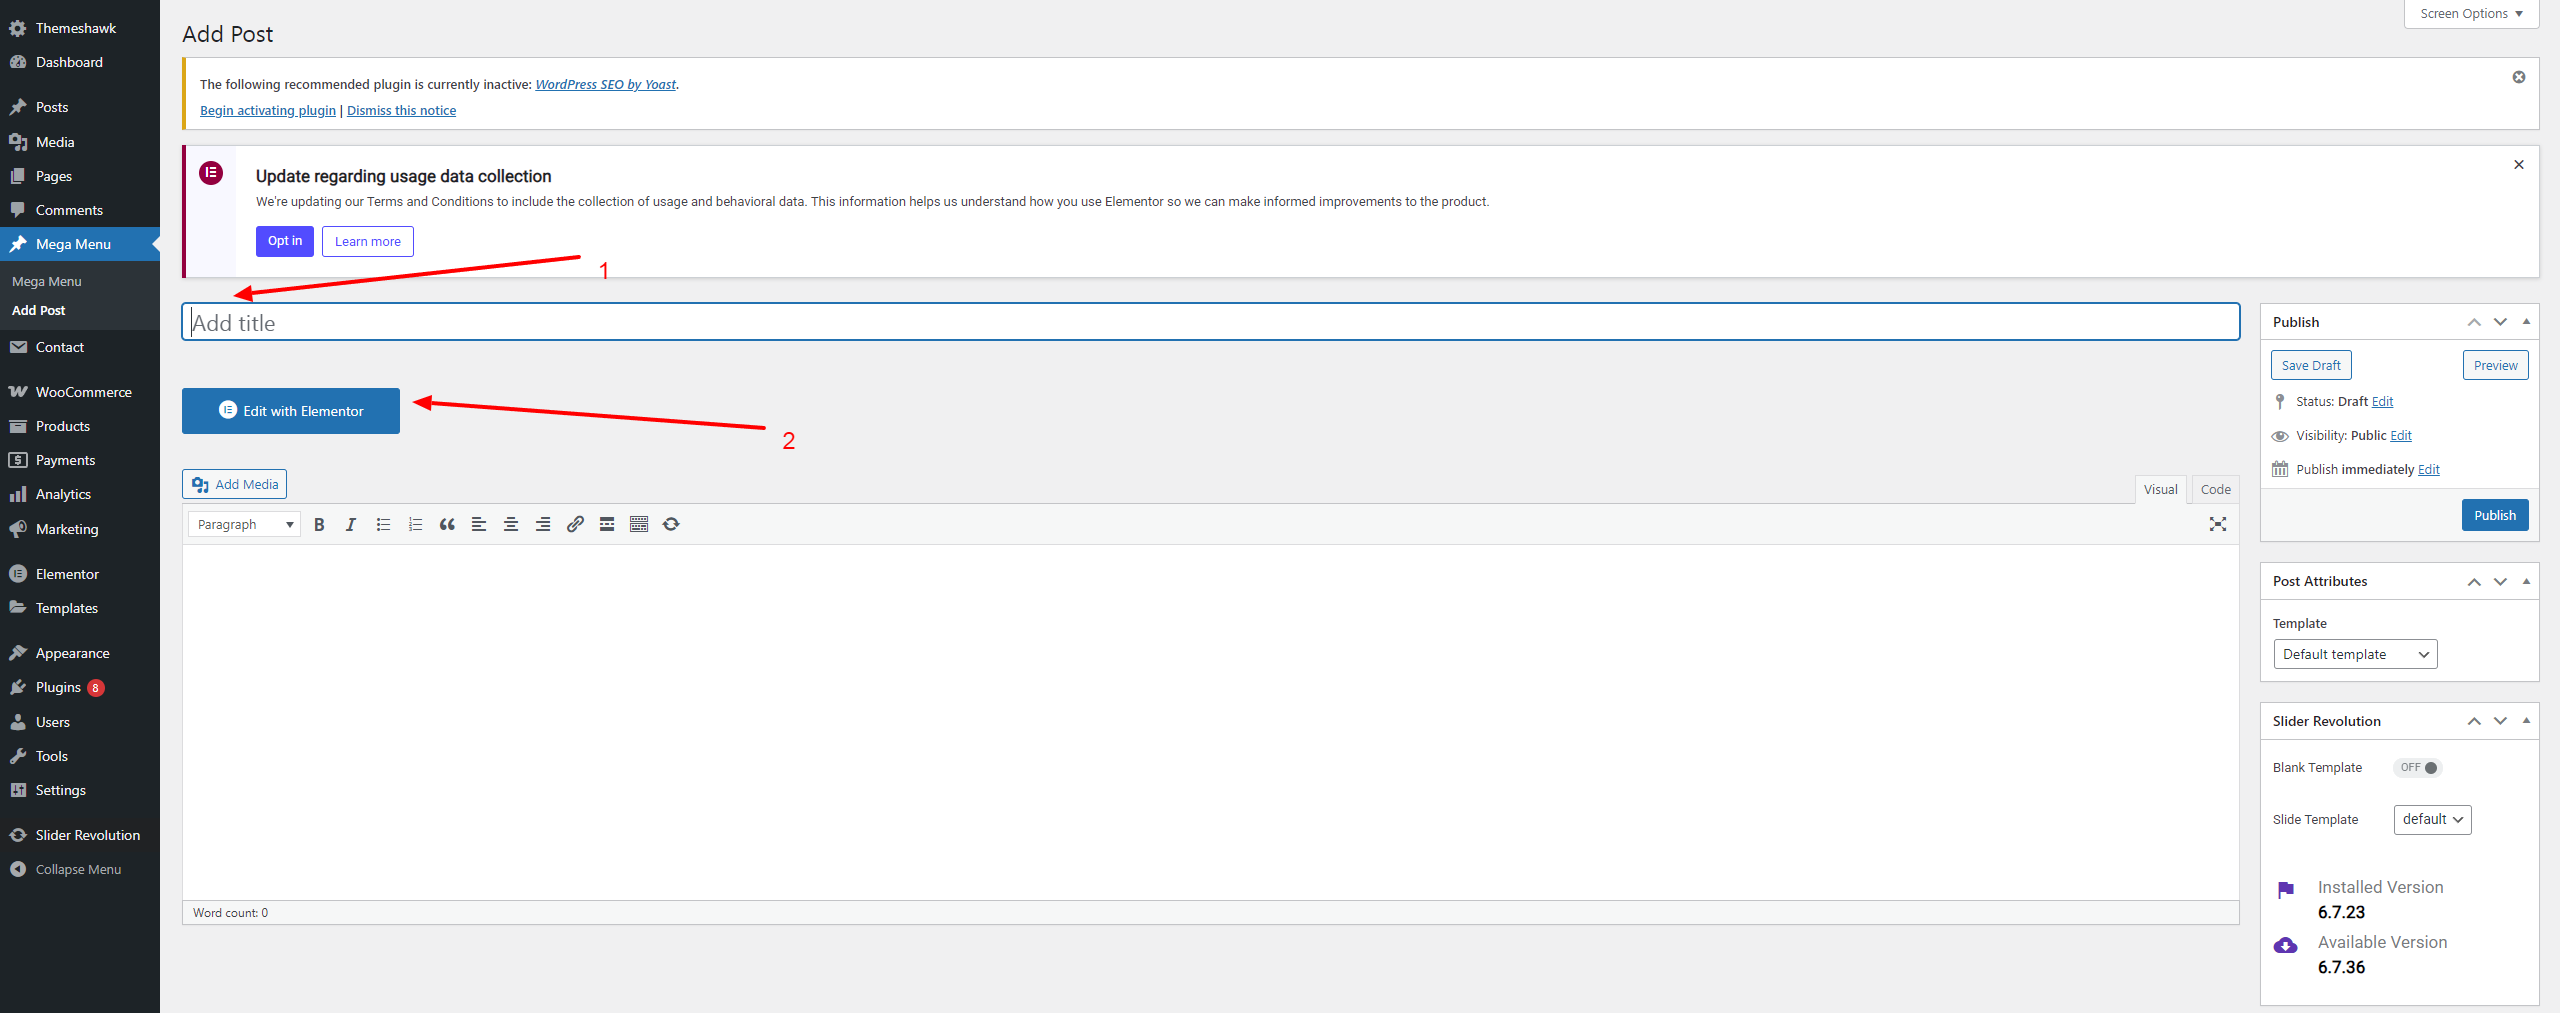
- After login to the admin panel, just go to mega menu and then click on add new post
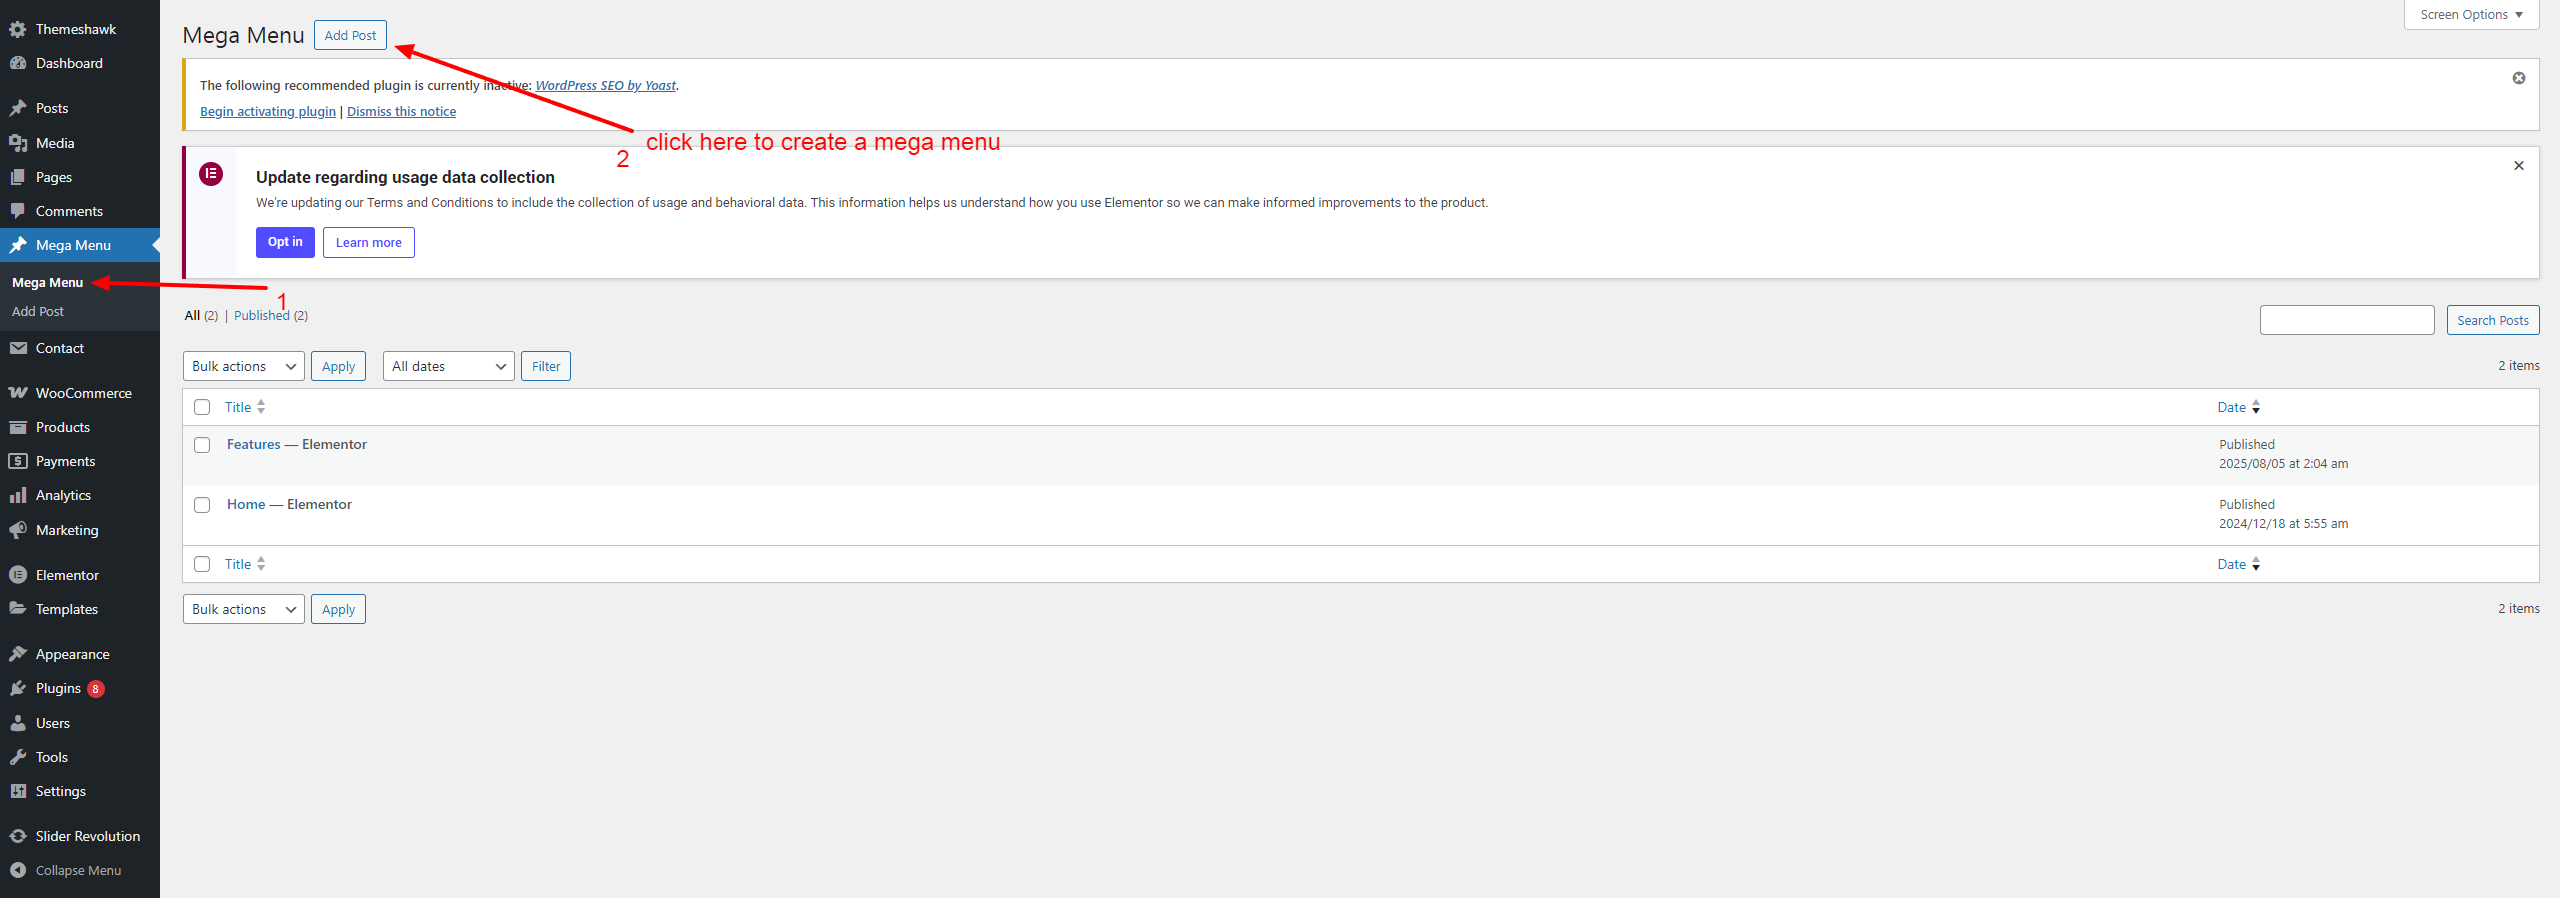
- Add Title and click on edit with elementor, create any kind of mega menu by using elementor page builder
For setting up mega menu in the menu like main menu etc, follow the steps
- First go to appearance and then click on menus
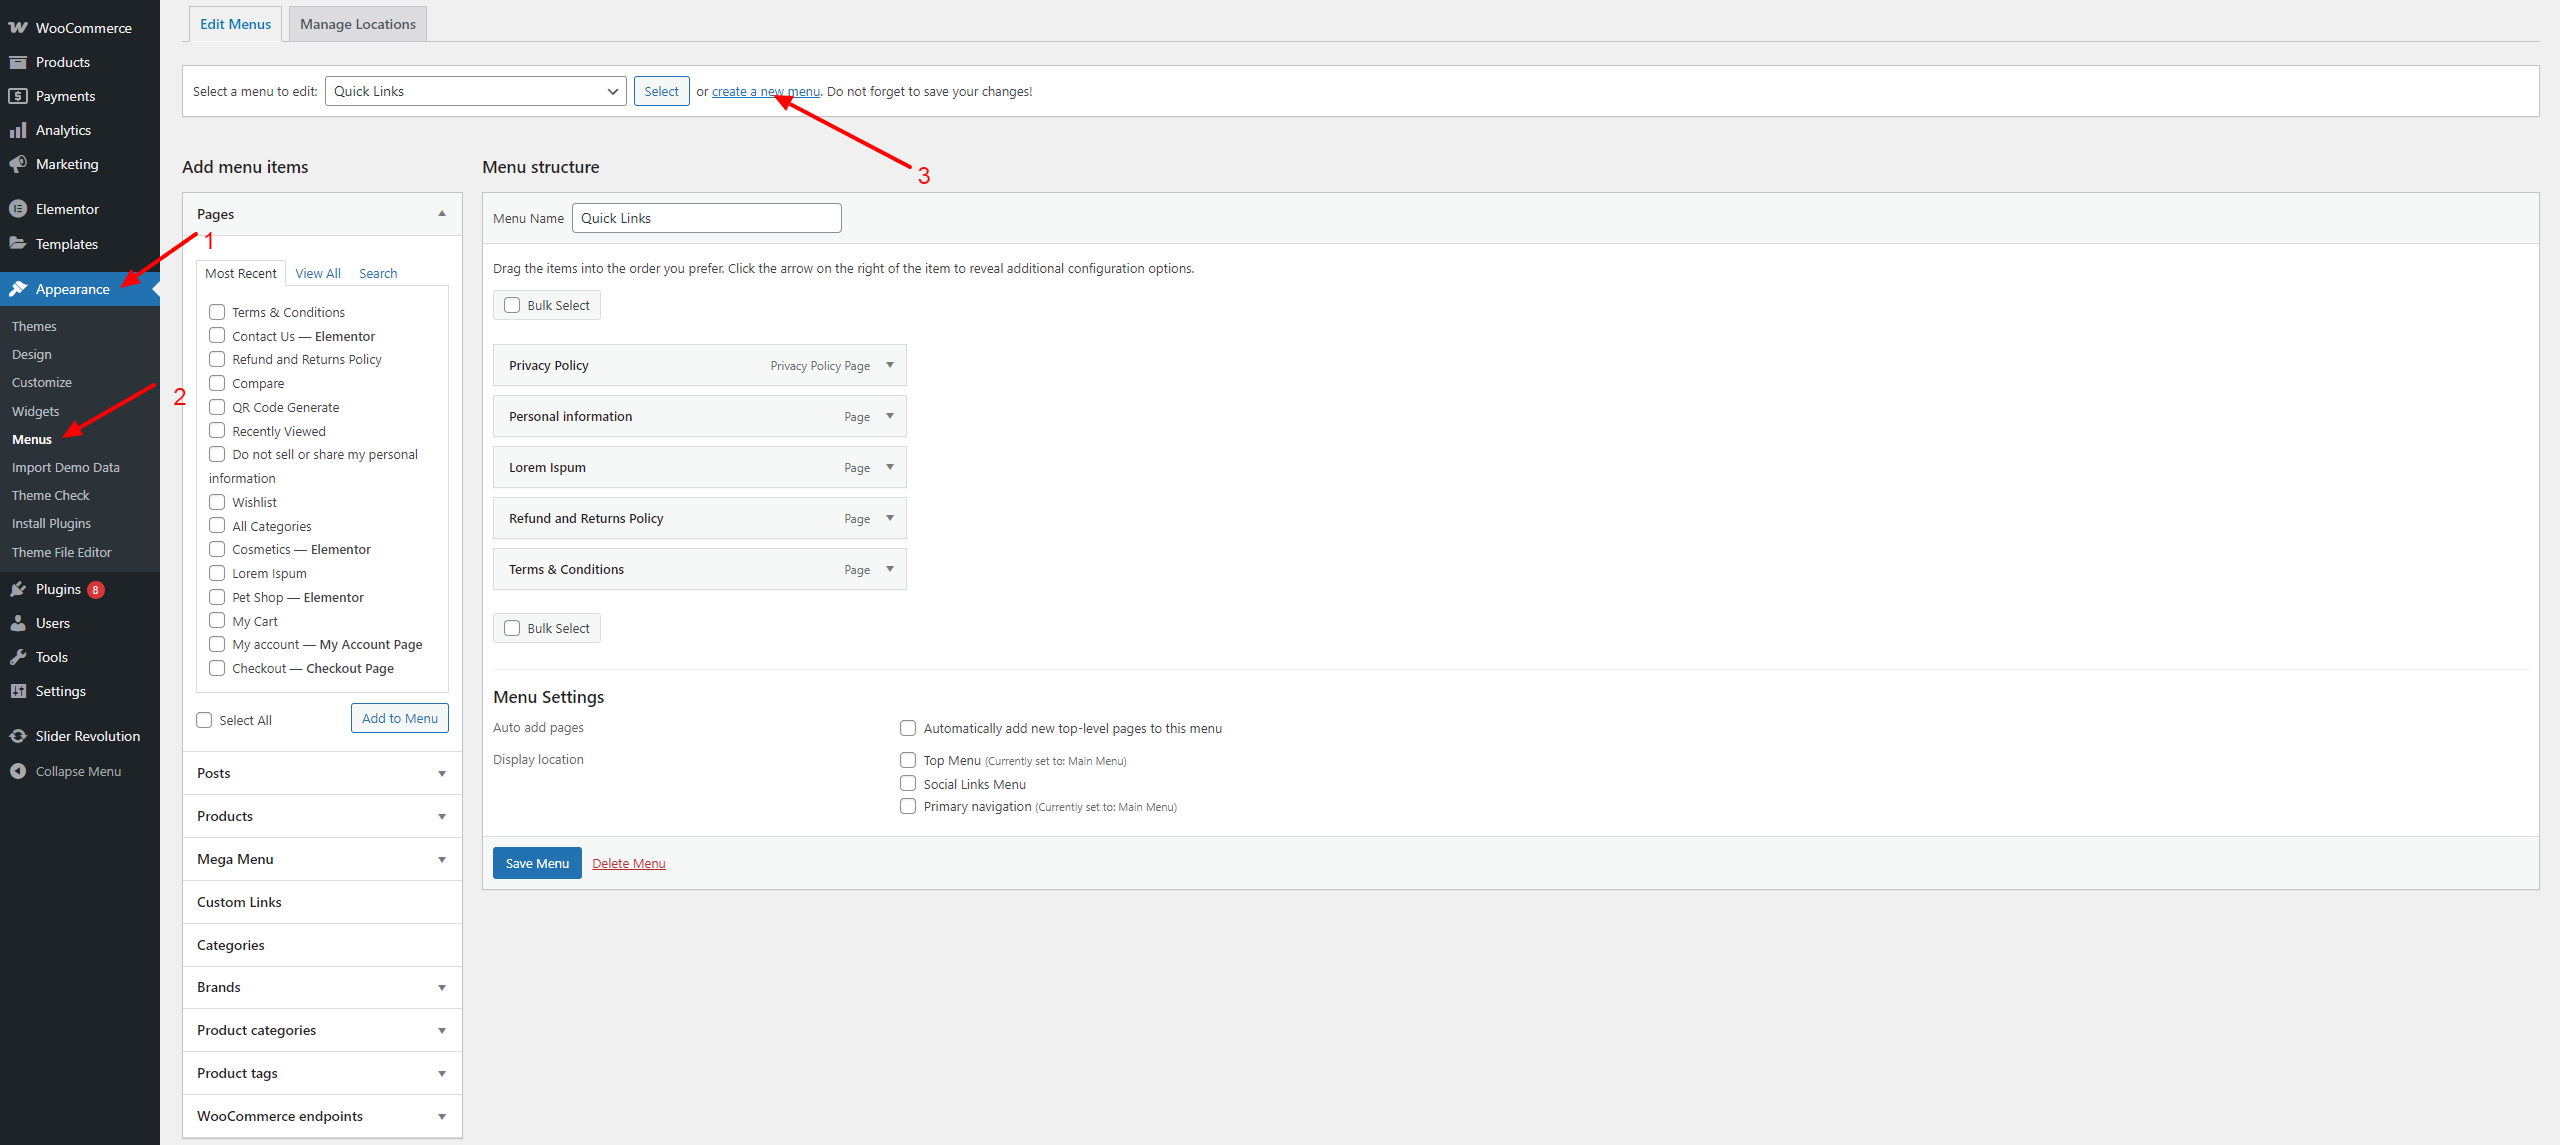
- Create new menu after adding title
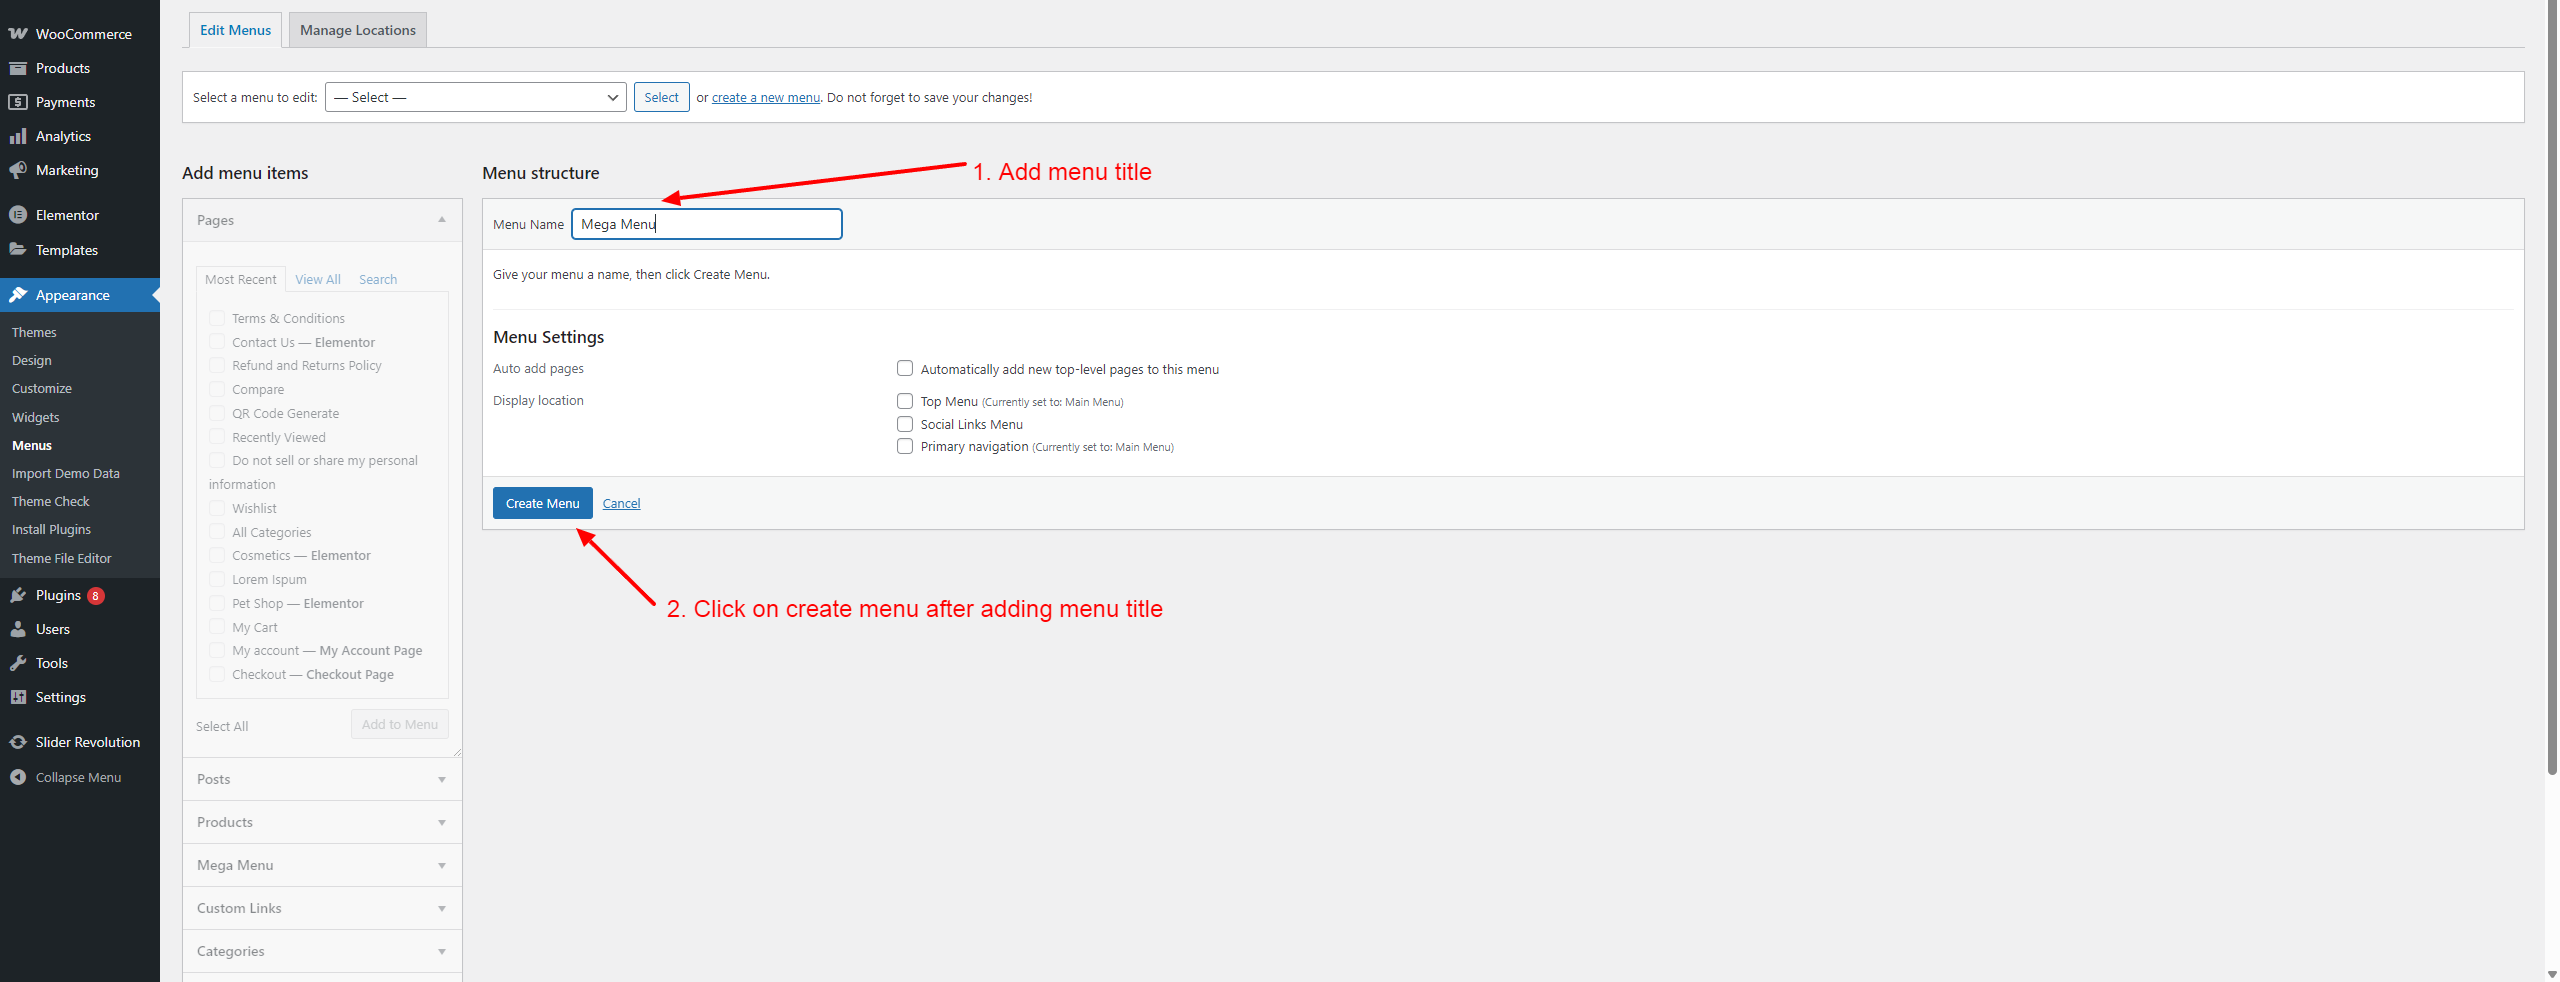
- Now add parent menu items and mega menu from sidebar
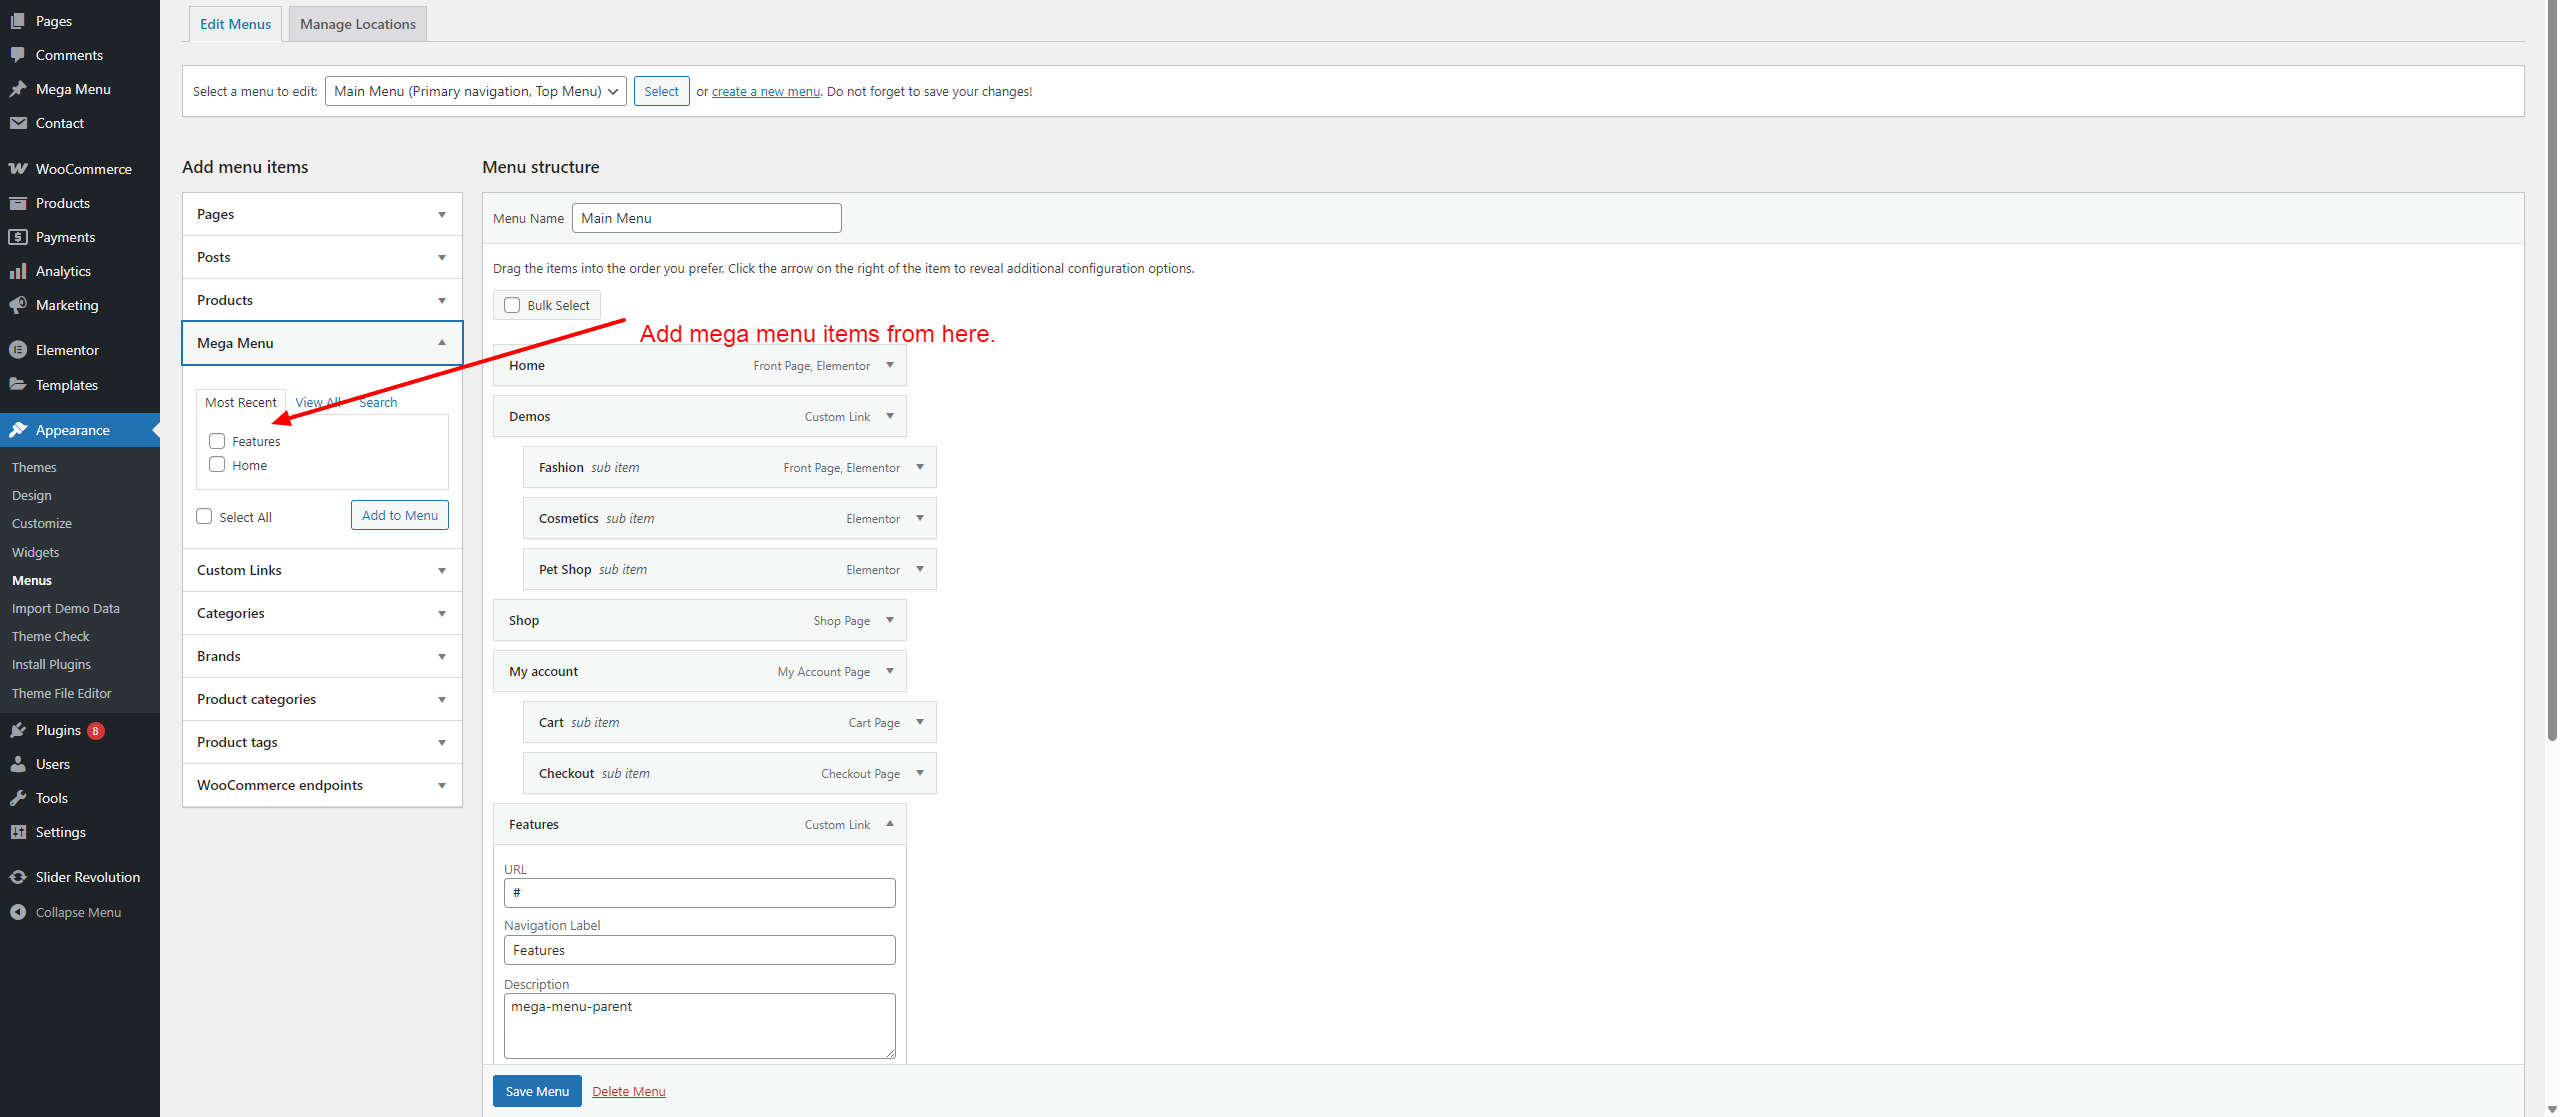
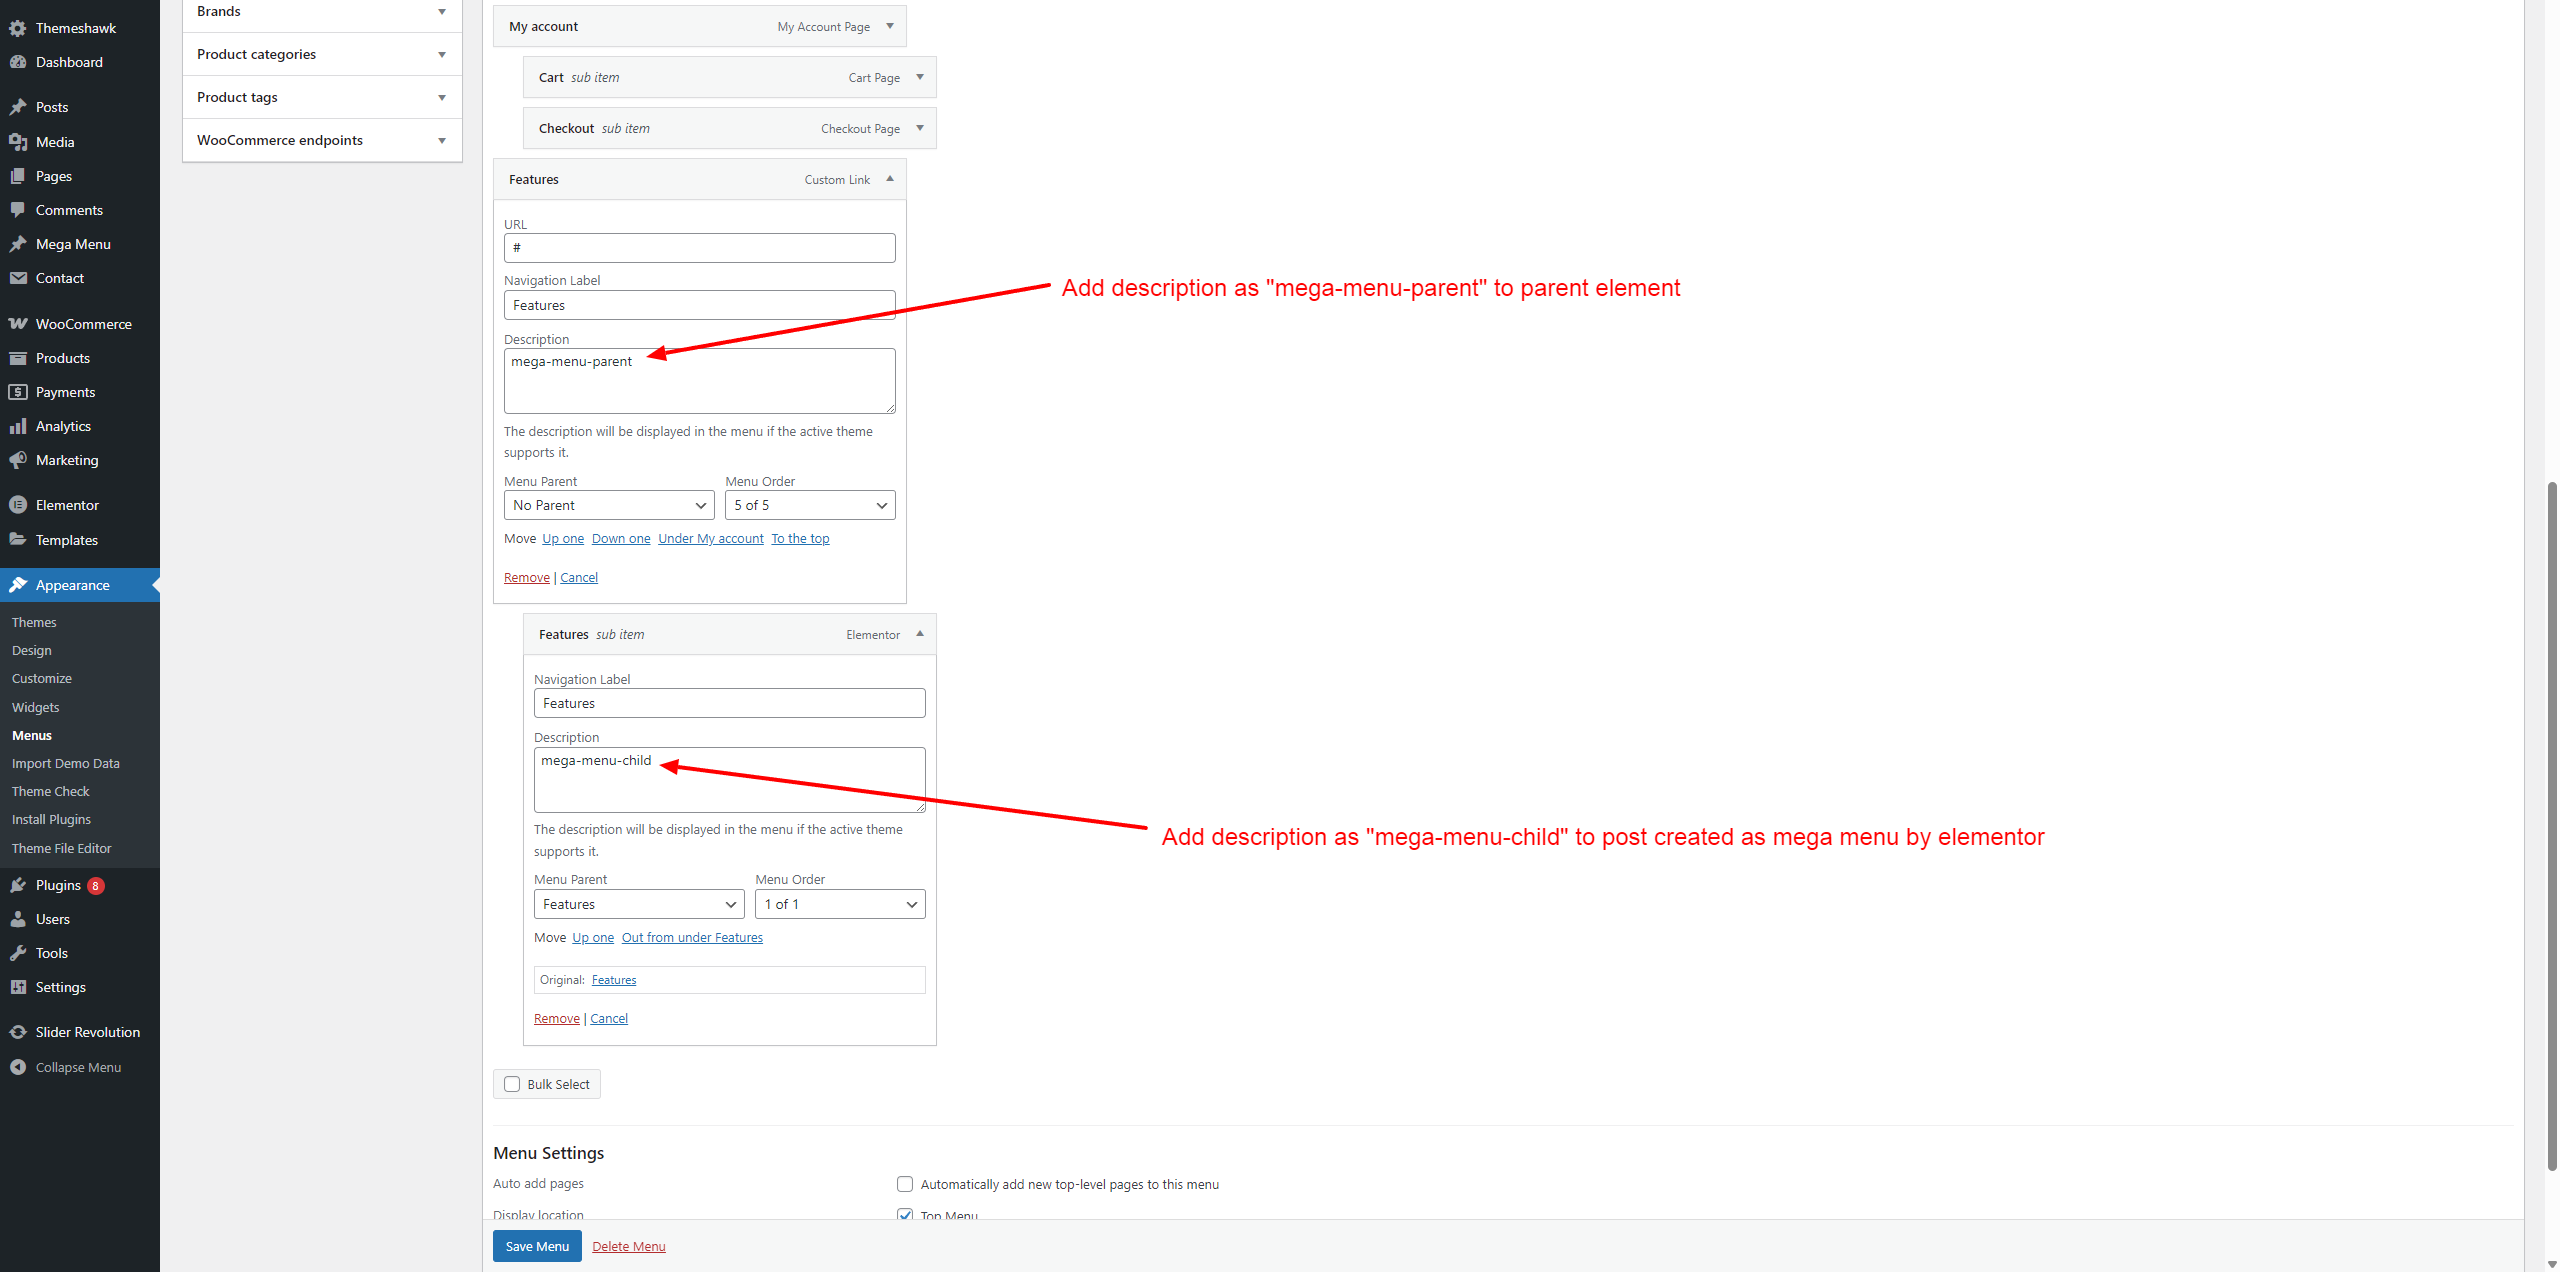
- After that, you are done
Third Party Plugin
For installing the slider demo, you need to download a slider revolution. You can download it from here. It is not included in the package
Credits
We are giving credit for images, fonts or any third part library.:
-
Image used are from https://www.freepik.com and https://unsplash.com/. All the images are royalty free.
-
Note: Please keep in mind that all images which is used are for preview purposes only. They are not included in the sale. Buyers are requested to use their own images. When importing demo, all images would be replaced by placeholder images.
-
Fonts used in the theme is Google fonts: Jost
- Third Party Code Library Used (Free to use): https://swiperjs.com, https://animate.style/